Category: Game Guides

In-depth game guides from Game Empress, with walkthroughs, tier lists, location maps, and step-by-step strategies to help you master the games you love.

  • Pragmata All Weapons: Where to Find All 15 Weapons

    Pragmata All Weapons: Where to Find All 15 Weapons

    If you’re looking for all weapons in Pragmata, the important thing to know is that this game does not treat weapons like ordinary shooter pickups. Every new unlock changes how you approach combat, because only Primary weapons regenerate ammo and stay with you permanently. Everything else is temporary. Once an Attack, Tactical, or Defenseweapon runs dry, it breaks and disappears.

    That single rule is what makes weapon unlocks matter so much. In a normal action game, a weapon guide is mostly a checklist. In Pragmata, it is also a progression guide. Some weapons make the early campaign far more manageable. Some become much more valuable once hacking grids get busier and more punishing. Others are tucked behind Shelter systems that are easy to overlook if you treat the game like a straight run from mission to mission.

    This guide covers all 15 weapons in Pragmata, where to find them, which ones you should care about first, which ones are easiest to miss, and which tools make the biggest difference in bosses, crowded rooms, and late-game Red Zones.

    How weapons work in Pragmata

    Hugh’s best loadout is built around four categories:

    Weapon Type What It Does
    Primary Permanent weapon with self-recharging ammo
    Attack Limited-use damage weapon
    Tactical Limited-use control or hacking support weapon
    Defense Limited-use survival or space-making tool

    Your Primary weapon is the foundation of every loadout because it is always available. Your Attack, Tactical, and Defense weapons are more situational and more valuable per use, because they are disposable.

    As you progress, the Shelter becomes the center of that progression. It is where you unlock discovered weapons permanently, improve Hugh and Diana’s combat tools, and interact with systems like Cabin’s Stamp Club, which can reward you with weapons and other major upgrades. Later on, you can also unlock the ability to carry two Attack weapons and two Tactical weapons at once, which makes your loadout much more flexible.

    That is when the game really opens up. Early on, you are mostly choosing one answer per slot. Later, you can start pairing a general-use tool with a more specialized option.

    All 15 weapons in Pragmata and where to find them

    Here is the full weapon list and each unlock location:

    Weapon Type First Available
    Grip Gun Primary Starting weapon
    Pulse Carbine Primary Sector 3: Terra Dome, Plant Factory
    Shockwave Gun Attack Sector 1: Solar Panel Plants, Power Distribution Center
    Charge Piercer Attack Sector 2: Mass Production Array, Side Alley
    Photon Laser Attack Sector 3: Terra Dome, Soil Research
    Homing Missiles Attack Sector 4: Lunum Mines, Mine Entrance
    Jackhammer Attack Complete the game
    Stasis Net Tactical Sector 1: Solar Panel Plants, Power Distribution Center
    Riot Blaster Tactical Sector 2: Mass Production Array, Shopping District
    Sticky Bombs Tactical Sector 3: Terra Dome, Eco Modeling Lab
    Code Generator Tactical Specialist Stamp Board, triple bingo
    Hacking Mines Tactical Director Stamp Board, triple bingo
    Decoy Generator Defense Sector 2: Mass Production Array, Lim Recycling Facility
    Impact Barrier Defense Sector 4: Lunum Mines, Crane Operation Yard
    Drone Hive Defense Associate Stamp Board, triple bingo

    That list already highlights one of the game’s most important patterns. Most weapons come through normal sector progression, but Code Generator, Hacking Mines, and Drone Hive are tied to Cabin’s Stamp Club, while Jackhammer sits behind game completion. So if you ignore the Shelter’s long-term reward systems, you can finish the campaign without ever collecting the full arsenal.

    Best weapons to prioritize first

    Not every weapon matters equally when you get it. Some unlocks change the game immediately, while others only become valuable in more specific situations.

    Shockwave Gun
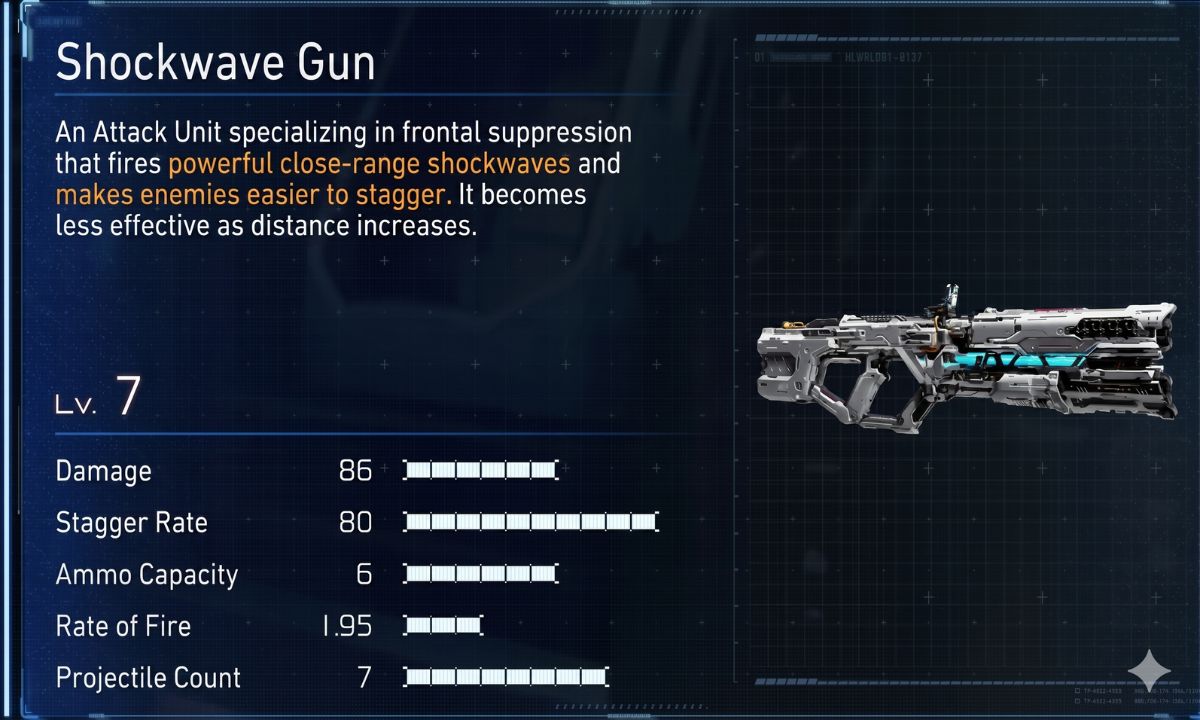
    Pragmata Shockwave Gun

    The first weapon most players should care about is the Shockwave Gun. It arrives early, hits hard, staggers reliably, and remains useful long after more options start opening up. It is simple, effective, and works in both standard encounters and boss damage windows.

    More importantly, it solves a real early-game problem: limited offensive power under pressure. When the game is still teaching you how to manage movement, hacking, and enemy timing at once, a weapon that gives you strong, immediate payoff matters a lot.

    Stasis Net
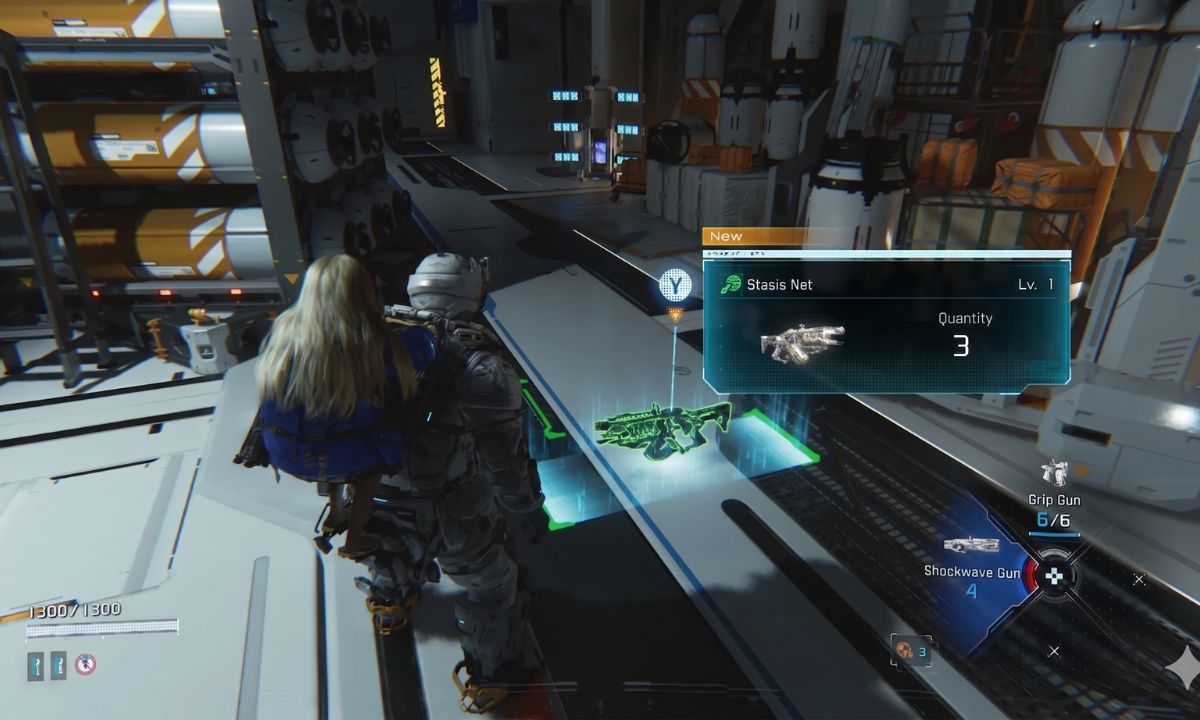
    Pragmata Stasis Net

    The Stasis Net is the other early standout. It is not flashy, but it makes the game safer. Freezing one enemy while you deal with another gives you breathing room when fights are getting messy, and that kind of control is worth more than raw damage in many early encounters.

    Grip Gun and Pulse Carbine
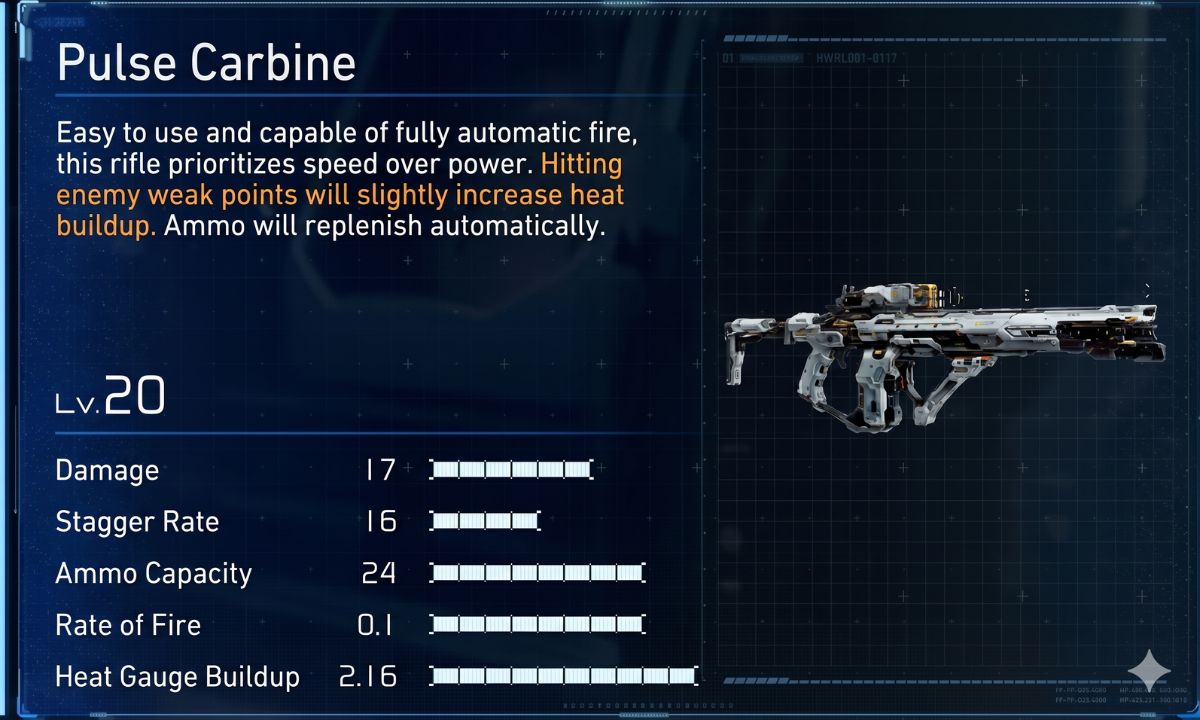
    Pragmata Grip Gun and Pulse Carbine

    Your Grip Gun matters because it never leaves your loadout. That alone makes it a sensible place to invest some upgrade resources. Later, the Pulse Carbine becomes a meaningful second Primary option once you reach Sector 3, especially if you prefer sustained fire over the Grip Gun’s simpler pace.

    That said, do not dump everything into Primary upgrades and neglect the rest of your kit. The best approach is balance. Your Primary weapon is your constant fallback, but hacking support, health, and situational weapons often make a bigger difference in whether you survive difficult encounters.

    The best early priorities overall

    For most players, the best first priorities are:

    • Shockwave Gun, because it is strong, early, and easy to use well
    • Stasis Net, because it immediately lowers combat pressure
    • Hacking support, because hacking is central to how you open enemies up
    • Health and survivability, because Pragmata punishes sloppy defensive play

    Which weapons are easiest to miss

    Some weapons are harder to miss than others. The ones tied to story progression usually show up naturally if you explore properly. The weapons most players are likely to miss or delay are the ones hidden behind side systems or post-game progression.

    Code Generator, Hacking Mines, and Drone Hive

    These are the three most obvious missable weapons because they are tied to Cabin’s Stamp Club, not normal mission pickups.

    That matters for two reasons. First, Cabin Coins are limited, so poor choices on Stamp Boards can slow your access to better rewards. Second, some board rewards are hidden until you reveal them, which makes it easy to spend carelessly if you are not paying attention.

    If you treat the Shelter like downtime between missions instead of part of the progression loop, these are the weapons you are most likely to miss.

    Jackhammer

    The fourth easy-to-miss weapon is Jackhammer, but for a different reason. It is not hidden in a sector or tucked behind a side route. It is a post-game unlock, which means first-run players should not waste time searching for it during the campaign.

    Why this matters

    The broader point is that Pragmata does not put every important reward directly in front of you. Some of the best or rarest weapons are tied to long-term Shelter engagement, not just exploration. If your goal is to complete the arsenal, you need to pay attention to both mission progress and Cabin’s reward systems.

    Best weapons by situation

    The best weapon in Pragmata depends on the problem you are trying to solve. A strong all-purpose loadout is useful, but the game is better understood as a series of combat situations that reward different tools.

    Best weapons for a standard first playthrough

    For a first run, the safest general setup is built around:

    • Grip Gun or Pulse Carbine
    • Shockwave Gun
    • Stasis Net
    • Decoy Generator

    Later, Sticky Bombs become worth rotating into that setup once Sector 3 opens up.

    This is a good first-playthrough core because it covers the basics without overcomplicating things. Your Primary gives you constant damage. Shockwave Gun gives you strong burst. Stasis Net helps control the room. Decoy Generator buys you time when things start collapsing.

    That combination is not the only workable loadout, but it is one of the easiest to trust through most of the campaign.

    Best weapons for bosses

    Boss fights change the rules. You get fewer clean damage windows, and every wasted shot hurts more.

    Charge Piercer

    The Charge Piercer becomes much more valuable in boss fights than in ordinary room clearing. It works well in narrow attack windows and rewards patience more than panic. If a boss forces you to wait for the right moment to punish, Charge Piercer fits that rhythm better than many other Attack weapons.

    Sticky Bombs

    Sticky Bombs matter in boss fights because their real value is not direct damage. They help simplify hacking grids, which reduces how long you stay exposed while trying to make the boss vulnerable. In fights where pressure never really stops, that can be a huge difference-maker.

    Homing Missiles

    Homing Missiles are not a universal answer, but they become practical when a boss is highly mobile or spends a lot of time airborne. In those situations, they remove some of the frustration that comes from trying to manually track hard-to-hit targets.

    Best weapons for crowd control

    When a room fills up with enemies, the priority shifts away from perfect single-target damage and toward keeping the fight under control.

    Stasis Net

    The Stasis Net remains one of the cleanest crowd-control tools in the game. Freeze one target, deal with another, then circle back before the window closes. It is a straightforward loop, but it works.

    Riot Blaster

    Once you unlock the second Tactical slot, Riot Blaster becomes more interesting. It is not as universally useful as Stasis Net, but it helps in situations where enemies cluster tightly enough that single-target tools start to feel inefficient.

    Best weapons for late-game and Red Zones

    Late-game encounters and Red Zones ask more from your loadout because they combine tighter margins, stronger enemies, and more punishment for mistakes.

    Code Generator

    Code Generator becomes a serious late-game tool because it improves hacking performance rather than just raw damage. In difficult rooms, that can be more important than another offensive option. It is one of the clearest examples of a weapon whose value grows with the game’s complexity.

    Sticky Bombs

    Sticky Bombs age very well into the late game because enemy hacking grids become more cluttered and more punishing. Anything that makes those grids cleaner becomes more valuable as the campaign goes on.

    Photon Laser and Charge Piercer

    Once your second Attack slot is open, Photon Laser and Charge Piercer make strong situational pairings. Photon Laser helps at range, while Charge Piercer remains useful when you want high burst in tight windows.

    Stamp Board weapons explained clearly

    Cabin’s Stamp Club is easy to underestimate because it initially looks like a side activity. It is not. It is one of the game’s most important long-term progression systems.

    The basic structure is simple. You earn Cabin Coins, spend them on bingo-style boards in the Shelter, and unlock rewards as you fill in rows and hit bingo milestones. Some of those rewards are cosmetic or utility-based, but some are major combat tools.

    For weapons, the key Stamp Board rewards are:

    • Drone Hive — Associate Board, triple bingo
    • Code Generator — Specialist Board, triple bingo
    • Hacking Mines — Director Board, triple bingo

    That means two things.

    First, if you ignore Stamp Boards, you are not just ignoring side content. You are skipping real combat options.

    Second, because Cabin Coins are limited and many rewards are hidden until revealed, you should not spend carelessly. The Stamp Club is part of combat progression, not just collectible padding.

    The most important takeaway

    If there is one thing worth remembering, it is this: Pragmata is not really about collecting a giant pile of weapons and calling it a day. It is about understanding why each weapon exists and what problem it helps solve.

    For most players, the best early priorities are Shockwave Gun, Stasis Net, and balanced upgrades to hacking, health, and your Primary weapon. The easiest weapons to miss are the three hidden behind Cabin’s Stamp Club, plus the post-game Jackhammer. The safest first-playthrough setup revolves around Shockwave Gun, Stasis Net or Sticky Bombs, and Decoy Generator, while Charge Piercer, Homing Missiles, and Code Generator become more valuable when bosses or late-game challenge rooms demand more specialized answers.

    That is what makes the arsenal in Pragmata interesting. The full weapon list is not just there for completionists. It maps the game’s learning curve: early survival, cleaner control, stronger hacking support, and finally late-game tools that reward players who actually engage with the Shelter instead of treating it like dead time.

  • Pragmata Best Loadout Guide: Best Weapons for Early Game, Bosses, and Red Zones

    Pragmata Best Loadout Guide: Best Weapons for Early Game, Bosses, and Red Zones

    If you are looking for the Pragmata best loadout, the right answer depends on the kind of fight you are preparing for. Pragmata gives you 15 weapons spread across four slots, but they do not all follow the same rule. Your Primary weapons regenerate ammo and stay with you permanently. Everything else is disposable. Once an Attack, Tactical, or Defense weapon runs dry, it is gone.

    That changes how you should think about loadouts. This is not really a game about hoarding the “best” gun and using it everywhere. It is about building a setup that covers different situations, then knowing when a limited-use weapon is worth spending.

    This guide breaks down:

    • a dependable all-purpose loadout for most of the campaign,
    • better picks for bosses and crowded rooms,
    • stronger options for late-game Red Zones,
    • and a full list of all 15 weapons with their unlock locations.

    How loadouts work

    Your loadout is divided into four categories:

    Slot What it does
    Primary Permanent weapon with self-recharging ammo
    Attack Limited-use damage weapon
    Tactical Limited-use control/support weapon
    Defense Limited-use protection/distraction tool

    At the start of the game, you can equip one weapon in each slot. Later on, you unlock the ability to carry two Attack weapons and two Tactical weapons at the same time, which gives you much more flexibility.

    Before each sector, you choose your starting setup at the Shelter. During missions, enemies can also drop replacements for weapons you have already burned through.

    Best general-use loadout

    Pragmata Best Loadouts Explained

    This is a safe, flexible setup for a normal playthrough. It is not the only viable build, but it works well across most of the campaign without depending on post-game weapons or Stamp Board rewards.

    Slot Recommended pick
    Primary Grip Gun early, then Pulse Carbine once unlocked
    Attack Shockwave Gun
    Tactical Stasis Net early, Sticky Bombs later
    Defense Decoy Generator

    Primary slot: Grip Gun early, Pulse Carbine later

    The Grip Gun is your starting Primary and the weapon you will use more than anything else simply because it never leaves your loadout. That makes it a smart place to invest early upgrade resources, although you still need to balance that against suit and hacking upgrades depending on your playstyle.

    Its main limitation is heat. If you hold the trigger too long, it overheats and forces a short cooldown. The simple way to handle that is to fire until heat becomes an issue, swap briefly to an Attack weapon, then return once the Grip Gun recovers.

    Later, in Sector 3, you unlock the Pulse Carbine as a second Primary option. It leans more toward sustained fire, making it better suited to longer engagements in the back half of the game. The downside is recoil — it pulls left enough to matter, especially when you are also trying to manage Diana’s hacking grid. Even so, it is usually the more comfortable late-game Primary once you get used to it.

    Attack slot: Shockwave Gun for consistency

    For most players, the Shockwave Gun is the safest all-purpose Attack choice. It hits hard, staggers reliably, and does not ask much from you beyond getting into range and timing your shots well.

    It fires slowly, but that is less of a problem than it sounds because you can swap away from it during its recharge window. Where it really pays off is in short damage opportunities — especially after Diana has already exposed an enemy and you want to cash in quickly.

    The main thing to watch is ammo efficiency. It does not give you many shots, so it works best when you treat it like a finisher rather than a panic button.

    Tactical slot: Stasis Net first, Sticky Bombs later

    The Stasis Net is the more useful Tactical weapon in the early game because it solves the immediate problem most players face: pressure. Freezing one enemy while you hack, shoot, or reposition around another makes chaotic rooms much easier to control. Once upgraded a bit, it also becomes much more reliable against moving targets.

    When you reach Sector 3, Sticky Bombs become available and start to take over more of the work. They do not deal much direct damage, but that is not the point. Their real value is that they simplify enemy hacking grids by reducing clutter and cutting down the time you spend exposed.

    That makes Sticky Bombs stronger as the campaign gets harder and the hacking sections become messier. Even then, they do not make the Stasis Net obsolete. If you have both Tactical slots unlocked, carrying both is often the most practical solution.

    Defense slot: Decoy Generator

    The Decoy Generator is simple, but that simplicity is exactly why it works. It throws out a hologram that draws enemy attention, giving you a few seconds to breathe, reposition, or finish a hack without being swarmed.

    That becomes especially useful in Red Zones, where the game stacks movement, enemy pressure, and hacking demands on top of each other. It also performs well without needing much upgrade investment, which is helpful if your resources are already being pulled elsewhere.

    Best alternatives by situation

    Best weapons for bosses

    Boss fights change the rules a bit. You get fewer clean damage windows, and wasting ammo hurts more.

    Charge Piercer

    The Charge Piercer is one of the better boss-focused Attack options because it delivers strong burst damage in a short opening. It takes longer to charge than the Shockwave Gun, especially at first, but upgrades improve that noticeably. If you are playing around boss patterns and only getting brief chances to hit back, it tends to fit that rhythm well.

    Sticky Bombs

    Sticky Bombs remain strong in boss encounters for the same reason they work elsewhere: faster, cleaner hacking. That matters even more when the target keeps attacking while you are trying to work through the grid.

    Homing Missiles

    If a boss moves constantly or spends time airborne, Homing Missiles become worth considering. They are not a universal pick, but lock-on can save a lot of frustration in fights where raw aim is the real problem.

    Best picks for crowd control

    When the room fills up, your problem is no longer single-target damage. It is space management.

    Stasis Net

    For most of the game, Stasis Net is still the cleanest answer. Freezing one enemy while dealing with another gives you breathing room without forcing you to sacrifice your Attack slot.

    Riot Blaster

    Once you unlock your second Tactical slot, Riot Blaster becomes worth keeping in mind for rooms where enemies cluster tightly. It is more situational than Stasis Net or Sticky Bombs, but it can help when single-target tools start to feel too slow.

    Best late-game and Red Zone tools

    Red Zones are where the game asks the most from your loadout. By this stage, most players will likely have their extra Attack and Tactical slots available, which gives you room to specialise more.

    Code Generator

    The Code Generator is one of the strongest late-game Tactical options if you are willing to work for it through the Specialist Stamp Board. It does not deal direct damage, but it improves hacking damage, clears error nodes, and creates OPEN nodes that keep enemies vulnerable longer. In difficult late-game rooms, that kind of support can matter more than raw firepower.

    Photon Laser

    The Photon Laser is a reasonable second Attack weapon for long-range pressure. It does not replace Shockwave Gun or Charge Piercer as a general first choice, but it fills a useful gap when burst weapons are not the cleanest answer.

    Full weapon list and unlock locations

    Weapon Slot First available
    Grip Gun Primary Starting weapon
    Pulse Carbine Primary Sector 3: Terra Dome, Plant Factory
    Shockwave Gun Attack Sector 1: Solar Panel Plants, Power Distribution Center
    Charge Piercer Attack Sector 2: Mass Production Array, Side Alley
    Photon Laser Attack Sector 3: Terra Dome, Soil Research
    Homing Missiles Attack Sector 4: Lunum Mines, Mine Entrance
    Jackhammer Attack Complete the game
    Stasis Net Tactical Sector 1: Solar Panel Plants, Power Distribution Center
    Riot Blaster Tactical Sector 2: Mass Production Array, Shopping District
    Sticky Bombs Tactical Sector 3: Terra Dome, Eco Modeling Lab
    Code Generator Tactical Specialist Stamp Board, triple bingo
    Hacking Mines Tactical Director’s Stamp Board, triple bingo
    Decoy Generator Defense Sector 2: Mass Production Array, Lim Recycling Facility
    Impact Barrier Defense Sector 4: Lunum Mines, Crane Operation Yard
    Drone Hive Defense Associate Stamp Board, triple bingo

    A few best weapons sit outside the normal progression path. Jackhammer is a post-game unlock, so it does not matter for a standard first run. Code Generator, Hacking Mines, and Drone Hive come from Cabin’s Stamp Boards rather than regular level pickups, so check those boards between sectors if you want to unlock them efficiently.

    If you want the simplest takeaway, it is this: start with Grip Gun + Shockwave Gun + Stasis Net + Decoy Generator, then fold in Pulse Carbine and Sticky Bombs as the campaign opens up. From there, tailor the rest of your setup to the kind of fights you are struggling with most.

  • MLB The Show 26 vs eBaseball PRO SPIRIT 2026: Which Baseball Game Should You Buy?

    MLB The Show 26 vs eBaseball PRO SPIRIT 2026: Which Baseball Game Should You Buy?

    If you are looking for a baseball game in 2026, these are the two main choices. MLB The Show 26 is the established option built around Major League Baseball, while eBaseball PRO SPIRIT 2026 brings a full Japanese professional baseball simulation to a global audience in English.

    The right choice depends on what kind of baseball experience you want. If you care most about MLB teams, wider platform support, and a familiar online setup, MLB The Show 26 is the safer pick. If you want a lower price, a native PC version, and a game built around Japanese professional baseball, eBaseball PRO SPIRIT 2026 offers something different.

    At a Glance

    MLB The Show 26

    • Developer: San Diego Studio
    • Release date: March 17, 2026
    • Platforms: PS5, Xbox Series X|S, Nintendo Switch
    • Price: $70 Standard / $100 Digital Deluxe
    • League focus: Major League Baseball
    • Game Pass: No
    • Cross-play: Yes, across console platforms
    • Native PC version: No

    eBaseball PRO SPIRIT 2026

    • Developer: Konami
    • Release date: July 16, 2026
    • Platforms: PS5 and PC via Steam
    • Price: $59.99
    • League focus: Japanese professional baseball
    • Game Pass: No
    • Cross-play: No
    • Native PC version: Yes

    Platforms

    Platforms

    MLB The Show 26 is available on PS5, Xbox Series X|S, and Nintendo Switch. The Switch version also works on Nintendo Switch 2. There is no native PC version, although Xbox Cloud Gaming gives players an official cloud-play option after purchase.

    eBaseball PRO SPIRIT 2026 is available on PS5 and PC through Steam. There is no confirmed Xbox or Switch version, so players on those platforms cannot play it at launch.

    If you own a PS5, both games are available. If you play on PC, eBaseball PRO SPIRIT 2026 is the only native option. If you play on Xbox or Switch, MLB The Show 26 is the clear choice.

    For more on the release date, bonuses, and launch details, see our Konami Announces eBaseball PRO SPIRIT 2026 for PS5 and PC article.

    For more on the release date, bonuses, and launch details, see our Konami Announces eBaseball PRO SPIRIT 2026 for PS5 and PC article.

    Price

    Price — eBaseball Costs Less

    MLB The Show 26 costs $70 for the Standard Edition and $100 for the Digital Deluxe Edition. The Deluxe Edition includes four days of early access, 20,000 Stubs, 20 The Show Packs, two WBC Choice Packs, one Legend Choice Pack, one WBC Uniform Pack, one Equipment Pack, and double daily login rewards. Players who bought a digital version of the series from MLB The Show 21 onward also get a 10% loyalty discount on the Deluxe Edition.

    eBaseball PRO SPIRIT 2026 costs $59.99 worldwide and does not have extra editions outside Japan. Pre-orders include 1,000,000 VP, and anyone who buys the game by December 31, 2026 gets the SAMURAI JAPAN 2026 Shohei Ohtaniplayer card as an early purchase bonus.

    At the standard price, eBaseball PRO SPIRIT 2026 is $10 cheaper and does not put early access behind a more expensive edition.

    The Biggest Difference: MLB vs Japanese Professional Baseball

    The Leagues — This Is the Biggest Difference

    This is the point that matters most.

    MLB The Show 26 is built around Major League Baseball. It includes all 30 MLB teams, real rosters, real stadiums, real player names, and official MLB presentation. Aaron Judge is the cover athlete, and World Baseball Classic content is tied into Diamond Dynasty. If you mainly follow American professional baseball, this is the game designed for you.

    eBaseball PRO SPIRIT 2026 is built around Japanese professional baseball. It uses the official Japanese league license, which means real Japanese teams, real Japanese stadiums, and real player data. That gives it a very different identity from MLB The Show 26. It is the better fit for players who follow Japanese baseball or want a baseball sim outside the MLB structure.

    There is one important limitation to know. The World Baseball Classic mode in eBaseball PRO SPIRIT 2026 is only available in Japan and the Asia region, so players in other regions will not get that content at launch.

    Game Modes

    Game Modes — Depth vs Variety

    MLB The Show 26 is built around four main modes

    Road To The Show is the career mode and gets the biggest update this year. It now includes a larger amateur section with 19 college teams, the licensed NCAA Men’s College World Series format, and a new Road to Cooperstown path that takes your created player from high school all the way to the Hall of Fame.

    Franchise Mode has a reworked front office system with a new Trade Hub and better roster logic.

    Diamond Dynasty remains the team-building mode with regular content updates, online competition, and seasonal programs.

    Storylines: The Negro Leagues returns for its fourth season

    eBaseball PRO SPIRIT 2026 offers a broader list of modes, including Exhibition, Season, Star Player, Hakkyu no Kiseki, Live Championship, Live Scenario, Grand Prix, Home Run Derby, Team Edit, and Edit Share.

    The standout mode is Hakkyu no Kiseki, a high school baseball management mode. You build a school program over several seasons, manage practice, make in-game decisions, develop players, and replace graduating seniors with new students each year. The goal is to guide your school to the Koshien tournament, the biggest high school baseball event in Japan. That gives eBaseball PRO SPIRIT 2026 a layer that feels very different from the professional focus of MLB The Show 26.

    Star Player also adds depth by letting you guide a created player through a career that can last up to 30 years, including off-field choices.

    Where MLB The Show 26 has the edge is live content. Diamond Dynasty is already established and gets frequent updates during the MLB season. eBaseball PRO SPIRIT 2026 may offer strong support too, but its long-term global update schedule is still unknown.

    Game Pass and Subscription Access

    Neither game is included with Game Pass in 2026.

    MLB The Show was a day-one Game Pass title from 2021 through 2024, but that changed with MLB The Show 25, and MLB The Show 26 continues that break.

    eBaseball PRO SPIRIT 2026 also has no Game Pass option announced, so both games require a full purchase.

    Who Should Buy MLB The Show 26?

    Who Should Buy MLB The Show 26

    Buy MLB The Show 26 if:

    • You mainly follow MLB
    • You want real MLB teams, players, and stadiums
    • You play on Xbox or Nintendo Switch
    • You care about Diamond Dynasty and seasonal content
    • You want a polished career mode built around the American baseball system

    This is the better choice for players who want the most familiar and complete MLB experience.

    Who Should Buy eBaseball PRO SPIRIT 2026?

    Buy eBaseball PRO SPIRIT 2026 if:

    • You play on PC and want a native baseball game
    • You follow Japanese professional baseball
    • You want to try Hakkyu no Kiseki
    • You prefer the lower $59.99 price
    • You have been waiting for this series to get a proper English release

    This is the better choice for players who want something different from the usual MLB-based formula.

    Should You Buy Both?

    Yes, and there is a fair case for it.

    These games are not trying to do the exact same thing. One is built around MLB, and the other is built around Japanese professional baseball. If you play on PS5 and care about both styles of the sport, buying both gives you access to two very different baseball experiences instead of one replacing the other.

    Choose MLB The Show 26 if you want MLB licensing, wider platform support, and the stronger live-service setup.

    Choose eBaseball PRO SPIRIT 2026 if you want a native PC version, a lower price, and a baseball sim built around Japanese professional baseball.

    If you play on PS5 and care about both MLB and eBaseball PRO SPIRIT 2026, owning both makes sense. If you only want one, the real question is simple: do you want an MLB game or a Japanese baseball game?

  • Forza Horizon 6 All 57 Achievements Revealed — Full List and How to Get 1000 Gamerscore

    Forza Horizon 6 All 57 Achievements Revealed — Full List and How to Get 1000 Gamerscore

    Playground Games has officially published the full achievement list for Forza Horizon 6 ahead of its May 19, 2026 launch on Xbox Series X|S and PC. The game launches with 57 achievements worth a combined 1,000 Gamerscore, covering everything from completing your first race to becoming a Horizon Legend and revealing the entire Japan map.

    With early access for Premium Edition players starting May 15, completionists now have just over a month to plan their route to 100%. Here is every achievement, what it requires, and how to approach the list efficiently.

    If you enjoy achievement hunting, also check out our Tomb Raider 1-3 Remastered achievement guide

    What You Need to Know Before You Start

    Forza Horizon 6 Achievement list

    Before diving into the list, three things are worth understanding about how Forza Horizon 6 structures its achievements.

    The two main progression tracks run in parallel. The Wristband system — inherited from the original Forza Horizon — tracks your Festival progression through seven colour-coded tiers from Yellow to Gold. The Collection Journal runs alongside it with a separate Stamp system, also running Yellow to Gold. Both tracks culminate in 50 Gamerscore achievements, making them the two most valuable completions in the game. You will essentially be working toward both simultaneously as you play.

    The highest-value achievements are tied to late-game content. Horizon Legend (50G), Master Explorer (50G), The Horizon Cartographer (50G) and the two playlist achievements (30G each) are the heaviest earners and will take the most time. Plan around these first.

    PS5 players should note: The achievement list as published covers Xbox and Steam versions only. When the PS5 version launches later in 2026, expect 58 trophies — the same 57 converted plus a Platinum.

    Forza Horizon 6 has reportedly leaked online ahead of its official May 19 launch. If you missed that story, here is everything we know about the Steam file leak.

    Forza Horizon 6 Achievement list

    All 57 Forza Horizon 6 Achievements — Full List

    Achievement What You Need to Do Gamerscore
    Working 9 to 5 Complete your first Job 10
    Just Getting Started Complete your first Touge Battle 10
    Welcome To Japan Complete The Opening Act 10
    First of Many Complete your first Qualifier 10
    Welcome To Horizon Earn the Yellow Wristband and join the Horizon Festival 10
    Festival Fan Earn the Green Horizon Festival Wristband 10
    Making Waves Earn the Blue Horizon Festival Wristband 10
    What, Like It’s Hard? Earn the Pink Horizon Festival Wristband 20
    Orange You Glad You Made It? Earn the Orange Horizon Festival Wristband 20
    In The Spotlight Earn the Purple Horizon Festival Wristband 30
    Horizon Legend Earn the Gold Horizon Festival Wristband and become a Horizon Legend 50
    Stamping Ground Earn the Yellow Stamp in your Collection Journal 10
    Seeing the Sights Earn the Green Stamp in your Collection Journal 10
    Travelling All Around Earn the Blue Stamp in your Collection Journal 10
    Making Your Own Path Earn the Pink Stamp in your Collection Journal 20
    Hey! Listen! Earn the Orange Stamp in your Collection Journal 20
    What An Adventure! Earn the Purple Stamp in your Collection Journal 30
    Master Explorer Earn the Gold Stamp and become a Master Explorer 50
    The Boss Earn the maximum Promotion in a Job 20
    A Fine Addition To My Collection Discover and claim a Treasure Car 10
    Treasure Hunter Discover and claim 9 Treasure Cars 30
    Bargain Hunt Purchase an Aftermarket Car 10
    The Horizon Cartographer Reveal the entire Map 50
    Another Lap Won’t Hurt Set a lap time at a Time Attack Circuit 10
    Fresh Tire Smoke Complete a Drag Meet 10
    Four Swords Complete a LINK Skill 10
    Racking Up The Miles Discover all 10 regions 20
    Tokyo Resident Complete 33 activities in the Tokyo City Region 20
    Crowd Pleaser Earn 36 Stars from PR Stunts in the Ohtani Region 20
    White Ghost Complete 5 Touge Battles 20
    Carkour! Complete a Horizon Rush 10
    Feel The Rush Complete 3 Horizon Rush Events 20
    Blank Slate Purchase the Yashiki Player House 10
    What Are You Doing In My Estate? Visit another player’s Estate 10
    Show Me What You’ve Got! Display 3 different cars in your Garage at the same time 10
    Dedicated Tourist Earn 3 Stars on any Day Trip Story Chapter 10
    Collector Collect 100 different cars 20
    First Love Purchase a car from the Autoshow 10
    Meching My Way Downtown Complete the Mech My Day Showcase Event 20
    Ascending New Heights Complete the Flight Club Showcase Event 20
    Parking All Over The World Park at 3 different Car Meets 10
    A Whole New World Drive any R Class car 10
    Ready to Rumble Earn 10 levels in Horizon Play 10
    Maxed Out Earn 100 levels in Horizon Play 30
    Even Playing Field Complete a Race Event within a Spec Racing Championship 10
    To The Moon Earn at least 1 Star at the Irokawa Launch Danger Sign 10
    All Eyes On You Park the 2025 GR GT Prototype at a Car Meet 10
    Track Day Set a lap time at a Time Attack Circuit while driving any Track Toy 10
    Historic Effort Earn a Series History reward 30
    Played-List Earn all Festival Playlist points for a season 30
    Smashscot Smash your first Regional Mascot 10
    Gotta Smash ’em All Smash 200 Regional Mascots 30
    A Few Splinters Is Nothing! Smash 200 Bonus Boards 30
    Racing Aficionado Win 57 Horizon Festival Race Events 30
    On The Board Win your first Horizon Festival Race Event 10
    Pin It! Discover 10 Landmarks 10
    Storyteller Earn 81 Stars from Stories 10

    How to Approach 1000 Gamerscore Efficiently

    Start With the Easy 10G Achievements First

    The first hour of the game will naturally unlock Welcome To Japan, Working 9 to 5, First of Many, Just Getting Started, First Love, On The Board, Smashscot, and Carkour — that is 80 Gamerscore before you even settle into a rhythm. Do not skip the opening missions even if you are tempted to free roam immediately.

    Prioritise the Wristband and Journal Tracks Together

    The Wristband and Stamp progressions are the backbone of the achievement list and will take the longest to complete. Both culminate in 50G achievements — Horizon Legend and Master Explorer. Since these gate access to the best content in the game including Legend Island, focus on advancing both tracks in parallel rather than grinding one at a time.

    The Horizon Cartographer Requires Deliberate Exploration

    Revealing the entire map is worth 50G but will not happen passively. The Japan map is described by Playground as the largest and most vertical in franchise history, featuring 10 distinct regions including Tokyo City, the Ohtani Region, and mountain areas inspired by routes like Mt. Haruna and Bandai Azuma. Set aside dedicated exploration sessions early to chip away at this progressively.

    The Grind Achievements Need the Most Time

    Three achievements require sustained effort over many hours: Gotta Smash ’em All (200 Regional Mascots — 30G), A Few Splinters Is Nothing! (200 Bonus Boards — 30G), and Racing Aficionado (57 race wins — 30G). Start smashing Boards and Mascots from the first session so these build up naturally alongside everything else rather than becoming a late-game chore.

    The Multiplayer Achievements Are Lighter Than Expected

    What Are You Doing In My Estate?, Four Swords, Even Playing Field, Parking All Over The World, and Show Me What You’ve Got! all require online interaction but none demand competitive wins or long multiplayer sessions. These should clear relatively quickly once you are online with other players.

    Played-List Requires Seasonal Commitment

    Earning all Festival Playlist points for a season (30G) means committing to a full week of seasonal content. Forza Horizon games run on a four-week seasonal rotation and each season brings a fresh set of Playlist objectives. Block out one full week — ideally your first — to knock this out while the game is new and engagement is naturally high.

    All Eyes On You — Do Not Miss This One

    Parking the 2025 GR GT Prototype at a Car Meet is a specific 10G achievement that is easy to overlook. The GR GT Prototype is the cover car for Forza Horizon 6. You will likely receive it early in the game. Take it to any Car Meet before you swap it out for something faster and this achievement is done in minutes.

    What the Achievement List Tells Us About the Game

    Forza Horizon 6 Achievement list

    Looking at the full list reveals something about how Playground Games has designed Forza Horizon 6’s structure. The Touge Battles, Horizon Rush events, Jobs, and the new Collection Journal all get dedicated achievements — meaning they are substantial parts of the game rather than optional side content.

    The regional achievements — Tokyo Resident (33 activities in Tokyo) and Crowd Pleaser (36 PR Stunt stars in the Ohtani Region) — suggest the map is designed with distinct regional identities that encourage players to spend real time in each area rather than passing through.

    The lightest cluster of achievements — the early 10G unlocks — is deliberately front-loaded to create an immediately satisfying opening few hours. This is a design philosophy Playground has refined across multiple Horizon entries and the achievement list reflects it clearly.

    Forza Horizon 6 — Key Details

    Developer: Playground Games (with Turn 10 Studios support) Publisher: Xbox Game Studios Release date: May 19, 2026 — Xbox Series X|S and PC Early access: May 15, 2026 — Premium Edition only PS5 release: Later in 2026 — date not yet confirmed Game Pass:Available day one on Xbox Game Pass Ultimate and PC Game Pass Setting: Japan — Tokyo City, Japanese Alps, mountain passes, and rural regions Cars at launch: Over 550 Total achievements: 57 on Xbox and PC — 58 trophies including Platinum expected on PS5

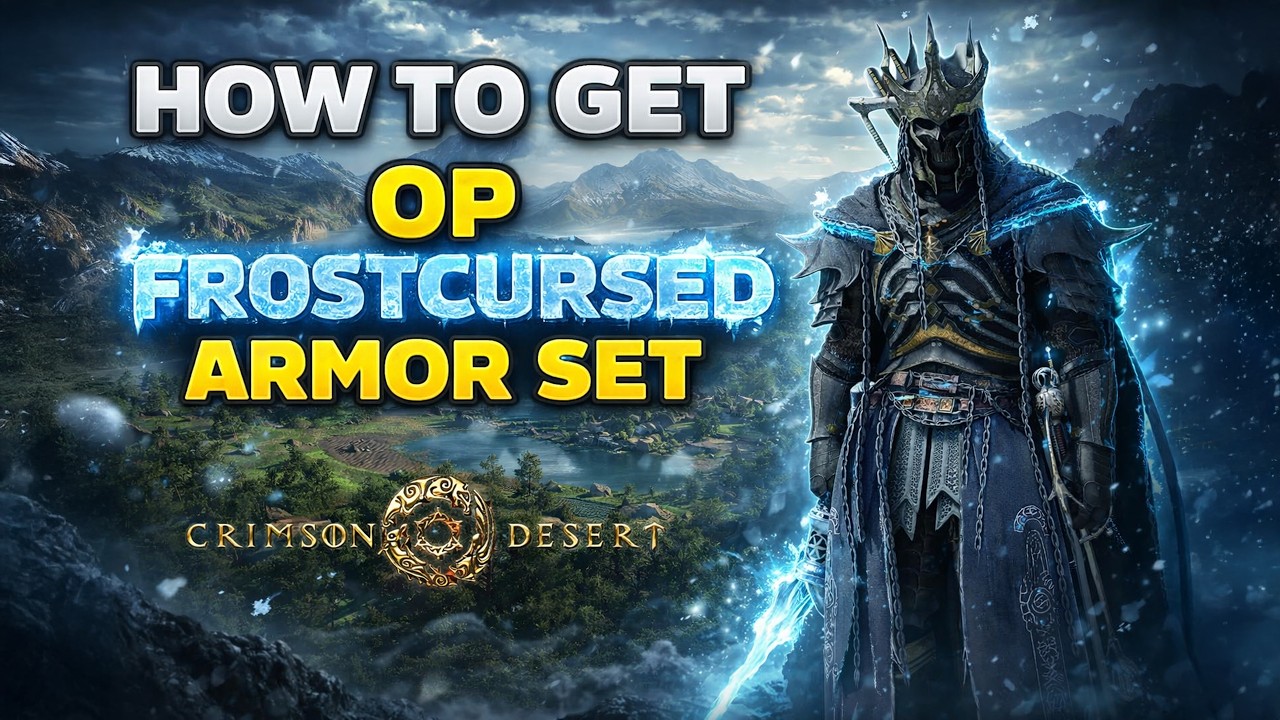
  • How to Get the Frostcursed Armor Set: Every Location in Crimson Desert

    How to Get the Frostcursed Armor Set: Every Location in Crimson Desert

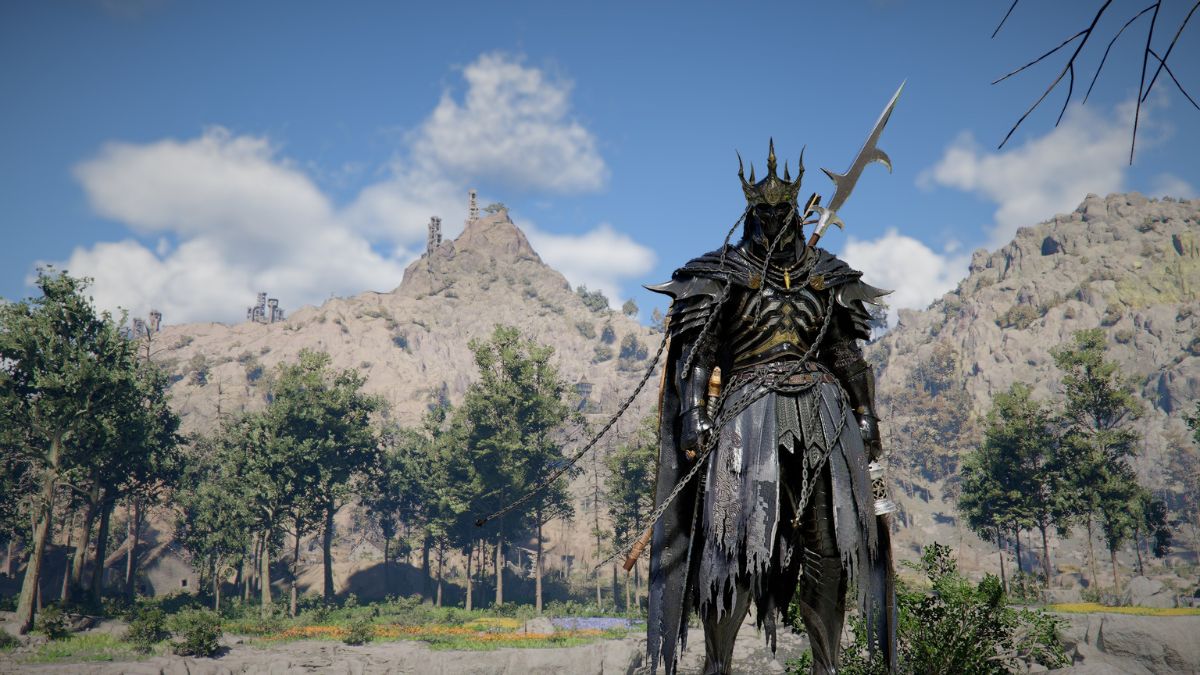
    If you want the full Frostcursed Armor Set in Crimson Desert, the good news is that all five pieces are clustered in north Demeniss rather than scattered across the whole map. The set includes the Frostcursed Plate Cloak, Helm, Gloves, Boots, and Armor, and most of the pieces are hidden behind waterfalls or tucked inside ruins, which means this is more of a route-planning problem than a boss-fight problem.

    The bigger catch is that several of these locations rely on traversal or utility skills. Current guide coverage agrees that Stab is needed to push through multiple waterfalls, while at least one location also requires Force Palm / Force Punch to break a wall, and another uses Blinding Flash to clear an obstructed passage.

    What you need before hunting the set

    Before you start, make sure you are ready to use Stab, because it is the key interaction for several Frostcursed locations in Demeniss. Stab is unlocked by default for all three playable characters, while other guides repeatedly show it as the method for passing through the waterfalls that hide several pieces. The chest armor also requires Force Palm/Force Punch to open the final path, and the cloak route involves burning red roots with Blinding Flash.

    That matters because a lot of bad loot guides skip the requirement section and then dump players at a waterfall with no explanation. If you go in knowing the interaction tools ahead of time, this set is much easier to clear in one run.

    Best route for the full Frostcursed Armor Set

    Frostcursed Armor Set

    The cleanest route is to sweep the area in roughly this order:

    1. Frostcursed Plate Cloak — Sanctum of Expiation
    2. Frostcursed Plate Helm — Chattering Rocks
    3. Frostcursed Plate Gloves — Lunar Spirit Grotto
    4. Frostcursed Plate Boots — Well of Tragedy Grotto
    5. Frostcursed Plate Armor — Mistshard Cave

    That path works because the locations are relatively close together in north Demeniss, and PC Gamer specifically notes that this sequence is an efficient travel order.

    Frostcursed Plate Cloak location

    The Frostcursed Plate Cloak is found in the Sanctum of Expiation in north Demeniss. It is placed in east across the river from Drakesfall Gorge in north Hernand, inside the sanctum ruins on top of a hill. To get it, head into the ruin, locate the central courtyard with the collapsing floor, then find the doorway with stairs leading down to red-spiked roots. Burn those roots with Blinding Flash, crawl through the passage, turn right, avoid the spike trap, and open the chest to claim the cloak.

    This is the piece most likely to slow people down, not because the chest is well hidden, but because the path is more involved than the waterfall locations. If you are starting the set run here, clear the area first so you are not trying to deal with enemies while working through the ruins.

    Frostcursed Plate Helm location

    The Frostcursed Plate Helm is at Chattering Rocks in Demeniss. Head to the southern of the two nearby Chattering Rocks locations, then look for a structure with a ladder on its side. Around the corner, there is a hidden room entrance concealed by vines, and the helm chest is inside.

    It is a general area as a small cluster of ruined buildings with a pool at the center, noting a vine-covered doorway near a stone window and ladder. Its guide says to burn the vines with Blinding Flash, enter, and loot the chest for the helm.

    The important part is not the exact wording from either guide. It is the landmark logic: go to the southern Chattering Rocks ruin, find the building with the ladder, and check the vine-hidden room. That is the helm location.

    Frostcursed Plate Gloves location

    The Frostcursed Plate Gloves are in Lunar Spirit Grotto in the northern part of Demeniss. The grotto is hidden behind a waterfall along the Denn River, and you need to use Stab to pass through before opening the treasure chest inside.

    PC Gamer adds a helpful navigation detail here: look for the waterfall near the mouth of the river leading east toward Tariv, then find the small cairn marking the path up to it. Stand in front of the waterfall and use Stab to push through. Inside, the gloves chest is waiting.

    This is where the route starts to become much simpler. Once you understand that the cairn is acting like a soft marker for these hidden grotto-style spots, the next two locations are easier to read.

    Frostcursed Plate Boots location

    The Frostcursed Plate Boots are found in the Well of Tragedy Grotto, northeast of Lunar Spirit Grotto. Game8 identifies the boots chest as being in a small cave called the Well of Tragedy in the Denn River area north of Demeniss.

    PC Gamer’s route guide makes the approach clearer: travel east from Lunar Spirit Grotto toward Tariv, then turn left up the next river until you reach another waterfall. Just like the gloves location, look for the small cairn at the base and use Stab to pass through the waterfall and reach the chest.

    If you are following the set in order, the boots should come quickly after the gloves. The two locations are mechanically similar, so once you find one, the other usually clicks faster.

    Frostcursed Plate Armor location

    The Frostcursed Plate Armor chest piece is inside Mistshard Cave, north of the Well of Tragedy area in Demeniss. Head to the cave far north of Demeniss, use Stab to get through the waterfall, then use Force Punch on the breakable wall to reach the treasure chest.

    PC Gamer matches that route closely, placing Mistshard Cave north across land from Well of Tragedy Grotto. It again notes the waterfall entrance and says to look for the cairn, Stab through the falls, and then use Force Palm on the rock immediately behind it to open the final path to the chest.

    This is the final piece and the one most likely to trip players who assume the waterfall is the whole puzzle. It is not. You still need to break the obstruction right after entering.

    Every Frostcursed Armor Set location at a glance

    For a quick cleanup pass, here is the full set in one place:

    • Cloak: Sanctum of Expiation
    • Helm: Chattering Rocks
    • Gloves: Lunar Spirit Grotto
    • Boots: Well of Tragedy Grotto
    • Armor: Mistshard Cave

    All five are in north Demeniss, and the set is best collected in one continuous trip instead of piecemeal backtracking.

    Why the Frostcursed set is worth getting

    The Frostcursed set is not just there to look good. PC Gamer describes it as one of the stronger ice-resistant armor sets in the game, noting that the helmet grants daze immunity and the boots provide extra XP and climbing speed. That makes it useful not only for cold-region exploration, but also for players chasing utility perks rather than raw defense alone.

    So the real reason to grab it early is simple: it is a high-value set with concentrated locations and no major boss gate attached in the current guide coverage. That is exactly the kind of gear run worth doing once and doing properly.

  • How to Get the Darkbringer Sword in Crimson Desert

    How to Get the Darkbringer Sword in Crimson Desert

    If you want one of the best early powerful weapons in Crimson Desert, the Darkbringer is absolutely worth the trip. Multiple current guides agree that the sword is hidden in the White Wastes Sanctuary in the Pailune region, and you can pick it up directly from the world without buying it or clearing a long quest chain.

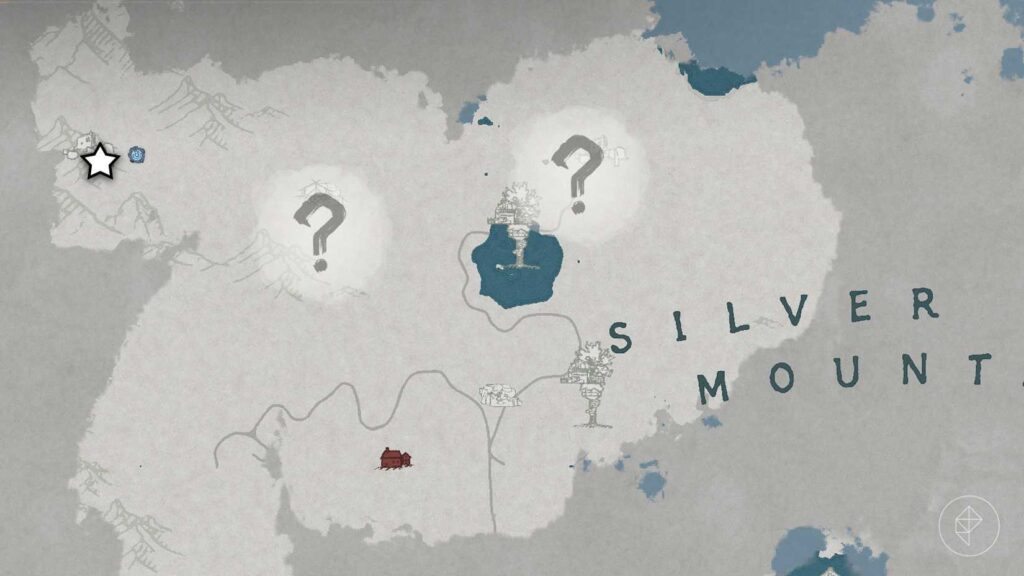
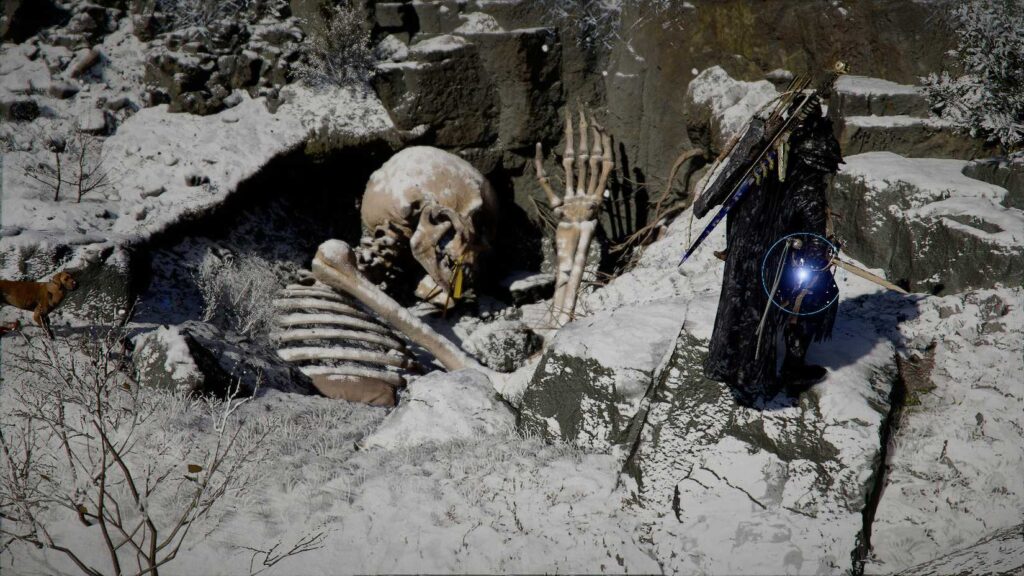
    The important part is this: Darkbringer is lodged in the mouth of a giant skeleton at White Wastes Sanctuary, which sits in the snowy northwestern part of Pailune. Guides consistently place it north of Whisperleaf Fortress, west or northwest of Silver Wolf Mountain, and around the Five-Finger Mountain area.

    Where to find Darkbringer

    crimsondesert_guide_darkbringer_map

    Head into northern Pailune and keep moving toward the snowy wilderness. The exact spot you are looking for is White Wastes Sanctuary. One detail that keeps coming up is that this area may still be partly covered by map fog, so do not assume you are in the wrong place just because your map looks incomplete.

    A good way to narrow it down is to use Whisperleaf Fortress as your reference point, then travel north-northwest. Some guides also mention a Mysterious Energy marker and an Abyss Nexus nearby; from there, the sanctuary is just up the hill to the west.

    When you arrive, look for a huge partially buried skeleton in the snow. That is the landmark. Walk up to the skull, interact with the sword between its teeth, and Darkbringer is yours.

    Step-by-step route

    crimsondesert_guide_darkbringer_skeleton

    Here is the clean version, without fluff:

    1. Travel to Pailune.
    2. Move toward the snowy northern section of the region.
    3. Use Whisperleaf Fortress and Silver Wolf Mountain as rough navigation points.
    4. Keep heading toward White Wastes Sanctuary near the Five-Finger Mountain area.
    5. Find the giant skeleton in the snow.
    6. Take the sword from the skeleton’s mouth.

    What makes Darkbringer worth getting

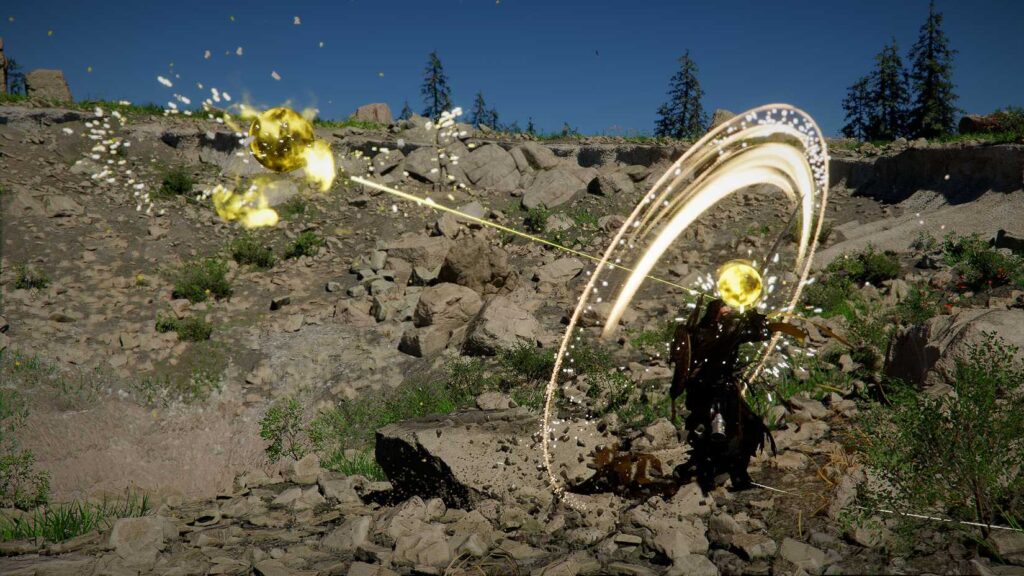
    Darkbringer is not just a flashy pickup. It is widely described as a unique two-handed sword that comes with Ator’s Orb, an Abyss Gear effect that adds extra offensive value to your attacks. Current guides say the weapon’s special effect triggers projectiles or explosive orbs when using a stamina attack or Forward Slash, giving you more reach and damage than a standard early-game weapon.

    That is why people are rushing for it early. It is sitting in the open world, it hits harder than a lot of what you will be carrying at that stage, and it gives you a built-in combat perk instead of just raw stats.

    Can you get Darkbringer early?

    Yes. Current player and guide coverage strongly suggests you can grab Darkbringer very early as long as you are willing to make the trip north and survive the route. You do not appear to need a major quest unlock just to pull it from the skeleton once you reach the sanctuary.

    That said, do not confuse “available early” with “easy for everyone.” The weapon is in a cold, remote area, and several sources note that preparation for the snowy region can help. Going in undergeared and pretending the route is trivial is how people waste time.

    Best tip before you go

    The biggest mistake is wandering the mountains without a real landmark in mind. Do not just roam and hope. Your target is not a random cave or chest. It is the White Wastes Sanctuary and the giant skeleton. Once you find that skeleton, the search is basically over.

    To get the Darkbringer sword in Crimson Desert, go to White Wastes Sanctuary in the northern Pailune region, look for the giant buried skeleton, and interact with the sword lodged in its mouth. It is one of the strongest early unique two-handed weapons currently covered by guides, largely because it comes with Ator’s Orb and gives your attacks extra offensive punch.

  • Crimson Desert: How to Get True Black Dye

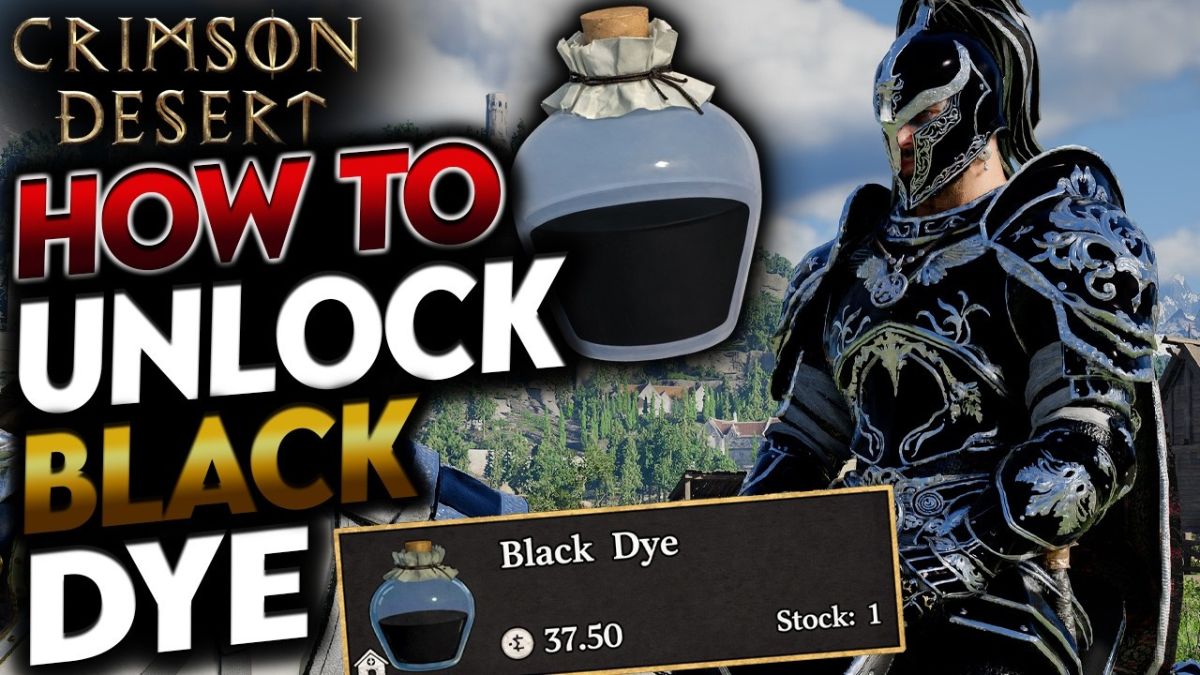
    Crimson Desert: How to Get True Black Dye

    Getting True Black Dye in Crimson Desert is not as simple as walking into a normal dye vendor and buying it outright. The current player-discovered route ties the unlock to Muiquun, where you need to complete a specific faction questline, move into the black market chain, and then unlock access to a hidden shop before the dye becomes available.

    If you are trying to customize your gear properly, especially after chasing major cosmetics and rare equipment like the Frostcursed Armor Set, this is one of the better appearance unlocks to prioritize.

    Start in Muiquun

    The route to True Black Dye begins in Muiquun, a settlement in the Crimson Desert region. This area matters because the dye appears to be tied not to a simple purchase trigger, but to a sequence of quests that gradually open up the settlement’s hidden market functions.

    A lot of players waste time searching regular merchants or camp services first. That is the wrong approach. If you want the real black dye and not just a close substitute, Muiquun is where you need to go.

    Complete Raiders in Muiquun First

    How to get black dye

    Your first job is to finish the full Raiders in Muiquun questline. This is the gate that appears to unlock the next stage of progression in the area, and skipping or partially completing it will stop you from reaching the black market chain that follows.

    That makes this less of a cosmetic pickup and more of a progression-based unlock. In other words, you are not just buying a color — you are earning access to the part of the map where that color becomes available.

    Move on to Muiquun’s Black Market

    Once the first quest chain is done, the next step is Muiquun’s Black Market. This is the section most players connect directly to the dye unlock, and it is where the route becomes more specific.

    Community-tracked methods point to this questline as the point where the hidden shop access starts to open. If you are not seeing the right vendor or dye options later, this is usually the part people missed.

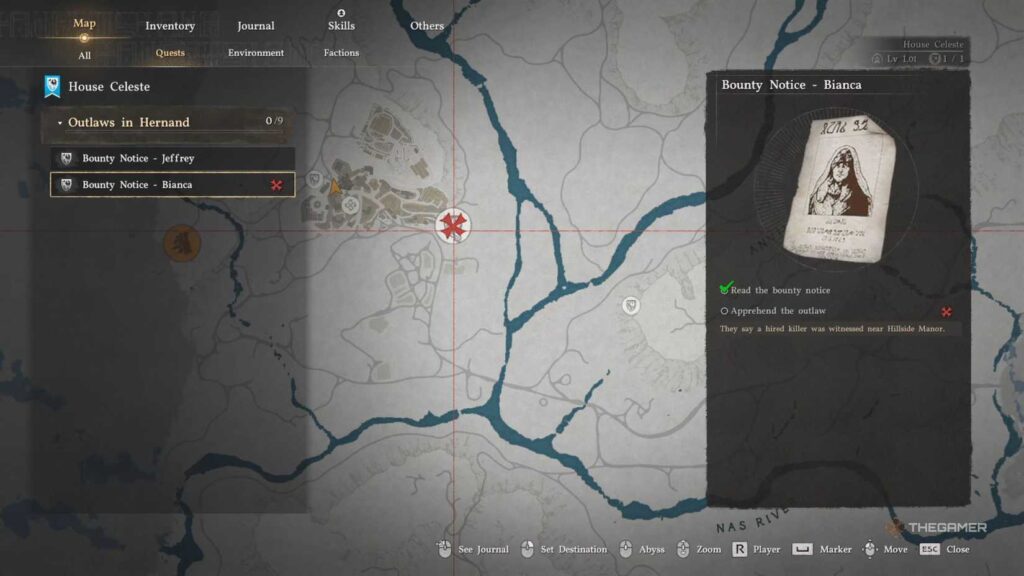
    It is the same kind of progression bottleneck players run into when chasing other sought-after items or objectives, whether that means farming gold bars, hunting down the Darkbringer sword, or finishing a more involved side objective like the Crimson Desert Bianca Bounty. The game likes to tie rewards to layered progression instead of simple pickups, and True Black Dye seems to follow that same pattern.

    Unlock the Back Alley Shop

    After the black market questline is complete, the next thing to check is the Back Alley Shop in Muiquun. This is the hidden vendor area most closely linked to the dye unlock.

    Some players report that the shop does not always appear instantly or that the vendor may not be standing there the moment they arrive. If that happens, give it a moment, move around the area, and check again instead of assuming the method failed. The bigger issue is usually incomplete quest progression, not a permanently missing vendor.

    Check the Varnian Dye Section

    Once the Muiquun unlock path is finished, True Black Dye should become available through the Varnian Dye section. This is the point where the process finally pays off.

    What makes this dye worth the trouble is that players keep distinguishing it from the many “almost black” shades that show up elsewhere. Crimson Desert has darker tones and substitutes, but True Black Dye is the option people chase when they want a real clean black look instead of a faded dark gray, red-black, or blue-black variation.

    Why True Black Dye Is Worth Unlocking

    For players who care about gear presentation, True Black Dye is one of the more useful appearance unlocks in the game because it works across multiple armor combinations and looks especially strong on darker sets, layered outfits, and more aggressive weapon builds.

    It also pairs well with some of the game’s more popular endgame or rare-item hunts. If you have already been working through guide-heavy content like the Frostcursed Armor Set, or you are still building up resources through gold barsfarming routes, getting access to a true black cosmetic option is an easy way to make your gear setup look more deliberate.

    That may sound secondary next to weapons and progression, but for a lot of players, customization is part of the reward loop. A rare sword or armor set looks better when the rest of the build actually matches it.

    Quick Steps to Get True Black Dye

    Here is the short version:

    1. Go to Muiquun

    Head to the Muiquun settlement in the Crimson Desert region.

    2. Complete Raiders in Muiquun

    Finish the full questline before doing anything else.

    3. Complete Muiquun’s Black Market

    This is the second major unlock step and appears to be essential.

    4. Find the Back Alley Shop

    Check the hidden shop area after the quest chain is done.

    5. Open the Varnian Dye section

    Look for True Black Dye once the unlock is active.

    The Best Current Route

    As of now, the clearest path is simple: finish Raiders in Muiquun, complete Muiquun’s Black Market, unlock the Back Alley Shop, and then check the Varnian Dye section for True Black Dye.

    That is the best-supported route players have found so far, and it fits the broader way Crimson Desert handles some of its more desirable unlocks. Whether you are chasing cosmetics, trying to earn more gold bars, searching for the Darkbringer sword, completing the Crimson Desert Bianca Bounty, or putting together a full build around the Frostcursed Armor Set, the game usually expects a bit more work than a basic vendor purchase.

  • Is Remnant From The Ashes Crossplay? How To Play With Friends On Different Platforms?

    Is Remnant From The Ashes Crossplay? How To Play With Friends On Different Platforms?

    Remnant: From the Ashes is a third-person shooter game that lets you explore and fight in a post-apocalyptic world, where you can use various weapons, items, and skills to survive. The game was developed by Gunfire Games and published by Perfect World Entertainment, and it is available for PC, PS4, PS5, Xbox One, and Xbox Series X|S.

    The game features a single-player mode, a co-op mode, and a survival mode, where you can play with or against other players online. However, one of the most common questions about the game is whether it supports crossplay, which is the ability to play with or against players on different platforms.

    In this article, we will answer this question and provide some details about the crossplay feature in Remnant: From the Ashes.

    Is Remnant From The Ashes Crossplay?

    Is Remnant From The Ashes Crossplay

    The short answer is yes, but only partially. Remnant: From the Ashes does support crossplay between PC, Xbox One, and Xbox Series X|S, which means that players on these platforms can join the same online sessions and play together.

    However, the game does not support crossplay between PS4, PS5, and any other platform, which means that PS4 and PS5 players can only play with other PS4 and PS5 players. This limitation is due to some technical and contractual issues that prevent the game from enabling crossplay on PS4 and PS5.

    How to Enable Crossplay in Remnant: From the Ashes?

    To enable crossplay in Remnant: From the Ashes, you need to follow these steps:

    • First, you need to have the game installed on your platform of choice, either PC, PS4, PS5, Xbox One or Xbox Series X|S. You also need to have a stable internet connection and an online subscription service, such as Steam, PlayStation Plus, or Xbox Live Gold, depending on your platform.
    • Next, you need to launch the game and go to the main menu, where you can choose from various options, such as Campaign, Adventure, Survival, or Options. You need to select the Options option, which will take you to the settings menu, where you can adjust the game preferences and features.
    • Then, you need to go to the Gameplay tab, which will show you the gameplay settings, such as the difficulty, the friendly fire, the voice chat, and the crossplay. You need to toggle the crossplay option to ON, which will enable the crossplay feature in the game. You can also toggle the crossplay option to OFF, which will disable the crossplay feature in the game.
    • Finally, you need to start or join an online session, and enjoy playing with or against other players on different platforms. You can also chat with other players using voice chat or text chat, and invite your friends to join your session using the invite option.

    By following these steps, you can enable crossplay in Remnant: From the Ashes and play with or against players on PC, Xbox One, and Xbox Series X|S. However, you cannot play with or against players on PS4 or PS5, as the game does not support crossplay on PS4 or PS5.

    What Are the Benefits and Drawbacks of Crossplay in Remnant: From the Ashes?

    Crossplay in Remnant: From the Ashes has some benefits and drawbacks, such as:

    Benefits

    • Crossplay allows you to play with or against more players, as you are not limited by the platform you are using. This can make the game more fun and diverse, as you can meet and interact with different players from different platforms.
    • Crossplay also allows you to play with or against your friends, even if they are using a different platform than you. This can make the game more social and cooperative, as you can team up or compete with your friends across different platforms.
    • Crossplay can also increase the longevity and popularity of the game, as it can attract and retain more players from different platforms. This can improve the quality and quantity of the online sessions, as well as the community and the support of the game.

    Drawbacks

    • Crossplay can also create some technical and compatibility issues, as different platforms may have different hardware and software specifications. This can affect the performance and stability of the game, as well as the fairness and balance of the sessions.
    • Crossplay can also create some communication and coordination issues, as different platforms may have different input and output methods. This can affect the interaction and cooperation of the players, as well as the enjoyment and satisfaction of the sessions.
    • Crossplay can also create some exclusivity and isolation issues, as some platforms may not support crossplay at all, or only support crossplay with certain platforms. This can affect the accessibility and availability of the game, as well as the inclusion and diversity of the players.

    Conclusion

    Remnant: From the Ashes is a third-person shooter game that lets you explore and fight in a post-apocalyptic world, where you can use various weapons, items, and skills to survive. The game supports crossplay between PC, Xbox One, and Xbox Series X|S, but not between PS4, PS5, and any other platform.

    Crossplay in Remnant: From the Ashes has some benefits and drawbacks, such as increasing the fun and diversity of the game but also creating some technical and compatibility issues.

    You might also be interested in the following games, Crossplay: Evil West Crossplay and Nobody Saves The World Crossplay We appreciate your interest in our website! Make Gameempress.com your go-to site for gaming information.

  • PSVR2 Tips and Tricks: How to Wear PSVR2 and Fix Blur Problem?

    PSVR2 Tips and Tricks: How to Wear PSVR2 and Fix Blur Problem?

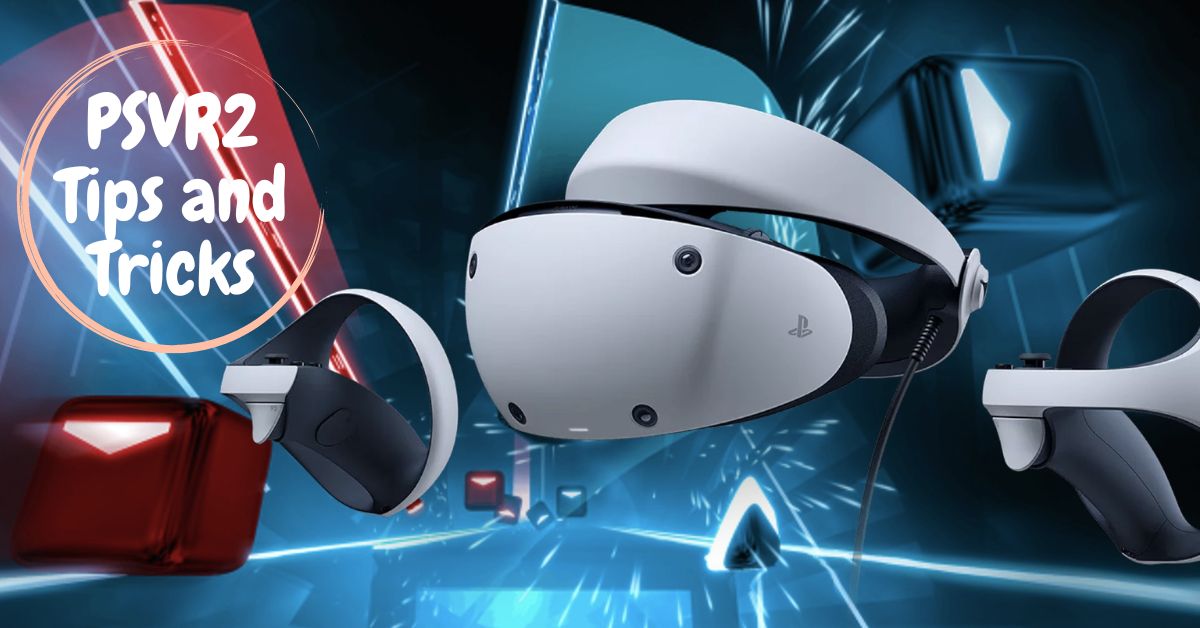
    PSVR2 Tips and Tricks: Here are some tips and tricks for using the PlayStation VR2 and other VR headsets without getting sick or tangled up.

    Sony’s PlayStation VR2 arrived last week, and while it’s one of the best virtual reality headsets we’ve ever tried, there are a few common VR mistakes and PSVR 2-specific annoyances that new buyers may encounter.

    Here are a few pointers to keep in mind if you’re using a virtual reality headset for the first time, or even if you’ve used them before and just bought a new one, to avoid things like getting sick, tripping over a cord, or losing power, or assuming Sony sent you a blurry VR headset when it’s just a trick of the light.

    Let’s start with that one.

    How to Wear and How to Fix the PSVR 2 Blur?

    You need to wear it right if you want a crisp picture and a snug fit that doesn’t pull on the crown of your head.

    PSVR2 Tips and TricksPSVR2 Tips and Tricks

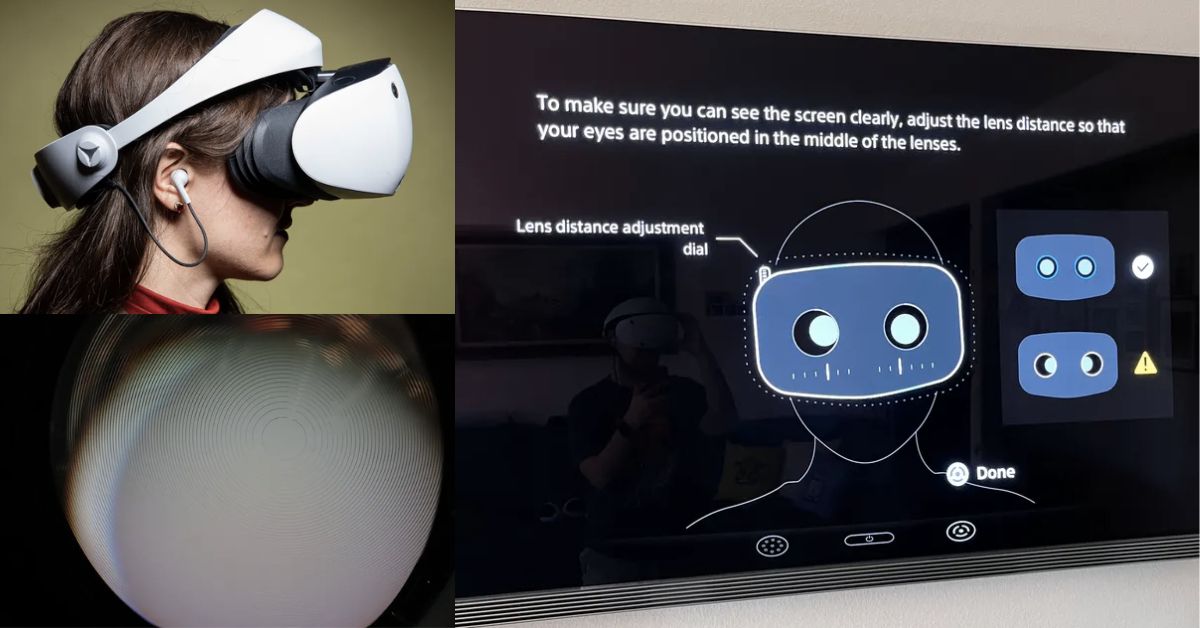
    Notice how the earpieces and the complete headset are angled slightly upwards? Observe how my coworker Adi has the band positioned so that the front rests on her forehead and the rear rests on her head.

    To achieve that is the goal. The PSVR 2 should sit on your head at a diagonal, not like a vice clamping your forehead and temples together. Securing the headband is not recommended until you’ve checked that the lenses are in the correct position.

    https://twitter.com/parolePSVR/status/1629619367821418496

    If you’ve worn a virtual reality headset previously, you may find the PSVR 2’s internal image hazy. This is because the image is only crisp in a small sweet spot created by Sony’s unique bespoke Fresnel lenses. Then you’ll have to fiddle with the headset’s placement on your head until you find the ideal position.

    When you first put on the headset, Sony guides you through a quick lens alignment tutorial, which you can access again from Settings > Accessories > Adjust Lens Distance. Still, it only tells you to twist a dial on the top left edge of the headset to move the lenses closer together or further apart. At the same time, the eye-tracking camera estimates the position of your eyes.

    Physically shoving the eye box up and down and possibly even tilting it left and right as you straighten a portrait on the wall would be helpful. Want an example? The lenses are at the proper distance apart in the preceding photo. However, the headset is still not perfectly horizontal.

    PSVR2 Tips and TricksPSVR2 Tips and Tricks

    While gazing dead ahead, the image should be so clear that you can identify the individual pixels. The headset’s clicky dial can then be used to secure it firmly. It shouldn’t feel like your brain is being squashed; adjust it so that you can shake your head up, down, left, and right without losing the comfortable fit.

    How to Handle the PSVR 2’s Cord?

    You and the more your colleagues play games on the PlayStation VR 2, the more tangled up you get in the cord’s 14.7 feet. It turns out that games like Pistol Whip, Pavlov, and Resident Evil Village—which require you to avoid certain death—make it very easy to lose your footing.

    We have no perfect solutions, but this is what we have for the time being

    PSVR2 Tips and TricksPSVR2 Tips and Tricks

    • If you can, place your PS5 on the floor. It’s not something you want to yank to the floor. Remember that once you’ve set up the headset, you won’t need the PS5 to be plugged into the TV anymore.
    • If you can, play the game with the PS5 turned away from you so the cord is behind you and out of the way. Sometimes that’s all you need, especially for games like Pistol Whip, where you don’t have to turn around too much.
    • You can begin a game facing any direction by hitting the Start/Options button to reset your location in VR.
    • Rather than taking immediate steps to feel the cable, try gliding your feet across the floor. Avoid wearing shoes, slippers, and sandals in favor of socks or barefoot.
    • If you find yourself entangled, turn around to face the direction you want to go. Rather than taking a right turn, you should make a series of three left turns.

    How to Avoid Getting Sick in Virtual Reality?

    Many people may experience virtual reality without getting motion sickness. Any headset that places magnifying lenses in front of a flat-screen can induce a vergence-accommodation conflict, making some people feel sick. Yet those who fall ill often recover their “VR legs” after a while.

    But if you’re like us and many VR fans get nauseous sometimes and want to avoid it, here are some suggestions that might help.

    Always turn by turning your head and body — never by moving a thumbstick

    If you move in the game but not the real world, your body may feel uneasy. My palms start sweating quite quickly if I use a thumbstick to turn right without turning my head. You can use your natural body to navigate around, even if games like Resident Evil Village may recommend using a thumbstick.

    PSVR2 Tips and TricksPSVR2 Tips and Tricks

    Turn on comfort settings like tunneling

    The best virtual reality games quickly prompt you to customize your experience for maximum relaxation. You can expect to see some tunneling, which reduces your field of view anytime you move. That’s a great way to lessen the chances of getting sick from playing VR games, and it’s usually adjustable as you adjust to the technology.

    Snap turns, as opposed to smooth turns, can be less triggering if you insist on using a joystick to turn, and many games provide them as an option.

    Move by teleporting if possible

    Many single-player games will let you aim at a spot on the ground nearby to teleport to that area. Still, certain games (Resident Evil Village, Pavlov) don’t enable teleport move because it disrupts immersion and could be unfair in multiplayer games. It’s one of the more relaxing ways to travel in virtual reality, as you can get to your destination without traveling there.

    Make sure your headset and controllers aren’t drifting

    It’s easy to suffer motion sickness in VR if your virtual head and hands start drifting around, which can happen with the PSVR 2 if lights are shining in the eyes of the headset’s cameras or if the room is too dark for the headset to detect movement.

    Sony’s headset may display a warning if the environment is abnormally dark or bright, but I’ve also seen it wander silently when a single bright bulb was pointed at my head. The issue stopped occurring after I redirected the overhead lighting.

    Turn on Tracking Support in Settings > Accessories > PlayStation VR2 if there is a TV in the room; this will allow you to utilize it as a second marker to improve tracking accuracy.

    Just don’t play overly triggering games

    Sitting in a kayak and proficiently paddling lit fire to my skull; thus, I won’t be playing Kayak VR again, even though I have no problems behind the wheel of a car in Gran Turismo 7. The results you get could be different than what we see. The virtual reality mode of Resident Evil Village features moments in which the game physically manipulates your head by bobbing it, pushing it to the floor, and even dragging it along the ground. Neither Adi nor I love VR experiences that require you to move your head in ways it is not naturally inclined to move.

    Take breaks

    Do not continue playing if you experience any of the following symptoms: sweating, a queasy stomach feeling, and lightheadedness. Don’t bother coming back until it’s gone. If the very idea of virtual reality makes you sick, you might as well forget about ever getting your VR legs.

    PSVR2 Tips and TricksPSVR2 Tips and Tricks

    Cutting Down on Other Cables

    The principal cord for the PSVR 2 cannot be removed, although other lines can be hidden. For instance, the PSVR 2’s in-built headphones may be stowed neatly in tabbed circular apertures rather than dangling loosely when not used.

    Most new headphones will have a more extended connection, but you can enjoy utterly wireless sound by connecting a USB wireless audio dongle to your PS5. Although there are cheaper solutions, we tried it using the SteelSeries Arctis Pro Wireless (You can purchase SteelSeries Arctis Pro by clicking here). Despite this, Bluetooth audio is currently unsupported.

    Keeping your PlayStation VR2 Sensation controllers charged can be painful if you plug each into the PS5 with its USB-C cable. Sony provides its own $50 charging dock for the controllers, which features pogo-pin adapters that fit into their USB-C connections.

    Yet, we can’t advise against it either, as it’s easy to place them down incorrectly and discover them virtually dead the following day. Despite Sony’s claims of a “click-in design,” the PS5’s conventional gamepads will not charge as securely as they do in the DualSense Charging Station.

    Many other manufacturers are now developing charging stations; some of these docks can accommodate the headset and the game system. Put them in the comments or email us if you need more essential VR comfort suggestions! In the future, we hope to add new information to this report.

  • Shiny Koraidon and Miraidon: How to Get Them in Pokemon Scarlet and Violet

    Shiny Koraidon and Miraidon: How to Get Them in Pokemon Scarlet and Violet

    Want to fill your Pokémon Scarlet and Violet living dex with Shiny Koraidon and Shiny Miraidon? Here’s how to get them! These are the two special Pokémon you encounter early in your journey. Wondering if it’s worth resetting to get them shiny?

    Pokémon Scarlet and Violet are the start of the ninth generation of Pokémon, and they introduce two legendary creatures right at the beginning of your adventure. But after spending years restarting the game to get a special shiny starter Pokémon, is it worth doing the same for these two legendary Pokémon?

    What are Shiny Pokemon?

    Shiny Pokemon are rare variants of regular Pokemon that have a different color scheme. In “Pokemon Scarlet and Violet,” shiny Pokemon are difficult to spot. However, that may not be the case when trainers are riding around on Koraidon/Miraidon.

    How to Get Shiny Koraidon and Miraidon?

    Right when you begin the game, you can’t get Shiny versions of the three starter Pokemon unless you breed them first. In the beginning, these Pokemon are “shiny locked,” so restarting the game won’t make them look different.

    Unfortunately, the rule also goes for Koraidon and Miraidon. In Pokemon Scarlet and Violet, you can’t find Shiny versions of these Pokemon because they’re shiny-locked.

    In the older games, you could sometimes find special shiny versions of certain legendary Pokemon. However, in the current Scarlet and Violet games, that’s not possible for these two legendary Pokemon.

    Shiny Koraidon
    Screenshot By GameEmpress

    Will Shiny Koraidon and Miraidon Be Available in the DLC?

    With the new Pokemon Scarlet and Violet DLC on the horizon, some folks think the Area Zero-themed DLC might finally let you snag a shiny Koraidon or Miraidon.

    Pokémon Sword and Shield wrapped up their DLCs with a cool raid feature. It made catching shiny legendary Pokémon easier. We might get something like that here, or they could give the Pokémon as a Mystery Gift later on.

  • How to Get Lots of Gold Bars in Crimson Desert Fast

    How to Get Lots of Gold Bars in Crimson Desert Fast

    If you want to build real wealth in Crimson Desert, gold bars are one of the smartest things to focus on early. They are not just rare valuables to dump for quick silver. They are tied to the bank system, convert at a much stronger rate than merchant sales, and can open the door to better money management much earlier than most players expect. Current guides and the game’s own bank notice all point the same way: if you want to get rich fast, start by treating gold bars like a financial asset, not ordinary loot.

    The fastest route right now is simple: grab the early hidden gold bar at Lioncrest Manor, use the bank correctly, and then work toward repeatable methods like respawn pickups, pickpocketing, and late-game crafting. That is a much better plan than wasting bars at merchants or chasing sketchy “infinite money” nonsense that may stop being useful the moment the game changes.

    Start With the Lioncrest Manor Gold Bar

    The best early gold bar route is the hidden stash inside Lioncrest Manor in Hernand. The known method is to enter from the back, climb up, and get inside through a window instead of trying the front entrance. Once you are in, head to the fireplace with the lion-head mantle and interact with the hidden compartment beneath it to steal the bar. That makes this one of the strongest early-game pickups because it is available close to the start and gives you a huge jump without long grinding.

    There are a few practical details that matter here. You need the steal interaction to be available, which means you should have your mask equipped, and some route notes also suggest the setup is easier after clearing Bruna’s Request, since that can reduce NPC traffic around the fireplace area. If you get caught, you can lose money, so treat this like a quick surgical grab, not a sloppy smash-and-grab run.

    How To Get A Ton Of Gold Bars In ‘Crimson Desert’ Without An Exploit

    Use the Bank, Not Merchants

    This is the part a lot of players screw up.

    A gold bar is worth 500 silver at the bank, while merchants only offer about 190 silver for one. That gap is too big to ignore. If you sell bars to a normal merchant just because it is convenient, you are throwing away a massive amount of value for no good reason.

    Banks are also important because they tie gold bars to the wider money system instead of treating them like a one-time payout. Known bank locations include Hernand, Calphade, Tommaso, and Delesyia, so once you have a bar in hand, you have multiple places to convert and manage it properly as you progress.

    The Early-Game Goal Is Not Just One Gold Bar

    A lot of players think the goal is simply to find one bar and cash it out. That is short-sighted.

    The smarter early goal is to use that first bar to get access to the bank and start building from there. One current route notes that opening a bank account requires 100 silver plus a gold bar deposit, which is exactly why that early manor bar matters so much. It gets you into the system sooner instead of leaving you scraping for silver and wondering why progress feels slower than it should.

    There is one caution worth knowing: the official notice page currently warns players not to use the bank’s investmentfeature if the deposited amount is less than 500 silver, which is equivalent to one gold bar. That does not make gold bars less valuable, but it does mean you should avoid careless banking decisions while that issue remains flagged.

    Gold Bars Can Be Farmed Again

    The manor pickup is strong because it is early, but it is also useful because it may not be strictly one-and-done. One currently maintained location guide says the Lioncrest Manor gold bar respawns after a set number of days, which means returning later can turn that early find into a repeatable source instead of a single lucky score. If that remains true in your version, it is easily one of the best gold bar farming routes available before you get deep into the game’s more advanced systems.

    That same guidance also points to another practical tip: trying the manor during the day can be easier than doing it at night, since there may be fewer NPC complications to work around.

    Steal Smarter, Not Constantly

    Beyond fixed locations, gold bars can also come from theft. Current stealing guides say bars can be stolen from places like Lioncrest Manor and also obtained by pickpocketing nobles. That gives you another path if you want to keep building wealth beyond static pickups.

    But there is a catch: regular theft lowers your contribution reputation. That means blindly stealing every chance you get is not actually “free money.” It can hurt your standing in a region and create longer-term friction. The smarter move is moderation: steal when the payoff justifies it, and do not tank your regional progress just to chase short-term gain.

    Craft Gold Bars Once the Game Opens Up

    If you want a more scalable method, crafting is where things get interesting.

    One known route says that solving the Spire of Insight puzzle in southern Hernand can reward a gold bar recipe, which later becomes usable through Witch’s Lair vendors in Chapter 3 under the special-items crafting menu. That shifts your strategy from “find a bar” to “produce bars,” which is obviously a much better place to be once your progression opens up.

    The reported crafting path includes materials like silver ore, mercury, and brimstone. Silver ore is much easier to pin down and can be mined from places like the cave near Heart of the Saint, while the more obscure materials appear to be tied to later exploration and progression. There is also another reported recipe path involving gold ore and a golden apple, with gold ore veins becoming easier to locate after defeating Marnie’s Excavatron in Karin Quarry.

    That means the long-term gold bar strategy is not just stealing and hoping. It is progression-based: unlock recipes, collect better materials, and shift toward repeatable production.

    The Best Order to Follow Get Lots of Gold Bars in Crimson Desert Fast

    If your goal is to get lots of gold bars fast without wasting time, the cleanest order looks like this:

    1. Steal the Lioncrest Manor bar

    This is the fastest known early boost and the easiest way to get started.

    2. Convert or deposit through the bank

    Do not dump bars to merchants for the weaker price.

    3. Revisit the manor later

    If the respawn behavior holds in your game, this becomes one of the best repeatable routes.

    4. Use theft selectively

    Pickpocketing can help, but constant stealing comes with reputation costs.

    5. Unlock crafting for the long term

    Once recipes and materials come online, crafting is the better route for sustained growth.

    The Biggest Mistake to Avoid

    The biggest mistake is treating gold bars like emergency cash.

    Yes, you can turn them into silver. But if you cash them out carelessly, sell them to the wrong NPC, or ignore their role in banking and crafting, you are burning one of the game’s better wealth-building tools just to solve a short-term problem. The best players are not just finding gold bars fast. They are using them in the way that keeps making money later.

    If you want lots of gold bars in Crimson Desert fast, begin with the hidden Lioncrest Manor stash, use the bankinstead of merchants, and then build toward repeatable theft routes and crafting once your progress catches up. Right now, that is the clearest legit path to turning early gold bars into real long-term wealth instead of wasting them on quick but dumb decisions.

  • Crimson Desert Bianca Bounty Guide: Where to Find Bianca and How to Capture Her

    Crimson Desert Bianca Bounty Guide: Where to Find Bianca and How to Capture Her

    If you’re stuck on the Bianca bounty in Crimson Desert, the problem usually is not the fight. It is finding her in the first place.

    Bianca is one of the early bounty targets tied to Hernand, and like other bounty hunts in the game, the search area on the map is a clue, not a perfect pin. That is why many players walk in circles and assume the quest is bugged. The good news is that Bianca is absolutely findable once you know where to look and when to look. Current guide coverage agrees that her bounty becomes available after bounty posters start appearing in Chapter 2, and her trail points toward the Church of Hernand and Hillside Manor.

    How to start the Bianca bounty in Crimson Desert

    To unlock the Bianca bounty, you need to pick up her bounty notice in Hernand. Bounty posters start appearing once you reach Chapter 2, and they can show up on notice boards, walls, and light posts around the city. Some current guides also specifically point to a lamp post near Beggar’s End as one place Bianca’s poster can appear.

    After you read the poster, Bianca’s last known area is marked on your map.

    That part matters, because the game does not always place her exactly where you expect. The marker gives you a hunting zone, not a guaranteed standing location. That is why you need to search the edges of the marked area too, not just the center. Game8 also notes that a moving bounty icon can appear on your minimap once you get close enough.

    Where to find Bianca

    The most reliable place to look first is the Church of Hernand.

    Multiple current guides place Bianca near the church, and one of the more useful details is that she may be inside one of the kitchen buildings there rather than out in the open. Some guides also mention Hillside Manor as another location tied to her last known movements, so that is your backup check if the church search comes up empty.

    A practical route is this:

    Start at the Church of Hernand.
    Check around the church grounds first.
    Then inspect the nearby buildings, especially the kitchen area.
    If Bianca is not there, head toward Hillside Manor and sweep the nearby paths and structures.

    Best time to find Bianca

    This is the detail a lot of players miss.

    Game8’s walkthrough says Bianca appears during the daytime around the Church of Hernand. If you search at night and get nothing, do not keep wasting time. Pass time, sleep, or come back during the day and check again. Another guide also recommends changing the time of day if she does not show up on your first pass.

    So the blunt answer is this: if Bianca is “missing,” the most likely reason is that you are searching at the wrong time.

    How to capture Bianca alive

    Once you find Bianca, she will try to run. The capture process is straightforward:

    First, chase her down.
    Then tackle her.
    After that, hit her a few times until the restrain or tie-up prompt appears.
    Once she is tied up, carry her and take her to the guards or constabulary to turn in the bounty.

    PC Gamer’s general bounty instructions line up with this too: tackle the target, strike them a few times, restrain them, then transport them back to jail in north Hernand City.

    Do not kill Bianca if you want full rewards

    This part is easy to mess up.

    Current guide coverage says you need to bring Bianca in alive to get the full reward. If you kill her by accident, your bounty payout is reduced. Beebom specifically states that killing bounty targets halves the reward.

    So do not overdo the damage once the capture prompt is about to appear.

    Bianca bounty rewards

    The currently published guides are consistent on the base reward: 5 Silver. PC Gamer also notes that bounty turn-ins award Hernandian Contribution, and Beebom specifically lists Bianca’s reward as 5 Silver Coins plus 300 Hernandian Contribution EXP.

    Quick Bianca bounty solution

    For anyone who just wants the fast answer:

    Pick up Bianca’s bounty poster in Hernand after reaching Chapter 2.
    Go to the Church of Hernand first.
    Search during the daytime.
    Check inside and around the church buildings, especially the kitchen building.
    If she is not there, check Hillside Manor.
    Tackle her, hit her until the restrain prompt appears, tie her up, and bring her back alive for the full reward.

    Why Bianca is easy to miss

    The game does a mediocre job of telling you that bounty markers are broad search zones. That is the real issue here.

    Bianca is not hard once you know the rules. The friction comes from three things:
    the map circle is not exact,
    she may be tucked into a building near the church,
    and time of day can affect whether she appears where you expect.

    That combination is exactly why this bounty wastes so much player time.

    Final tip

    Do not treat the map marker as gospel. Sweep the church grounds, search the nearby buildings, and do it in daylight. That is the difference between finishing the bounty in a few minutes and wasting half an hour wondering whether the quest is broken. Current walkthroughs point to the same core solution, and the church-side search is the best starting point by far.

    FAQ

    Where is Bianca in Crimson Desert?

    Bianca is tied to the Church of Hernand and Hillside Manor search area, with current guides recommending the church first. One guide specifically says she can be found in a kitchen building near the church.

    When does the Bianca bounty unlock?

    It becomes available after bounty posters start appearing in Hernand in Chapter 2.

    Why can’t I find Bianca?

    The most likely reasons are that you are searching at night, staying only inside the map circle, or not checking the nearby church buildings.

    What do you get for completing the Bianca bounty?

    Current guide sources list 5 Silver as the reward, and at least one source also reports 300 Hernandian Contribution EXP for turning her in alive.

    Do you need to capture Bianca alive?

    Yes. Current guide coverage says bringing bounty targets in alive gives full rewards, while killing them reduces the payout.

  • The Sims 4: University Cheat Codes

    The Sims 4: University Cheat Codes

    The Sims 4: Discover University added more options for the young adult life stage, including two different universities and honor roll programs to assist your sims to get a head start on their future jobs. New interests, abilities, and professions were also introduced with The Sims 4: Discover University. Read this if you want to know how to get around the university’s policies and how to use these brand-new features without any hassle.

    Challenges For The Sims 4 Graduate Degrees

    The following shortcuts are the fast track to a diploma. You can earn a standard degree, an honors degree, a distinguished degree, and a distinguished degree with honors. A BA from Britechester University and a BS from Foxbury Institute are the cheating acronyms you need. By using the cheats that finish in “honors,” you may ensure that your Sim receives a high GPA and is awarded a prestigious honors degree.

    Degree: Art History

    Cheats

    attributes. equip trait traits. equip trait traits. equip trait traits. equip trait traits. equip trait traits. equip trait traits. equip trait traits. equip trait traits. equip trait traits. equip trait traits. equip trait traits. equip trait traits. equip trait traits. equip trait traits. equip trait traits. equip trait traits.

    Master’s in Biology

    University of Biology Equipment Traits traits. equip trait

    Qualifications: Bachelor Of Arts In Biology

    • Required: University-Level Biology Equipment
    • traits. equip trait University Biology
    • B.S. Traits. equip trait University of Biology Degree

    DegreeBSHonors

    • The Level of Education in Communications
    • University Communication Equipment Trait traits. equip trait
    • Earned Bachelor of Arts in Traits, Equipment, and University Communications
    • Traits. equip trait University Communications Degree: BA Honors
    • A BS in traits. equip trait University Communications

    An Accredited College Or University With A Major In Computer Science

    skills. equip trait skills. equip trait traits. equip trait traits. equip trait traits. equip trait traits. equip trait traits. equip trait traits. equip trait traits. equip trait traits. equip trait traits. equip trait traits. equip trait traits. equip trait traits. equip trait traits. equip trait traits. equip trait traits.

    Degree In The Arts Of Cooking

    • University of Culinary Arts B.A. traits. equip trait University of Culinary Arts
    • Characteristics. equip trait University, CulinaryArts Degree.BAHonors

    Bachelor Of Science In Culinary Arts Traits.

    • equip trait University CulinaryArtsBachelor of Science with Honors

    School of Dramatic Arts

    attributes. equip trait University DramaDegreeBA attributes. equip trait University DramaDegreeBAHonors attributes. equip trait University DramaDegreeBS attributes. equip trait University DramaDegreeBSHonors.

    Academic Training In Economic Theory

    • trait University Economics equipment trait
    • A Bachelor of Arts in Economics from a Top University
    • A Bachelor of Arts with High Honors in Economics from a Top University
    • Bachelor of Science in Equipment and University Economics
    • DegreeBSHonors

    Diploma In The Arts

    • Equipment Traits: BA Fine
    • Arts Equipment Traits: BA Fine Arts Equipment
    • Traits: BA Fine Arts Equipment Traits: BS Fine Arts
    • Equipment Traits: BS Fine Arts
    • Equipment Traits: BS Fine
    • Arts Equipment Traits: BS
    • Fine Arts Equipment Traits: BS Fine
    • Arts Equipment Traits: BS Fine
    • Arts Equipment Traits: BS Fine
    • Arts Equipment Traits: BS Fine
    • Arts Equipment Traits: BS Fine
    • Arts Equipment Traits: BS Fine
    • Arts Equipment Traits: BS Fine
    • Arts Equipment Traits:

    Earning A Degree In History

    • features. equip trait University History
    • Bachelor of Arts in Traits: Equipment University History
    • Characteristics of a B.A. in Honors with Distinction in Equipment and University History
    • Master’s Degree traits. equip trait University History BS
    • DegreeBSHonors

    A Bachelor’s In Language And Literature

    skills. equip trait skills. equip trait traits. equip trait traits. equip trait traits. equip trait traits. equip trait traits. equip trait traits. equip trait traits. equip trait traits. equip trait traits. equip trait traits. equip trait traits. equip trait traits. equip trait traits. equip trait traits. equip trait traits.

    A Bachelor’s In Language And Literature

    skills.equip trait traits. equip trait traits. equip trait traits.equip trait traits.equip trait traits.equip trait traits.equip trait traits.equip trait traits.equip trait traits.equip trait traits.equip trait traits.equip trait traits.equip trait traits.equip trait traits.equip trait traits. equip trait traits.

    Degree In Psychology

    traits. equip trait traits. equip trait University PsychologyDegreeBA traits. equip trait traits. equip trait traits. equip trait University PsychologyDegreeBAHonors traits. equip trait traits. equip trait traits. equip trait traits.equip trait traits.equip trait traits.equip trait traits.equip trait traits.

    Percentage Of Malevolence

    attributes. equip trait traits. equip trait University VillainyDegreeBA attributes. equip trait traits. equip trait University VillainyDegreeBAHonors attributes. equip trait traits.equip trait traits.equip trait traits.equip trait traits.equip trait traits.equip trait traits. equip trait traits. equip.

    A Mixologist’s Diploma

    • traits. equip trait UniversityBartenderDegree

    The availability of prestigious degrees for your Sim is related to the field of study they pursue at their chosen university.

    Foxbury University’s prestigious programs include the following fields of study:

    • Biology
    • Economics
    • Computer Science
    • Physics
    • Psychology

    The following are some of the top fields of study at Villainy Britechester University:

    Culture and the Transmission of Artistic Knowledge

    • Arts (Cooking, Acting, Painting, Sculpture, History, Literature, and Language)

    Check out our comprehensive guide to all the money cheats in The Sims 4 if you’re having financial difficulties while attending college.

    Easy Game Golden Tickets For The Sims 4 University

    New robotics, research, and debating abilities were all introduced in The Sims 4: Discover University. You’ll need the following cheats to level these up to their maximum possible (change the X with the desired level; for instance, to reach level 10 in robotics, you’d use stats. and set skill level Major Robotics 10).

    Major Robotics X Robotics Stats.set Skill

    Discussion and Analysis major research debate x stats.set skill

    Career Hacks For The Sims 4

    The expansion pack also included new career options; below you’ll find the cheats you need to rapidly advance in any of them (if you want to take a step backward in your chosen profession, simply change the term “promote” to “demote”).

    Career- Education

    Cheat

    careers Adult Education careers. promote

    Career-Engineering

    Cheat

    careers Adult Engineering careers. promote

    Career-Law

    Cheat

    jobs. advertise jobs Adult Law

    Online Gaming Community Member

    Volunteer Opportunities in Electronic Sports

    A Call for Soccer Team Volunteers!

    career. advertise career Volunteer SoccerTeam

  • Green Plesioth Location in Azuria and How to Beat It in Monster Hunter Stories 3

    Green Plesioth Location in Azuria and How to Beat It in Monster Hunter Stories 3

    If you are hunting Green Plesioth in Azuria, the key area to focus on is Mirror Lake. Current guide coverage places Green Plesioth in Azuria: Mirror Lake, and egg-location guides also list Azuria as one of its habitats. That makes Mirror Lake the main place to search if your goal is either to fight the monster directly or farm its egg.

    The problem is that Green Plesioth does not feel like a guaranteed, always-visible overworld spawn every time you enter the zone. That lines up with player confusion around Azuria spawns and with the fact that many guides frame Green Plesioth farming around habitats, dens, and retreat mechanics, not just “walk here and it will always be standing there.” In plain English: if you go to Mirror Lake once, do not see it, and assume the guide is wrong, that is probably your mistake rather than the game’s.

    Where to Find Green Plesioth in Azuria?

    Azuria environment in Monster Hunter Stories 3

    The best Azuria zone to search is Mirror Lake. Both Green Plesioth habitat coverage and egg guides point to that sub-area specifically, which is why broad “Azuria” advice is too vague to be useful. If you are writing a real guide, say Mirror Lake clearly instead of making players wander the whole region.

    There is also a useful Azuria track item tied to Green Plesioth called Jade-Green Fin. One guide places it in the river between Azuria Castle and the Ashen Pass entrance, which gives players another clue that Green Plesioth activity is tied to Azuria’s water-heavy routes rather than random dry-land sections. That does not replace Mirror Lake as the main farming spot, but it helps narrow the search pattern across the region.

    If your goal is a Green Plesioth egg, the smarter method is not mindless map-resetting. The more reliable approach is to use the game’s retreat mechanic. Game8 notes that if you force a monster to retreat, it goes back to its den, and the eggs inside will then all be from that same species. That is a much better farming loop than hoping a random den gives you what you want.

    Best Way to Farm Green Plesioth

    Here is the efficient route:

    Go to Mirror Lake in Azuria, look for Green Plesioth activity, engage the monster, and try to force a retreat rather than simply ending the fight as fast as possible. According to current guides, retreat can be triggered by either getting a high battle score or using a paintball. Once the monster retreats, follow it to the den and collect the species-specific eggs there.

    This matters because regular den farming is random. Guides explicitly note that eggs in normal monster dens are not guaranteed, so players who only raid dens without manipulating retreats are choosing the slower method. If you want a practical guide rather than fluff, this is the point that should be front and center.

    Green Plesioth Weaknesses

    Current breakdowns list Green Plesioth’s main body as weak to slashing, piercing, and blunt damage. That means you are not dealing with a fight where only one weapon class works; instead, you have flexibility. The real edge comes from using the right damage consistently and keeping control of the fight rather than walking in underleveled and hoping the monster folds.

    Green Plesioth is also described as a more agile and more hostile subspecies than regular Plesioth, with strong mobility on both land and in water. So even if the raw weakness chart looks forgiving, you should expect a more annoying fight if you are sloppy with turn management or enter the battle without enough healing and status coverage.

    How to Beat Green Plesioth in Azuria

    The basic plan is simple: fight it in Mirror Lake, use your strongest reliable weapon type, and focus on a clean win with enough control to trigger retreat if you are farming eggs. Since Green Plesioth is tied to Azuria’s lake habitat, you should prepare for a water-zone encounter and bring a setup that can survive drawn-out exchanges rather than a glass-cannon loadout built only for burst.

    If you are struggling, the likely issue is not some hidden secret mechanic. It is usually one of three things: you are searching the wrong part of Azuria, you are relying on random dens instead of retreat farming, or you are entering the fight underprepared and turning a manageable hunt into a resource drain. The available guides do not suggest some elaborate unlock condition just for regular Green Plesioth in Azuria; they point back to Mirror Lake and standard habitat/den mechanics.

    Can’t Find Green Plesioth? Do This

    If Green Plesioth is not showing up for you, do this instead:

    Head back to Mirror Lake, sweep the area again, and stop wasting time searching unrelated Azuria sections first. If your real goal is the egg, shift immediately to den and retreat-based farming instead of treating overworld visibility as your only method. And if you are chasing broader Azuria progression, remember that other Plesioth-related encounters in the region, such as Invasive Plesioth, are separate and tied to different conditions and locations, so do not confuse those guides with the regular Green Plesioth hunt.

    Yes, Green Plesioth can be found in Azuria, and the place you should care about is Mirror Lake. If you want to beat it, bring a solid damage setup and fight cleanly. If you want to farm it efficiently, force a retreat and raid the resulting den instead of gambling on random egg spawns. That is the difference between a guide that actually helps and one that just repeats the map name and wastes the reader’s time.

  • Is Gotham Knights Crossplay in 2026? Complete Guide to Multiplayer on PS5, Xbox & PC

    Is Gotham Knights Crossplay in 2026? Complete Guide to Multiplayer on PS5, Xbox & PC

    Gotham Knights crossplay is one of the most searched topics for the 2022 open-world Batman game even in 2026. Players want to know if they can team up with friends across PS5, Xbox Series X|S, and PC without buying extra copies.
    The short answer: Gotham Knights does not have full crossplay. Xbox and PC players can play together, but PS5 players are still limited to other PS5 users only. No changes have been made since the 2023 Xbox/PC update.
    This updated guide covers the exact Gotham Knights crossplay status, supported platforms, cross-save details, and how to set up co-op in 2026.

    Gotham Knights Crossplay Status in 2026

    Gotham Knights launched without any cross-platform play in October 2022. A September 2023 update added limited crossplay, but only between Xbox Series X|S and all PC versions (Steam, Epic Games Store, and Microsoft Store).
    As of March 2026, the official FAQ on the Gotham Knights website still states: “Cross-platform support is not planned at this time.” PlayStation 5 remains completely separate. There have been no new patches or announcements adding PS5 crossplay.

    Gotham Knights Crossplay Supported Platforms Explained

    Here’s the current breakdown of Gotham Knights crossplay in 2026:
    • Xbox Series X|S + PC: Full crossplay supported.
      You can invite or join friends between Xbox and any PC version. This works seamlessly thanks to Xbox Play Anywhere.
    • PC (Steam + Epic + Microsoft Store): Yes, all PC players can play together regardless of launcher.
    • PS5: No crossplay with Xbox or PC.
      PS5 users can only connect with other PS5 friends via PlayStation Network.
    • Cross-generation: Not applicable – the game never released on PS4 or Xbox One.

    If you and your friends are on Xbox or PC, Gotham Knights crossplay works great. If anyone is on PS5, you’ll need to play on the same platform.

    Why Doesn’t Gotham Knights Have Full Crossplay?

    The limited Gotham Knights crossplay setup comes from platform agreements and development decisions. The Xbox/PC support was added when the game joined Xbox Game Pass. Sony’s policies kept PS5 isolated. Warner Bros. Montreal has not released any roadmap or updates to expand crossplay, and the game is no longer receiving major new features.

    Gotham Knights Cross-Save and Cross-Progression

    • Xbox + PC: Yes – full cross-save and cross-progression. Your characters, story progress, and unlocks transfer between Xbox and PC using the same account.
    • PS5: No cross-save. Progress stays locked to your PlayStation account.

    This makes Xbox and PC the most flexible options for Gotham Knights multiplayer.

    How to Play Co-op with Gotham Knights Crossplay

    1. Progress past the early story missions until online co-op unlocks.
    2. Set your session to “Public” or send direct invites.
    3. On Xbox/PC: Use the in-game friends list – crossplay activates automatically.
    4. On PS5: Only invite other PS5 players through PlayStation Network.

    Requirements:

    • Internet connection required (no local co-op).
    • Xbox needs Xbox Live Gold or Game Pass Ultimate.
    • PS5 needs PlayStation Plus.
    • PC needs no extra subscription.

    The game supports 2-player story co-op and up to 4-player Heroic Assault mode

    Will Gotham Knights Add PS5 Crossplay in the Future?

    There are no official plans or announcements for full Gotham Knights crossplay in 2026. Community discussions on Reddit, Steam, and recent YouTube videos confirm the current setup is likely permanent. The game has moved into maintenance mode with no new content updates expected.

    Should You Buy Gotham Knights for Co-op in 2026?

    • Yes, if everyone is on Xbox or PC – the crossplay and cross-save work reliably and the game is often on sale or included with Game Pass.
    • Consider the same platform for everyone if PS5 players are involved.

    Gotham Knights crossplay is partial at best. Xbox and PC users get the best multiplayer experience, while PS5 remains standalone.

    Gotham Knights Crossplay FAQ

    Does Gotham Knights have crossplay in 2026?

    No full crossplay. Only Xbox and PC are connected.

    Can PS5 play with Xbox or PC?

    No.

    Does Gotham Knights have cross-save?

    Yes between Xbox and PC only.

    Is there local co-op?

    No – online only.

    If you have more questions about Gotham Knights crossplay, co-op setup, or platform recommendations, leave a comment below. We’ll keep this guide updated if anything changes. Ready to play? Check current prices on Steam, Xbox, or PlayStation Store and grab the game while it’s discounted.

  • Top 10 Anime Video Games: Unleash Your Inner Anime Hero

    Top 10 Anime Video Games: Unleash Your Inner Anime Hero

    Anime in video games is vibrant and eye-catching. Video games bring anime to life with 3D models that keep the anime’s unique style. Many video games based on anime stay true to the original series. It’s amazing how drawings can turn into detailed and complex games. If you enjoy popular anime, check out some of the games we recommend below.

    Dragon Ball Fighter Z

    Dragon Ball Fighter Z

    One of the best Dragon Ball Z fighting games to try is Dragon Ball FighterZ. It’s considered the top 2D fighting game for DBZ fans because of its amazing graphics and special effects.

    Even if you don’t play games, you’ll enjoy watching it. Despite being 2D, Dragon Ball FighterZ is lively and colorful, with cool animations in a 3D world. Each character has their special moves that make them stand out uniquely.

    Demon Slayer Kimetsu No Yaiba: The Hinkkami Chronicles

    Demon Slayer Kimetsu No Yaiba The Hinkkami Chronicles

    Demon Slayer: The Hinokami Chronicles is a game where you play as Tanjiro Kamado. You follow Tanjiro’s story through the main plot of Demon Slayer. In addition to the RPG mode, there’s a versus mode for PvP matches with friends. The fighting mechanics are enjoyable, and each character’s special breathing techniques are faithfully recreated in the game.

    Naruto Ultimate Ninja Storm 4: Road To Boruto

    Naruto Ultimate Ninja Storm 4 Road To Boruto

    If you like Naruto, this fighting game is about Naruto Shippuden anime. Naruto Ultimate Ninja Storm 4: Road to Boruto includes both the original series and Next Generation’s anime.

    If you’re a fan of the show, you can use this game to experience Naruto Uzumaki’s adventures again. In Free Battle mode, you can fight in famous places such as Hidden Leaf Village, Orochimaru’s hideout, and Hidden Rain Village.

    Attack on Titan 2: Final Battle

    Attack on Titan 2 Final Battle

    If you’ve ever wanted to fly through the air on cables like the Scout Regiment, you can in Attack on Titan 2: Final Battle. The first Attack on Titan game introduced the basic skills needed, while the second game perfected them for smoother gameplay.

    If you follow the series, you’ll see the game closely follows the show’s story, with your own character adding their unique tale. The game offers extensive character customization, which sets it apart from other games.

    It features popular characters like Eren, Mikasa, and Armin. The movement and fighting mechanics are excellent in this version, making it a top choice for Attack on Titan fans on PC.

    One Piece: Pirate Warriors 4

    One Piece Pirate Warriors 4

    If you enjoy lively games, check out One Piece: Pirate Warriors 4. It’s a fun action game that covers a big part of the manga’s story. While it doesn’t include everything, it still captures the spirit of One Piece and lets fans have a great time playing. As the fourth game in the series, it’s well-polished, especially its combat system, which has been improved over the years.

    Dragon Ball: Kakarot

    Dragon Ball Kakarot

    If you love Dragon Ball Z, this game is perfect for you. It’s an open-world experience focused on the DBZ part of the anime. You’ll explore familiar places and battle in arenas just like in the original series.

    Unlike other Dragon Ball games, this one sticks to the DBZ story, giving fans a new and exciting way to enjoy it. Even if DBZ wasn’t your favorite part of the series, you should give this game a try. And if it was, you don’t want to miss out!

    Psycho-Pass: Mandatory Happiness

    Psycho-Pass Mandatory Happiness

    If you liked the dark and thought-provoking Psycho-Pass series, you’ll find more grim, human-rights-focused stories to enjoy. This visual novel game has a powerful storyline set in a futuristic Tokyo, where people are monitored by the Psycho-Pass system.

    Compared to many other games, Mandatory Happiness offers a relatively calm experience, especially if you find anything in Psycho-Pass relaxing. The visual novel captures the same mood and atmosphere as the original series, letting you choose between playing an Investigator or an Enforcer in the main story.

    My Hero Ultra Rumble

    My Hero Ultra Rumble

    If you enjoy My Hero Academia and want more community interaction in your gaming experience, My Hero Ultra Rumble is a great option. It’s a battle royale game, which is a very popular type of game. Some people think there are a lot of battle royale games out there already.

    But this game lets you feel like you’re the character from the series. You can use their special moves and see them grow, just like in the anime. Each character has their voice lines, and the game includes locations from the series. The roster of characters is always getting bigger, so it feels like you’re playing in a battle royale set in a superhero anime world.

    My Hero One’s Justice 2

    My Hero One’s Justice 2

    If you’ve ever wanted to see My Hero Academia characters battle each other in a game, now you can. My Hero One’s Justice 2 is a sequel to the first game. Don’t worry about the ‘2’ in the title; you don’t need to play the first game first.

    Both games have short stories and can be played in any order. They’re all about having fun fighting. The second game has more characters to choose from than the first, so it’s a great choice.

    Digimon Story: Cyber Sleuth – Hacker’s Memory

    Digimon Story Cyber Sleuth – Hacker’s Memory

    In general, Digimon games have varying quality, but Cyber Sleuth stands out. It includes over 80 new Digimon and makes the game smoother with better features. Digimon Story games are known as the best in the series and are a strong rival to Pokemon. While it might not beat Pokemon, it offers a great experience for fans of monster-collecting games.

    If you want to read more listing articles you can also read Top 10 Merge Games