In-depth game guides from Game Empress, with walkthroughs, tier lists, location maps, and step-by-step strategies to help you master the games you love.
Halo Reach is a sci-fi shooter game that lets you play as a member of Noble Team, a group of elite soldiers who fight against the alien Covenant on the planet Reach. The game is part of the Halo: The Master Chief Collection, which includes six Halo games remastered for PC. The game is available on PC, Xbox One, and Xbox Series X/S, but can you run it on your computer? What are the Halo Reach PC requirements? Let’s find out in this guide.
Halo Reach PC Requirements
Halo Reach PC Requirements
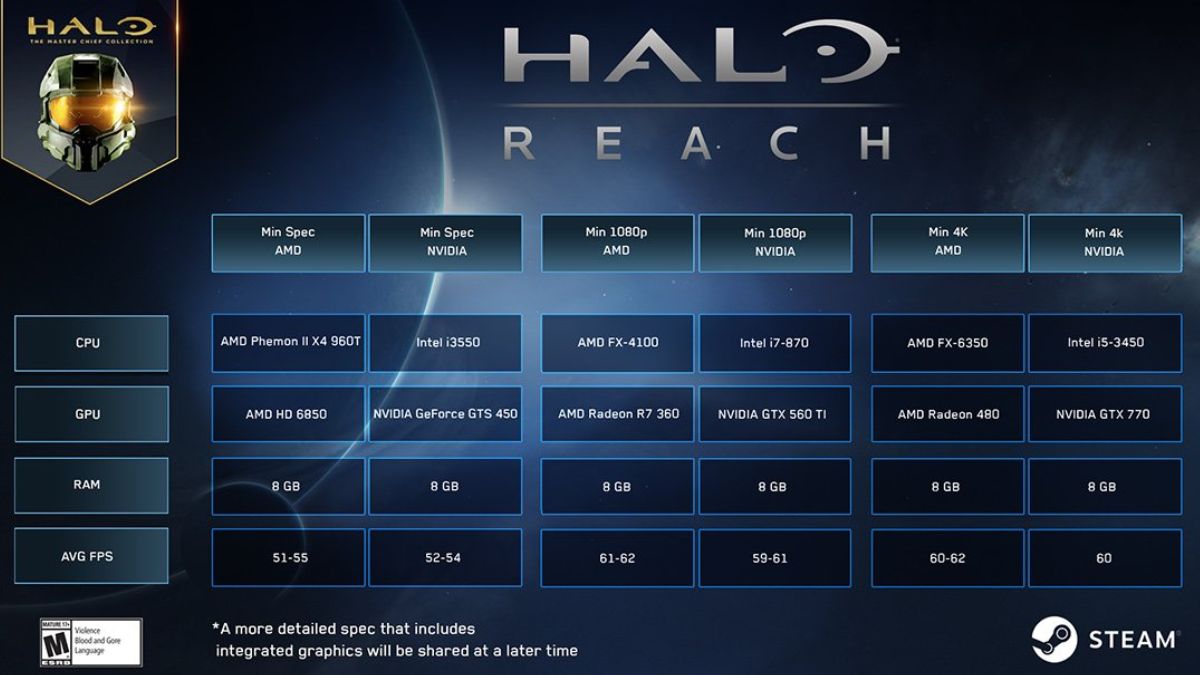
The Halo Reach PC requirements are the minimum and recommended specifications for your computer to run the game smoothly and without issues. The Halo Reach PC requirements are based on the official information from Steam. Here are the Halo Reach PC requirements:
Minimum Requirements
OS: Windows 7 SP1, 8.1, 10 (64-bit required)
CPU: Intel Core i5-2500, AMD Phenom II X4 960T or equivalent
Memory: 8 GB RAM
GPU: NVIDIA GeForce GTS 450, AMD Radeon HD 6850 or equivalent
GPU Memory: 2 GB
DirectX: Version 11 (Direct3D feature Level 11.1)
Storage: 25 GB available space
Sound Card: DirectSound compatible (must support DirectX 9.0c or higher)
Recommended Requirements
OS: Windows 10 (64-bit required)
CPU: Intel Core i7-6700, AMD FX-4100 or equivalent
Sound Card: DirectSound compatible (must support DirectX 9.0c or higher)
How to Check Your PC Specifications?
To check your PC specifications, you can use the following methods:
Use the System Information tool. To access it, press the Windows key and type “System Information”. Then, click on the System Information app that appears. You will see a summary of your system information, such as your OS, CPU, memory, and GPU.
Use the DirectX Diagnostic Tool. To access it, press the Windows key and type “dxdiag”. Then, click on the dxdiag app that appears. You will see a summary of your system information, as well as your DirectX version and GPU memory.
Use a third-party software. There are many software that can help you check your PC specifications, such as CPU-Z, GPU-Z, or Speccy. You can download and install them from their official websites, and then run them to see your system information.
How to Optimize Your PC Performance?
If your PC meets the minimum requirements, but not the recommended requirements, you may still be able to run the game, but with lower graphics settings and performance. To optimize your PC performance, you can try the following tips:
Update your drivers. Drivers are software that helps your hardware communicate with your OS and applications. Updating your drivers can improve your PC performance and fix any compatibility issues. You can update your drivers manually by visiting the manufacturer’s website, or automatically by using driver updater software.
Adjust your graphics settings. Graphics settings are options that affect the visual quality and performance of the game. You can adjust your graphics settings in the game’s menu, or the graphics card’s control panel. Lowering your graphics settings can improve your FPS (frames per second) and reduce lag and stuttering. Some graphics settings you can adjust are resolution, texture quality, anti-aliasing, shadows, and effects.
Close unnecessary programs. Programs that run in the background can consume your CPU, memory, and disk resources, and affect your PC performance. You can close unnecessary programs by using the Task Manager. To access it, press Ctrl+Alt+Delete and select Task Manager. Then, click on the Processes tab and end the processes you don’t need.
Defragment your disk. Disk fragmentation is a condition where the files on your disk are scattered and not stored contiguously. This can slow down your disk access and performance. You can defragment your disk by using the Disk Defragmenter tool. To access it, press the Windows key and type “Disk Defragmenter”. Then, click on the Disk Defragmenter app that appears. You will see a list of your disks and their fragmentation status. You can select the disk that you want to defragment and click on the Optimize button.
Star Citizen is a massively multiplayer online space simulator that has been in development since 2012 by Cloud Imperium Games, a studio led by Chris Roberts, the creator of the Wing Commander series.
The game aims to create a realistic and immersive sci-fi universe, where players can explore, trade, fight, and live on various planets, moons, stations, and ships. The game also features a single-player campaign called Squadron 42, which stars actors like Mark Hamill, Gary Oldman, and Gillian Anderson.
Star Citizen is one of the most ambitious and crowdfunded games ever made, having raised over $400 million from backers as of 2021. The game is currently in the alpha stage and is available to play on PC via the official website or Steam. However, many console players, especially PlayStation 5 owners, are wondering if the game will ever come to their platform. In this article, we will answer this question and provide some facts and updates about Star Citizen PS5.
Is Star Citizen Coming to PS5?
No, Star Citizen is not coming to PS5, at least not anytime soon. Cloud Imperium Games has not announced or confirmed any plans to bring the game to PS5 or any other console. The game is designed and optimized for PC, and the developer has stated that they are focusing on the PC version of the game for now.
Star Citizen 3.22 Patch Notes
The reason for this decision is that Star Citizen is a very complex and demanding game, which requires high-end hardware and software to run smoothly. The game uses the Lumberyard engine, which is based on the CryEngine, and supports features like procedural generation, ray tracing, volumetric clouds, and dynamic physics.
The game also has a large and persistent universe, which can host thousands of players and objects at the same time. The game also has a modular and customizable system, which allows players to modify and upgrade their ships, weapons, and equipment.
These features make Star Citizen a very challenging game to port to PS5 or any other console, as they would require significant compromises and reductions in quality and performance.
Take a look at Star Citizen Twitter official Page:
The PS5 may have impressive specs and capabilities, but it still has limitations and restrictions compared to the PC. For example, the PS5 has a fixed memory and storage capacity, which may not be enough to handle the game’s huge and detailed assets. The PS5 also has a closed and regulated system, which may not be compatible with the game’s open and flexible system.
Therefore, Star Citizen is not likely to come to PS5 or any other console soon, unless the developer decides to change their vision and direction for the game, or the console technology advances significantly to match the PC standards.
What Are the Alternatives to Star Citizen on PS5?
While Star Citizen may not be coming to PS5, some other games may offer a similar or satisfying experience for console players who are interested in space simulation. Here are some of the best alternatives to Star Citizen on PS5:
Elite Dangerous: A space simulator that lets players explore, trade, fight, and survive in a vast and realistic galaxy, with various ships, factions, and activities. The game also supports VR and online multiplayer and has regular updates and expansions. The game is available on PS4 and PS5 via backward compatibility.
No Man’s Sky: A space adventure that lets players discover, explore, and create in a procedurally generated and infinite universe, with billions of planets, stars, and creatures. The game also supports VR and online multiplayer and has frequent updates and additions. The game is available on PS4 and PS5 via backward compatibility.
EVE Online: A space MMO that lets players engage in various activities and professions in a persistent and player-driven universe, with thousands of systems, planets, and ships. The game also has a complex and dynamic economy, politics, and warfare, and has regular updates and events. The game is available on PC but can be streamed to PS5 via GeForce Now.
These are some of the best alternatives to Star Citizen on PS5, but you can find more games on the PS Store or online. You can also keep an eye on the upcoming games that may offer a space simulation experience, such as Starfield, Kerbal Space Program 2, and The Outer Worlds 2.
Conclusion
Star Citizen is a space simulator that is currently in development for PC and is not coming to PS5 or any other console anytime soon. The game is very complex and demanding, and would require significant compromises and reductions to run on PS5 or any other console. The developer has not announced or confirmed any plans to bring the game to PS5 or any other console and is focusing on the PC version of the game for now.
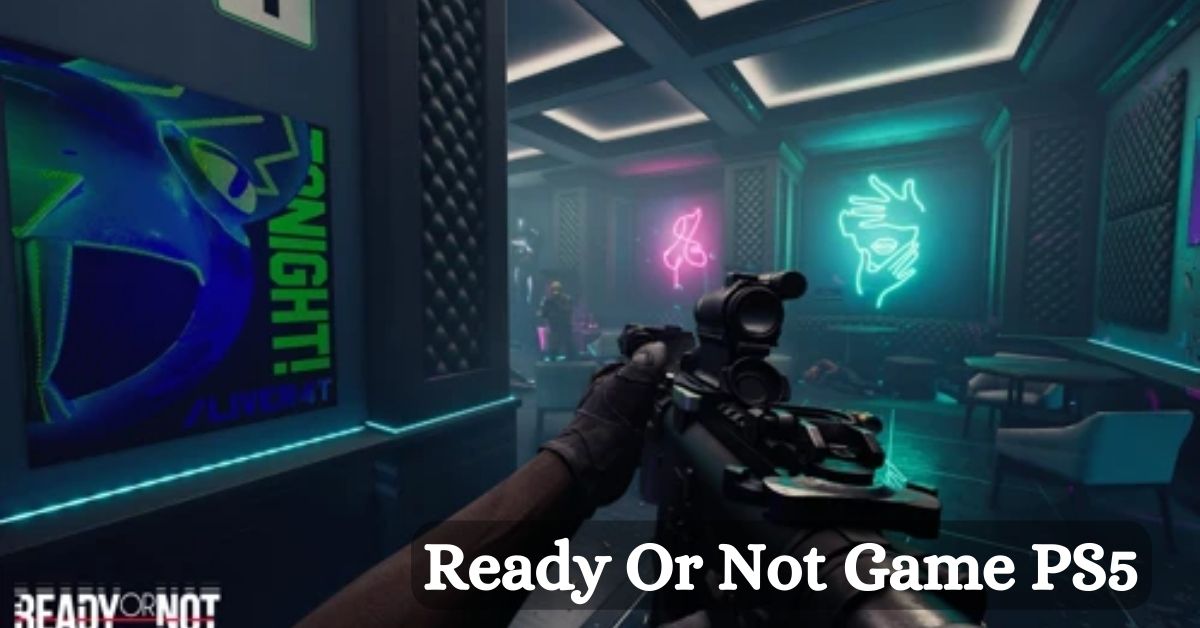
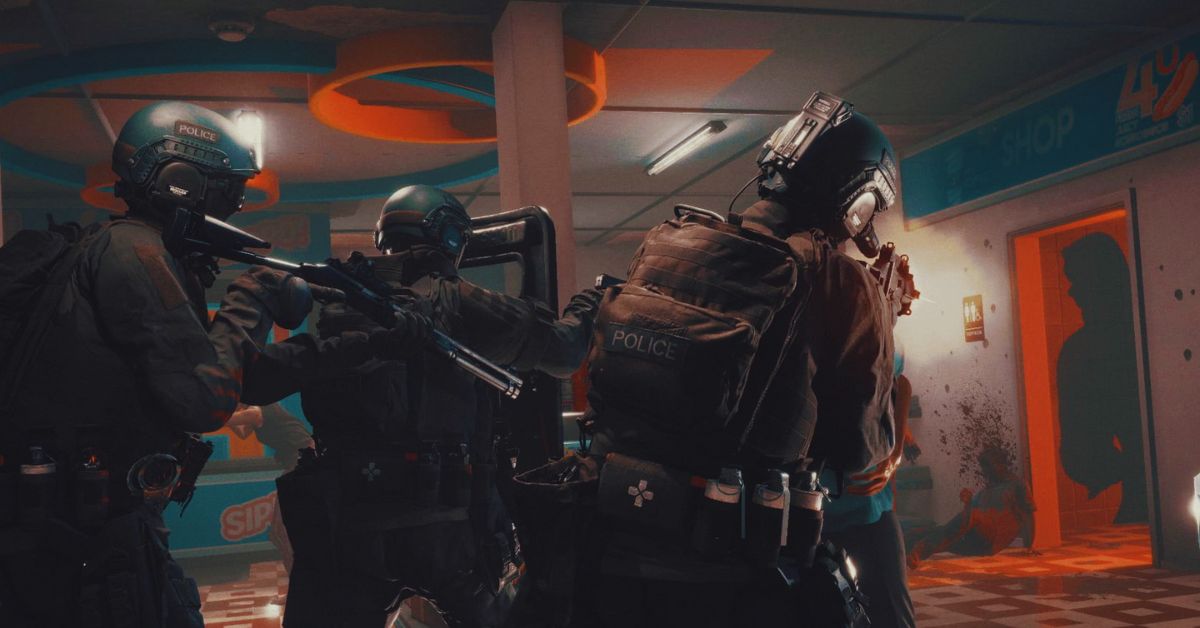
Ready or Not is a realistic and immersive tactical shooter game that simulates the experience of a SWAT team in various scenarios, such as hostage rescue, bomb defusal, or drug bust. The game features a single-player campaign, a co-op mode, and a multiplayer mode, where players can use a variety of weapons, gadgets, and tactics to complete their objectives.
The game also boasts a high level of customization, realism, and interactivity, as players can modify their loadouts, interact with the environment, and make decisions that affect the outcome of the missions.
Ready or Not was released on Steam Early Access on December 13, 2023, after several years of development and testing. The game has received positive reviews from critics and players, who praised its graphics, gameplay, and atmosphere.
However, many PlayStation fans are wondering if Ready or Not will ever come to PS5 or PS4, and enjoy the game on their consoles. In this article, we will answer that question and explain the current status and plans of Ready or Not for PlayStation.
Is Ready or Not Available on PS5 or PS4?
Ready Or Not 1.0 Patch Notes
No, Ready or Not is not available on PS5 or PS4, and it is unlikely to be anytime soon. The game is currently exclusive to PC, and it is only playable on Steam. The developers of Ready or Not, Void Interactive, have not announced any plans or intentions to bring the game to PlayStation or any other console platforms.
There are several reasons why Ready or Not is not available on PS5 or PS4, and why it may be difficult or impossible to port the game to PlayStation in the future. Some of these reasons are:
The game is still in early access, and it is not finished or polished yet. The developers are still working on adding new features, content, and improvements to the game, and they are focusing on the PC version first. The game also has some bugs, glitches, and performance issues that need to be fixed before it can be considered for console release.
The game is very demanding and complex, and it may not run well or at all on PS5 or PS4. The game requires a powerful PC to run smoothly and with high graphics settings, and it may not be compatible or optimized for the PS5 or PS4 hardware and software. The game also has a lot of mechanics and systems that may not work well or at all on the PlayStation controllers and interface.
The game is very niche and hardcore, and it may not appeal to or sell well on the PlayStation market. The game is designed for a specific and dedicated audience of tactical shooter fans, who prefer realism, challenge, and teamwork over casual, arcade, and solo gameplay. The game may not attract or satisfy the majority of PlayStation players, who may prefer more accessible, popular, and mainstream games.
Will Ready or Not Ever Come to PS5 or PS4?
The long answer is maybe, but don’t hold your breath. The developers of Ready or Not have not ruled out the possibility of bringing the game to PlayStation or other console platforms in the future, but they have also not confirmed or promised anything.
The developers have stated that they may consider porting the game to consoles “depending on the reception of the final game”, which implies that they will wait until the game is fully released and successful on PC before making any decisions or plans for console release.
However, even if the developers decide to port the game to PlayStation, it may take a long time and a lot of resources and effort to do so. The developers will have to overcome the technical and logistical challenges of adapting the game to the PS5 or PS4 hardware and software, as well as the creative and marketing challenges of appealing to the PlayStation audience and competing with other games.
The developers will also have to deal with the legal and contractual issues of obtaining the rights and permissions to publish the game on PlayStation, as well as the financial and operational issues of funding and distributing the game on PlayStation.
Therefore, PlayStation fans who are interested in playing Ready or Not should not expect or hope for the game to come to PS5 or PS4 anytime soon, or at all. The best way to play the game is to get a PC and buy the game on Steam, or to watch the game on YouTube or Twitch.
Alternatively, PlayStation fans can look for other tactical shooter games that are available or coming soon to PS5 or PS4, such as Rainbow Six Siege, Rainbow Six Extraction, or Ghost Recon Breakpoint.
One fan-made modification for Fallout 4 is Fallout London, which expands the scope of the Resource Wars’ catastrophic impact outside the United States. On April 23, 2024, the mod will be published, bringing with it new lore, characters, settings, and stories to the Fallout series. The ten finest features that make Fallout London a worthwhile game are listed below.
10 Reasons Why You Should Play Fallout London
1. A New Location
Fallout London is the first mod to take the Fallout series outside of the United States, and it does so with style and attention to detail. The mod aims to fully recreate the city of greater London and its familiar landmarks, such as Big Ben, the Tower of London, Buckingham Palace, and more.
The mod also features five smaller hub areas, each with its distinct atmosphere and culture. From the aristocratic Westminster to the anarchic Camden Town, Fallout London offers a diverse and immersive exploration of the British wasteland.
2. A New Story
Between Fallout 1 and Fallout 2, the year 2237 takes place in Fallout London. Following a lab break-in, the player is tasked with escaping to the surface and uncovering the mysteries surrounding the enigmatic Project Cobalt.
While exploring London, the player will come across several groups, each with its objective and set of reasons, all fighting for control of the city. The user can choose between different endings in the mod’s branching plot.
3. A New Character
The Wayfarer, a new character in Fallout London, is a direct descendant of a British spy from before the war. How the Wayfarer engages with the environment and its inhabitants is shaped by their one-of-a-kind history and character. For even more character customization options, the mod lets you change the Wayfarer’s look, abilities, bonuses, and attributes.
4. A New Lore
By delving into British culture and history both during and after the Great War, Fallout London adds to the Fallout universe’s canon. The Resource Wars, the Commonwealth, and nuclear destruction all had an impact on Britain, as this mod shows.
Among the many new features introduced by the mod are the London Underground, the British Royal Family, and the Knights of the Round Table. Respecting the original Fallout canon while adding its creative spin and flavor, the mod attempts to be lore-friendly.
5. A New Gameplay
Adapting Fallout 4’s gameplay to a British setting, Fallout London adds new features and systems. There are a plethora of new swords, muskets, bowler hats, tea, motorcycles, and armor pieces included by the mod.
Additionally, the patch introduces new adversaries, each with its own set of abilities and vulnerabilities, including mutant animals, robots, raiders, and cultists. Moreover, the update alters the fighting system to make it more difficult and lifelike. Bar brawls, horse racing, chess, and other minigames are among the additional objectives and activities included in the update.
6. A New Soundtrack
The new score for Fallout London is perfect for the mod’s tone and setting. Original compositions and licensed music from several decades and genres, including rock, pop, classical, and folk, make up the soundtrack.
A number of well-known British bands, including The Rolling Stones, The Clash, The Beatles, and others, have songs featured on the soundtrack. On the soundtrack, you can hear various radio stations, each with its own DJ and style, including Radio London, Radio Free England, and Radio Anarchy.
7. A New Voice Acting
The excellent voice acting in Fallout London is what really makes the game come alive. Among the more than two hundred voice actors included in the mod are well-known figures in the field, like Doctor Who’s David Tennant and Tom Baker.
A wide variety of accents and dialects, including Cockney, Scottish, Irish, and more, are voiced by actors in the mod. Subtitles and localization for several languages, including French, German, Spanish, and more, are also included in the mod.
8. A New Art Style
Unlike previous Fallout games, Fallout London features a fresh graphical style. The mod highlights the contrast between the beautiful and terrifying post-apocalyptic London with the use of a more brilliant color palette and a more stylized and comical appearance.
To further improve the mod’s visual quality and immersion, it employs a more realistic and detailed texture in addition to more dynamic and atmospheric lighting.
9. A New Community
A fan-made mod, Fallout London is all about the fanbase. The mod’s creators are a group of skilled modders who have a strong affinity for Fallout and video games. Additionally, the mod has a sizable and engaged fan base that helps keep it running by giving suggestions, criticism, and financial support.
The mod enthusiastically welcomes and encourages a wide range of fan-created content, such as artwork, stories, films, and more. Among the many fan-focused events and contests organized by the mod are the Fallout London Fan Art Contest, the Fallout London Cosplay Contest, and the Fallout London Merchandise Giveaway.
10. A New Experience
Fans of the Fallout series can get a fresh take on the game with the Fallout London mod. Instead of being a carbon copy of Fallout 4, this mod creates an entirely new game from the ground up. The mod takes on the challenge of modifying and improving the series’ history and gameplay, which makes it bold, groundbreaking, and original.
The mod offers players hours of content and entertainment, making it fun, engaging, and entertaining. You can play the mod with just Fallout 4 and its official DLCs. Thus, it’s free, accessible, and straightforward to install. Since it is a mod that the creators put a lot of heart and soul into, Fallout London is definitely worth your time.
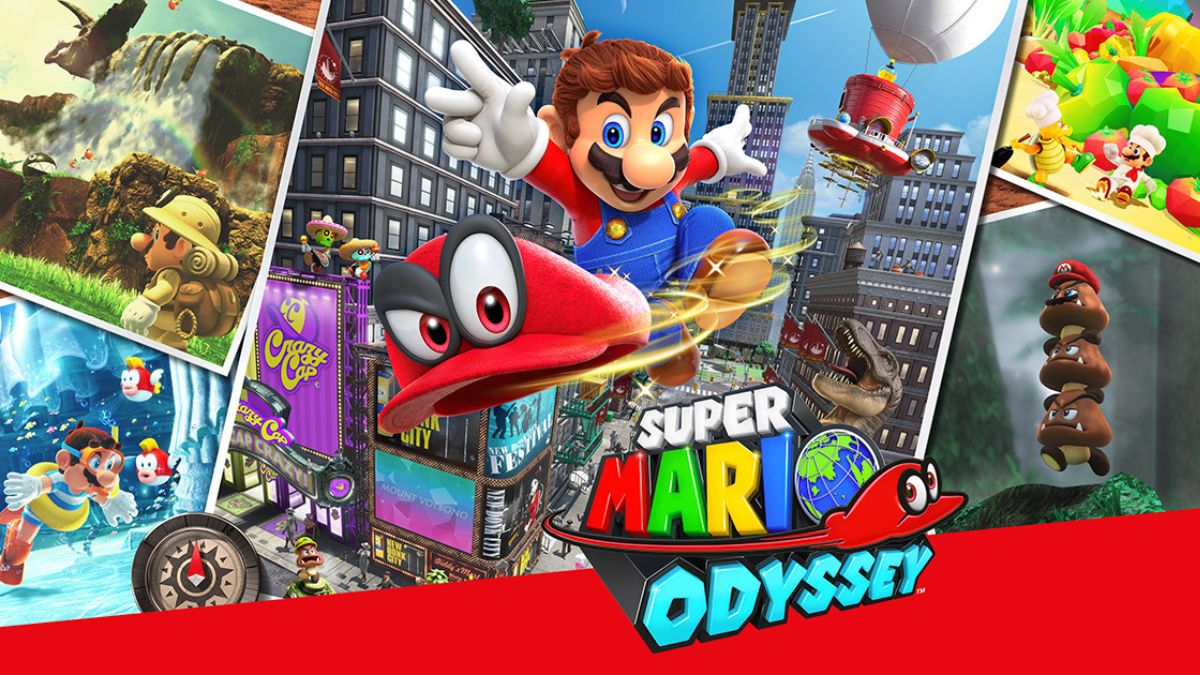
Super Mario Odyssey is a platform game that is part of the Super Mario series. The game was developed by Nintendo and released in 2017 for the Nintendo Switch, a hybrid console that can be used as a handheld or a home device.
The game follows the adventure of Mario and his new companion Cappy, a sentient hat that can capture and control various objects and enemies. The game features a large and diverse open world, with over 40 locations to explore and hundreds of moons to collect. The game also has various modes and features, such as co-op, photo, and balloon world.
However, some players may want to play the game on their PC, either because they do not own a Nintendo Switch, or because they prefer the PC’s graphics, controls, and performance. Fortunately, there is a way to play Super Mario Odyssey on PC, using a Nintendo Switch emulator.
An emulator is software that can simulate the functions and features of another device, such as a console or a handheld. Using an emulator, players can run Nintendo Switch games on their PC, as long as they meet the minimum requirements and follow the instructions.
Super Mario Odyssey PC Requirements
To play Super Mario Odyssey on PC, players need to have a PC that meets the minimum requirements for the Nintendo Switch emulator.
Super Mario Odyssey PC Requirements
The most popular and reliable Nintendo Switch emulator is Yuzu, which is an open-source project that aims to create a compatible and accurate Nintendo Switch emulator for PC. According to the official website of Yuzu, the minimum PC requirements for the emulator are:
Operating system: Windows 7 64-bit or higher, Linux, or macOS
CPU: Intel Core i3-6100 or AMD Ryzen 3 1200 or higher
GPU: OpenGL 4.6 or Vulkan 1.1 compatible
RAM: 8 GB or higher
Disk space: 1 GB or higher
Internet connection: Required for downloading games and updates
Note that these are the minimum requirements for the emulator, not for the game. The actual performance and quality of the game may vary depending on the PC’s specifications, settings, and compatibility.
Some games may run faster or slower, have graphical or audio glitches, or not run at all. Therefore, it is advisable to check the compatibility list of Yuzu² to see if Super Mario Odyssey is playable on the emulator, and to update the emulator and the game to the latest versions.
How to Download and Install Yuzu and Super Mario Odyssey on a PC?
To play Super Mario Odyssey on PC, players need to download and install Yuzu and the game on their PC. Here are the general steps to download and install Yuzu and Super Mario Odyssey on a PC:
Download Yuzu: Players can download Yuzu from its official website or a trusted source, such as GitHub. Players can choose the version that matches their operating system and preferences, such as the stable or the early access build. Players can also download the latest updates and patches for the emulator from the same sources.
Install Yuzu: Players can install Yuzu by running the downloaded file and following the instructions. Players can also create a shortcut for the emulator on their desktop or start menu for easy access. Players can also customize the emulator’s settings and options, such as the resolution, the controller, the language, and the bios.
Download Super Mario Odyssey: Players can download Super Mario Odyssey from the Nintendo eShop or a trusted source, such as NoPayStation. Players need to have a Nintendo Switch or a Nintendo account to access the Nintendo eShop, and they need to have a valid license or a backup of the game to play it legally. Players can also download the latest updates and patches for the game from the same sources.
Install Super Mario Odyssey: Players can install Super Mario Odyssey by copying the downloaded file to the nand folder of Yuzu. Players can also create a shortcut for the game on their desktop or start menu for easy access. Players can also customize the game’s settings and options, such as the difficulty, the subtitles, and the audio.
Launch Yuzu and Super Mario Odyssey: Players can launch Yuzu and Super Mario Odyssey by double-clicking on their shortcuts or by opening them from their folders. Players can also use the emulator’s menu to browse and select the game. Players can also use the emulator’s hotkeys to control the game, such as F11 to toggle fullscreen, F5 to save, F7 to load, and Esc to exit.
Monster Legends is a mobile game that lets you collect, breed, and battle various monsters with different elements, skills, and stats. Breeding is one of the most important aspects of the game, as it allows you to create new and powerful monsters by combining two existing ones.
However, breeding is not always easy, as it involves some luck, strategy, and knowledge. In this article, we will provide a comprehensive guide on how to breed monsters in Monster Legends, and what are the best combinations and tips to get the most out of it.
How to Breed Monsters in Monster Legends?
Monster Legends Breeding Guide
To breed monsters in Monster Legends, you will need to follow these steps:
Build and upgrade your Breeding Mountain and your Hatchery. These are the buildings where you can breed and hatch your monsters. You can find them in the Shop menu, under the Buildings tab. You can upgrade them to increase their capacity and speed.
Choose two monsters that you want to breed. You can select any two monsters that you have in your habitats, as long as they are not legendary or mythic. You can also use some special monsters, such as Galante or Violet, that can increase the chances of getting certain results.
Place the two monsters in the Breeding Mountain and start the breeding process. You can do this by tapping on the Breeding Mountain, and then dragging the two monsters to the slots. You can also use the Breeding Calculator, a tool that can help you find the best combinations and outcomes. You can access the Breeding Calculator from the Breeding Mountain menu, under the Calculator tab.
Wait for the breeding to finish and collect the egg. The breeding time will depend on the rarity and the elements of the monsters that you used. You can speed up the breeding by using gems, the premium currency of the game. You can also use the Breeding Guardian, a feature that can reduce the breeding time by half. You can activate the Breeding Guardian from the Breeding Mountain menu, under the Guardian tab.
Place the egg in the Hatchery and wait for it to hatch. The hatching time will also depend on the rarity and the elements of the monster that you obtained. You can speed up the hatching by using gems, or by asking your friends for help. You can also use the Hatching Guardian, a feature that can reduce the hatching time by half. You can activate the Hatching Guardian from the Hatchery menu, under the Guardian tab.
Claim your new monster and place it in a suitable habitat. You can do this by tapping on the Hatchery, and then tapping on the egg. You can also rename your monster, or sell it if you don’t want it. You can place your monster in any habitat that matches its element, or in a legendary or mythic habitat if it has that rarity.
Best Monsters to Breed in Monster Legends
There are hundreds of monsters that you can breed in Monster Legends, each with its strengths and weaknesses. However, some monsters are more desirable and useful than others, especially the legendary and mythic ones.
These are the monsters that have the highest stats, the best skills, and the most versatility. However, breeding legendary and mythic monsters is not easy, as it requires specific combinations, rare ingredients, and low chances. Here are some of the best monsters that you can breed in Monster Legends, and how to get them:
Nemestrinus: A legendary nature monster that can heal, buff, and debuff. You can breed Nemestrinus by using Rhynex and Darknubis.
Vadamagma: A legendary fire monster that can deal massive damage and burn enemies. You can breed Vadamagma by using Skipples and Duchess.
Rockantium: A legendary earth monster that can stun, taunt, and shield. You can breed Rockantium by using Musu and Terracrank.
Thorder: A legendary thunder monster that can shock, daze, and haste. You can breed Thorder by using Rabidex and Tartarus. Lord of the Atlantis: A legendary water monster that can freeze, drown, and buff. You can breed Lord of the Atlantis by using Razfeesh and Drop Elemental.
Darkzgul: A legendary dark monster that can possess, curse, and bleed. You can breed Darkzgul by using Fayemelina and Darknubis.
Goldfield: A legendary magic monster that can regenerate, remove negative effects, and support. You can breed Goldfield by using Erpham and Drop Elemental.
Arch Knight: A legendary light monster that can blind, stun, and weaken. You can breed Arch Knight by using Goldcore and Esthirel.
Nebotus: A legendary dark monster that can resurrect, drain life, and deal heavy damage. You can breed Nebotus by using Obsidia and Cthulhu.
Worker Hulk: A legendary magic monster that can apply random effects, reflect damage, and protect. You can breed Worker Hulk by using Pandalf and Hyperion.
Laomu: A legendary nature monster that can poison, heal, and control. You can breed Laomu by using Erpham and Galante.
Varuna: A legendary water monster that can freeze, mega freeze, and apply random effects. You can breed Varuna by using Arnu and Drop Elemental.
The Firestorm: A legendary fire monster that can ignite, burn, and deal area damage. You can breed The Firestorm by using Captain Legends and Pyrook.
Ultrabot: A legendary metal monster that can stun, magnetize, and deal massive damage. You can breed Ultrabot by using Gold Ra and Darknubis.
Pixelion: A legendary magic monster that can apply random effects, remove positive effects, and support. You can breed Pixelion by using Sparkwedge and Sealion.
Dr. Hazard: A legendary dark monster that can poison, infect, and deal area damage. You can breed Dr Hazard by using Freedom Feather and Elder Sporeling.
Cyan Nathura: A legendary nature monster that can stun, poison, and deal heavy damage. You can breed Cyan Nathura by using Nereida and Evaranae.
Killeraptor: A legendary earth monster that can stun, daze, and deal area damage. You can breed Killeraptor by using Rhinoram and Eburwin.
Master Skeel: A legendary thunder monster that can shock, daze, and deal heavy damage. You can breed Master Skeel by using Skeel Trooper and Slayentaur¹.
Exo Skeel: A legendary thunder monster that can shock, haste, and deal massive damage. You can breed Exo Skeel by using Griffex and Chordim.
Noctum: A legendary dark monster that can possess, curse, and deal heavy damage. You can breed Noctum by using Cthulhu and Razfeesh.
Oghma: A legendary light monster that can blind, stun, and deal area damage. You can breed Oghma by using Seraphim and Aurinia.
Barbatos: A legendary dark monster that can deal massive damage, drain life, and sacrifice. You can breed Barbatos by using Fenix and Dommeath¹.
Akhenotep: A legendary earth monster that can petrify, weaken, and deal heavy damage. You can breed Akhenotep by using Darknubis and Manolyth.
Basthet: A legendary earth monster that can stun, slow, and deal area damage. You can breed Basthet by using Pegasus and Storm.
Megaosteum: A legendary fire monster that can burn, ignite, and deal massive damage. You can breed Megaosteum by using Coldberus and Greygoyle.
Lord Mammoth: A legendary water monster that can freeze, mega freeze, and deal heavy damage. You can breed Lord Mammoth by using Duchess and Rorcal.
Ouros: A legendary earth monster that can taunt, shield, and reflect damage. You can breed Ouros by using Irockman and Sludger.
Count Vlad: A legendary dark monster that can possess, drain life, and deal area damage. You can breed Count Vlad by using Greygoyle and Vortux.
Lilysha: A legendary light monster that can blind, stun, and deal heavy damage. You can breed Lilysha by using Zim and Fayemelina.
Uru: A legendary magic monster that can apply random effects, remove negative effects, and deal area damage. You can breed Uru by using Fenix and Chordim.
Anton Acorne: A legendary water monster that can freeze, drown, and deal heavy damage. You can breed Anton Acorne by using Nautilus-1 and Avaast.
Will Razor Face: A legendary dark monster that can possess, curse, and deal heavy damage. You can breed Will Razor Face by using Fliploch and Fayemelina.
Nidaria: A legendary water monster that can freeze, poison, and deal heavy damage. You can breed Nidaria by using Freeza and Anaitis.
Dragonflight is the latest expansion of World of Warcraft, the popular MMORPG that takes place in the fantasy world of Azeroth. In Dragonflight, players can explore the mysterious and dangerous Dragon Isles, a new continent that is home to ancient secrets, powerful dragons, and new enemies.
One of the professions that players can learn and practice in Dragonflight is Alchemy, the art of creating potions and phials that can enhance your abilities, heal your wounds, or harm your foes. Alchemy is a versatile and useful profession that can benefit any class and role, whether you are a tank, a healer, a damage dealer, or a support.
In this guide, we will show you how to level up your Alchemy skill, how to discover new recipes, how to use the new Experimentation system, how to choose your Alchemy specialization, and how to craft the best potions and phials for your needs.
How to Level Up Your Alchemy Skill?
Dragonflight Alchemy Guide
The first step to becoming a master alchemist is to level up your Alchemy skill, which determines what kind of potions and phials you can craft and how effective they are. You can level up your Alchemy skill by crafting potions and phials, by doing Experimentations, or by completing Alchemy quests.
The maximum Alchemy skill level in Dragonflight is 100, and you can track your progress by opening your profession window (press K by default).
To start learning Alchemy, you will need to find an Alchemy trainer, who can teach you the basics of the profession and give you some starter recipes. You can find Alchemy trainers in the following locations:
Conflago in Valdrakken, the capital city of the Dragon Isles. He is located near the Alchemist’s Lab Bench, which is a crafting station that you will need to use for most Alchemy recipes.
Srireth in Ohn’ahran Plains, a zone in the southern part of the Dragon Isles. She is located in a small camp near the river, where you can also find some herbs that you will need for Alchemy.
Zherrak in The Waking Shores, a zone in the eastern part of the Dragon Isles. He is located in a cave near the coast, where you can also find some fish that you will need for Alchemy.
An’timon in The Waking Shores, a zone in the eastern part of the Dragon Isles. He is located in a tower near the ruins, where you can also find some crystals that you will need for Alchemy.
Once you have learned Alchemy, you can start crafting potions and phials, which are the main products of the profession. Potions are consumable items that can give you various effects, such as healing, mana regeneration, stat boosts, or damage.
Phials are similar to potions, but they are not consumed when used. Instead, they have charges that can be replenished by using a Phial Refiller, which is a device that you can craft with Alchemy. Phials can also give you various effects, such as shields, buffs, or debuffs.
To craft potions and phials, you will need to gather some materials, such as herbs, fish, crystals, and vials. You can find these materials in the wild, by harvesting nodes, fishing, or mining. You can also buy them from vendors or the Auction House, or trade them with other players.
You will also need to use the Alchemist’s Lab Bench, which is a crafting station that you can find near the Alchemy trainers or in some other locations. To craft a potion or a phial, you will need to follow a recipe, which is a list of ingredients and instructions that you can learn from trainers, books, quests, or Experiments.
To level up your Alchemy skill, you will need to craft potions and phials that are appropriate for your current skill level. You can see the difficulty of each recipe by the colour of its name in your profession window. The colours are as follows:
Orange: These recipes will always give you a skill point when you craft them. They are the best recipes to level up your Alchemy skill.
Yellow: These recipes will sometimes give you a skill point when you craft them. They are good recipes to level up your Alchemy skill, but not as reliable as orange ones.
Green: These recipes will rarely give you a skill point when you craft them. They are not very good recipes to level up your Alchemy skill, but they can be useful if you have no other options.
Gray: These recipes will never give you a skill point when you craft them. They are useless recipes to level up your Alchemy skill, and you should avoid them.
To level up your Alchemy skill efficiently, you should always try to craft orange or yellow recipes, and avoid green or grey ones. You should also try to discover new recipes with higher difficulty, by doing Experimentations or completing quests. Here is a list of some of the best recipes to level up your Alchemy skill from 1 to 100:
1-10: Minor Healing Potion, Minor Mana Potion
10-20: Lesser Healing Potion, Lesser Mana Potion
20-30: Healing Potion, Mana Potion
30-40: Greater Healing Potion, Greater Mana Potion
40-50: Superior Healing Potion, Superior Mana Potion
50-60: Major Healing Potion, Major Mana Potion
60-70: Primal Healing Potion, Primal Mana Potion
70-80: Supreme Healing Potion, Supreme Mana Potion
80-90: Ultimate Healing Potion, Ultimate Mana Potion
90-100: Transcendent Healing Potion, Transcendent Mana Potion
How to Discover New Recipes?
As you level up your Alchemy skill, you will need to discover new recipes that can help you craft better potions and phials. There are two main ways to discover new recipes:
Experimentations and quests
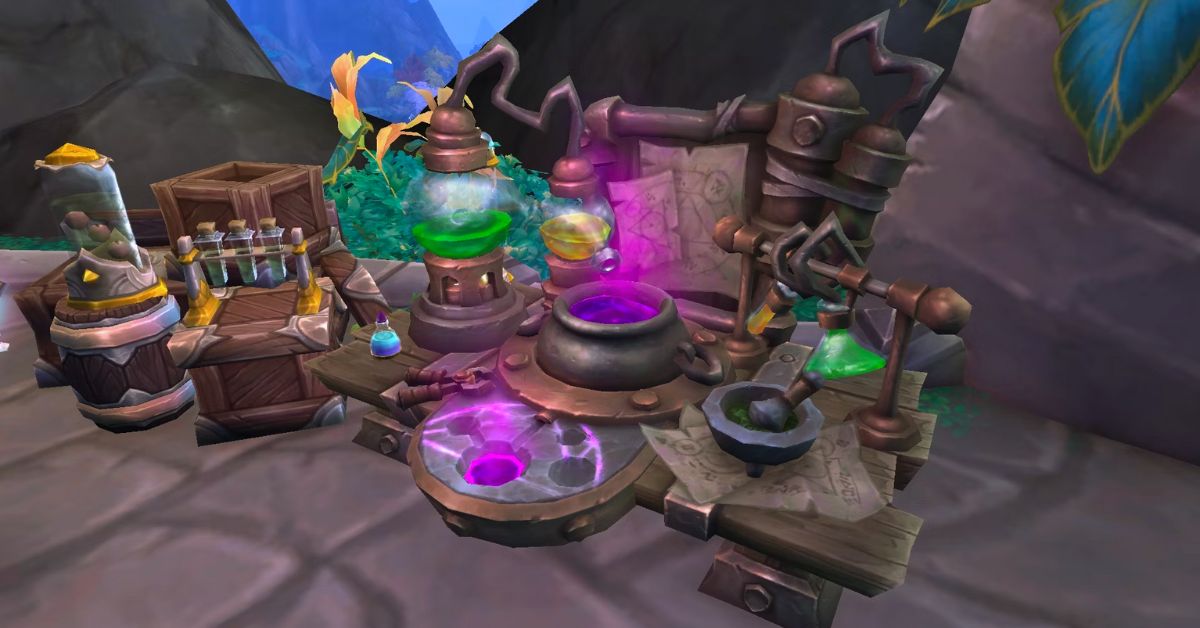
Experimentations are a new feature of Alchemy in Dragonflight, that allows you to create new potions and phials by combining different ingredients and reagents. Experimentations can be done at the Alchemist’s Lab Bench, and they require some materials, such as herbs, fish, crystals, vials, and Dragon’s Alchemical Solution.
Dragon’s Alchemical Solution is a special reagent that can be obtained by destroying potions and phials with the Reclaim Concoctions spell, which is a skill that you can learn from the Alchemy trainers.
To do an Experimentation, you will need to choose a type of potion or phial that you want to create, such as Healing, Mana, Toxic, Shield, or Buff. Then, you will need to choose a base ingredient, such as an herb, a fish, or a crystal, that will determine the main effect of the potion or phial.
Finally, you will need to choose a modifier ingredient, such as a herb, a fish, or a crystal, that will determine the secondary effect of the potion or phial. You will also need to add some Dragon’s Alchemical Solution, which will determine the quality and quantity of the potion or phial.
Once you have chosen your ingredients, you can start the Experimentation, which will consume the materials and produce a random potion or phial. The potion or phial will have a name, a description, and a color, that will indicate its effect and quality. The colours are as follows:
White: These potions and phials have the lowest quality and effect. They are not very useful, and you should destroy them with Reclaim Concoctions to get more Dragon’s Alchemical Solution.
Green: These potions and phials have a low quality and effect. They are somewhat useful, but you can find better ones with more Experimentations.
Blue: These potions and phials have a medium quality and effect. They are quite useful, and you should keep them for yourself or sell them to other players.
Purple: These potions and phials have a high quality and effect. They are very useful, and you should keep them for yourself or sell them to other players for a high price.
Orange: These potions and phials have the highest quality and effect. They are extremely useful, and you should keep them for yourself or sell them to other players for a very high price.
The Experimentation will also give you a chance to discover a new recipe, which will allow you to craft the same potion or phial with the same ingredients and reagents. The chance to discover a new recipe is not 100%, but you will usually get at least one from doing 10 Experimentations.
The discovered recipes will be added to your profession window, and you can craft them at the Alchemist’s Lab Bench. The discovered recipes will also have a difficulty color, which will indicate how much skill they will give you when you craft them.
Experimentations are a fun and creative way to discover new potions and phials, but they also have some drawbacks. First, they are expensive, as they require a lot of materials and Dragon’s Alchemical Solution, which can be hard to obtain.
Second, they are random, as you can never be sure what kind of potion or phial you will get, or if you will discover a new recipe. Third, they are risky, as you can get a debuff that will prevent you from doing more Experimentations for 4 hours. Therefore, you should do Experimentations wisely, and not rely on them too much.
Quests are another way to discover new recipes, that are more reliable and less costly than Experimentations. Quests are tasks that you can get from NPCs, such as Alchemy
This is everything you need to know about Dragonflight Alchemy Guide. Additionally, you can check our guide on Diablo 4 Uber Lilith Guide and Iron Leaves Raid Guide. Stay connected with GameEmpress.com to get the latest news and guides about the gaming world.
Guitar Hero is a popular music and rhythm video game series that lets you play along to your favourite songs using a guitar-shaped controller. The series, which started in 2005, has spawned several titles, spin-offs, and expansions, covering different genres, artists, and eras of music. Whether you are a fan of rock, metal, pop, or hip-hop, Guitar Hero has something for you.
Can You Play Guitar Hero On Xbox One?
Can you play Guitar Hero on Xbox One? the latest generation of Microsoft’s gaming console? The answer is yes but with some limitations and requirements. Whether you are a veteran or a newcomer to the Guitar Hero universe, this guide will help you rock out on your Xbox One.
How to Play Guitar Hero on Xbox One Using Backward Compatibility?
One of the easiest ways to play Guitar Hero on Xbox One is to use the backward compatibility feature, which allows you to play select Xbox 360 and original Xbox games on your Xbox One. The backward compatibility feature is free and does not require any additional hardware or software. However, not all Guitar Hero games are backwards compatible, and some features may not work as intended.
To play Guitar Hero on Xbox One using backward compatibility, you will need the following:
An Xbox One console with the latest system update
A compatible Guitar Hero game disc or digital copy
A compatible Guitar Hero guitar controller or a standard Xbox One controller
An internet connection and an Xbox Live account
To play Guitar Hero on Xbox One using backward compatibility, follow these steps:
Insert the Guitar Hero game disc into your Xbox One, or download the digital copy from the Microsoft Store. The game will install automatically on your console.
Connect your Guitar Hero guitar controller to your Xbox One, or use a standard Xbox One controller. You may need an adapter to connect your guitar controller, depending on the model and the game. You can buy the adapter online or as part of a bundle that includes the guitar controller and the game.
Launch the Guitar Hero game from your Xbox One home screen or the My Games & Apps menu. The game will run as if it were on an Xbox 360, with the same graphics, sound, and gameplay.
Enjoy playing Guitar Hero on your Xbox One.
Here is a list of the Guitar Hero games that are backwards compatible with Xbox One:
Guitar Hero II
Guitar Hero III: Legends of Rock
Guitar Hero: Aerosmith
Guitar Hero: Metallica
Guitar Hero: Smash Hits
Guitar Hero: Van Halen
Guitar Hero 5
Guitar Hero: Warriors of Rock
How to Play Guitar Hero on Xbox One Using Guitar Hero Live?
Another way to play Guitar Hero on Xbox One is to use Guitar Hero Live, which is the latest and final installment of the Guitar Hero series, released in 2015. Guitar Hero Live is a reboot of the series, featuring a new guitar controller, a new gameplay mode, and a new music service.
Guitar Hero Live is compatible with Xbox One, as well as other platforms, such as Xbox 360, PlayStation 4, PlayStation 3, Wii U, iOS, and Android.
To play Guitar Hero on Xbox One using Guitar Hero Live, you will need the following:
An Xbox One console with the latest system update
A Guitar Hero Live game disc or digital copy
A Guitar Hero Live guitar controller
An internet connection and an Xbox Live account
Guitar Hero Live has two main modes of play: GH Live and GHTV. GH Live is a single-player mode that lets you play in front of real live-action crowds and experience the thrill of being on stage. GHTV is a multiplayer mode that lets you play along to official music videos and compete against other players online. You can also access additional features, such as leaderboards, achievements, and rewards.
This is everything you need to know about Can You Play Guitar Hero On Xbox One? Additionally, you can check our guide on Guitar Hero 2 Cheats and How To Save Outfits In GTA 5? Stay connected with GameEmpress.com to get the latest news and guides about the gaming world.
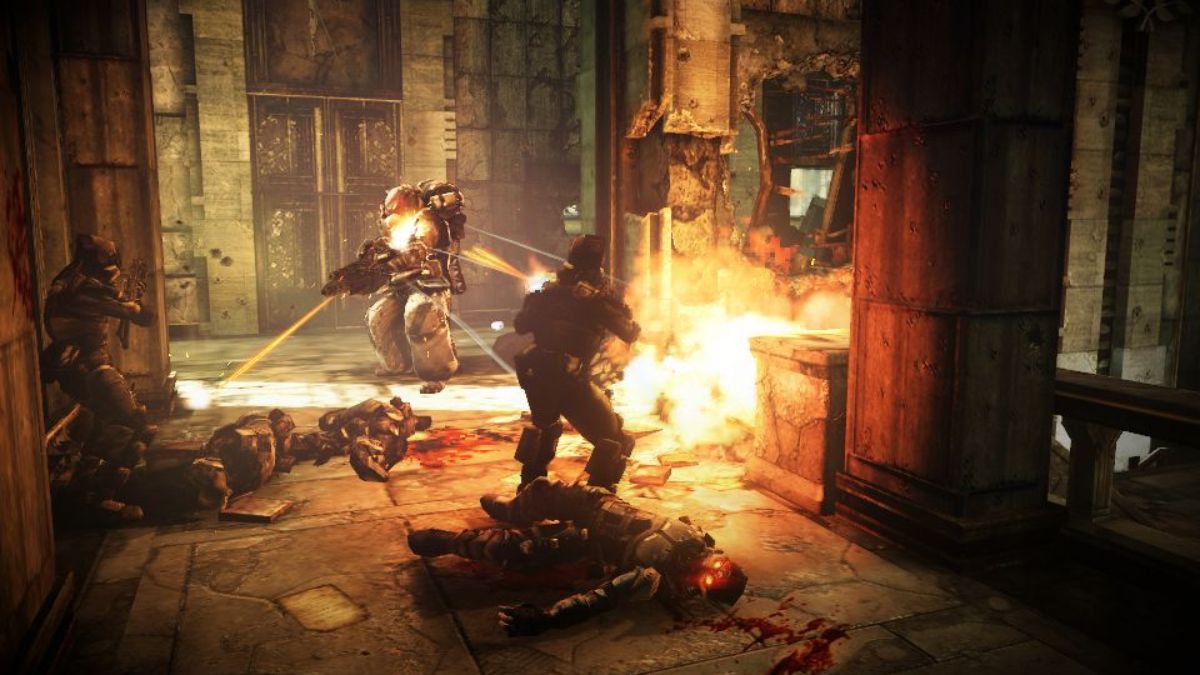
Killzone Mercenary is a first-person shooter game that is part of the Killzone series. The game was developed by Guerrilla Cambridge and released in 2013 for the PlayStation Vita, a handheld gaming device.
The game follows the story of Arran Danner, a mercenary who works for both the ISA and the Helghast during the events of the first three Killzone games. The game features a single-player campaign, a multiplayer mode, and a variety of weapons, gadgets, and missions.
However, some players may want to play the game on their PC, either because they do not own a PS Vita, or because they prefer the PC’s graphics, controls, and performance. Fortunately, there is a way to play Killzone Mercenary on PC, using a PS Vita emulator.
An emulator is software that can simulate the functions and features of another device, such as a console or a handheld. Using an emulator, players can run PS Vita games on their PC, as long as they meet the minimum requirements and follow the instructions.
Killzone Mercenary PC Requirements
Killzone Mercenary PC Requirements
To play Killzone Mercenary on PC, players need to have a PC that meets the minimum requirements for the PS Vita emulator. The most popular and reliable PS Vita emulator is Vita3K, which is an open-source project that aims to create a compatible and accurate PS Vita emulator for PC.
Operating system: Windows 7 or higher, Linux, or macOS
CPU: Intel Core 2 Duo or AMD Athlon 64 X2 or higher
GPU: OpenGL 4.1 or higher compatible
RAM: 4 GB or higher
Disk space: 1 GB or higher
Internet connection: Required for downloading games and updates
Note that these are the minimum requirements for the emulator, not for the game. The actual performance and quality of the game may vary depending on the PC’s specifications, settings, and compatibility.
Some games may run faster or slower, have graphical or audio glitches, or not run at all. Therefore, it is advisable to check the compatibility list of Vita3K² to see if Killzone Mercenary is playable on the emulator, and to update the emulator and the game to the latest versions.
How to Download and Install Vita3K and Killzone Mercenary on PC?
To play Killzone Mercenary on PC, players need to download and install Vita3K and the game on their PC. Here are the general steps to download and install Vita3K and Killzone Mercenary on PC:
Download Vita3K: Players can download Vita3K from its official website or from a trusted source, such as GitHub³. Players can choose the version that matches their operating system and preferences, such as the stable or the nightly build. Players can also download the latest updates and patches for the emulator from the same sources.
Install Vita3K: Players can install Vita3K by extracting the downloaded file to a folder of their choice. Players can also create a shortcut for the emulator on their desktop or start menu for easy access. Players can also customize the emulator’s settings and options, such as the resolution, the controller, the language, and the bios.
Download Killzone Mercenary: Players can download Killzone Mercenary from the PlayStation Store or a trusted source, such as NoPayStation. Players need to have a PS Vita or a PSN account to access the PlayStation Store, and they need to have a valid license or a backup of the game to play it legally. Players can also download the latest updates and patches for the game from the same sources.
Install Killzone Mercenary: Players can install Killzone Mercenary by copying the downloaded file to the app folder of Vita3K. Players can also create a shortcut for the game on their desktop or start menu for easy access. Players can also customize the game’s settings and options, such as the difficulty, the subtitles, and the audio.
Launch Vita3K and Killzone Mercenary: Players can launch Vita3K and Killzone Mercenary by double-clicking on their shortcuts or by opening them from their folders. Players can also use the emulator’s menu to browse and select the game. Players can also use the emulator’s hotkeys to control the game, such as F5 to save, F9 to load, F11 to toggle fullscreen, and Esc to exit.
Conclusion: Killzone Mercenary PC Requirements are Not Too High
To sum up, Killzone Mercenary is a first-person shooter game that is part of the Killzone series. The game was developed by Guerrilla Cambridge and released in 2013 for the PlayStation Vita, a handheld gaming device.
The game follows the story of Arran Danner, a mercenary who works for both the ISA and the Helghast during the events of the first three Killzone games. The game features a single-player campaign, a multiplayer mode, and a variety of weapons, gadgets, and missions.
Heavenly Sword is a hack-and-slash action-adventure game that was released in 2007 for the PlayStation 3. The game follows the story of Nariko, a warrior who wields the legendary Heavenly Sword, a weapon that can only be used by a god or a mortal who is willing to sacrifice their life.
The game features stunning graphics, cinematic cutscenes, and dynamic combat. But can you play Heavenly Sword on PC in 2023? What are the Heavenly Sword PC requirements? This article will answer these questions and more.
What is Heavenly Sword?
Heavenly Sword is a game developed by Ninja Theory and published by Sony Computer Entertainment. The game is set in a fantasy world inspired by ancient China and Japan, where a tyrannical king named Bohan seeks to obtain the Heavenly Sword, a powerful weapon that was once wielded by a god.
Heavenly Sword PC Requirements
The game’s protagonist is Nariko, a young woman who belongs to a clan that guards the sword. When Bohan invades her village, Nariko takes up the sword and fights against his army, knowing that the sword will eventually drain her life. Along the way, she is aided by Kai, a quirky archer, and encounters various enemies and allies.
The game is mainly a hack-and-slash game, where the player can use the sword to perform different attacks and combos. The sword has three stances: speed, range, and power, which can be switched by using the analogue stick. The game also features quick time events, where the player has to press the correct buttons to execute cinematic moves.
The game also has some sections where the player can use other weapons, such as a cannon or a crossbow. The game has six chapters, each with multiple levels and boss fights. The game also has a bonus mode, where the player can replay the levels with different objectives and challenges.
How to Play Heavenly Sword on PC?
The official way to play Heavenly Sword on PC is to use the PlayStation Now service, which is a cloud gaming platform that allows users to stream PlayStation games on their PC, PS4, PS5, or other compatible devices.
PlayStation Now requires a subscription fee, a stable internet connection, and a compatible controller. The service has a library of over 800 games, including Heavenly Sword¹. To play Heavenly Sword on PC using PlayStation Now, the user has to follow these steps:
Sign up for a PlayStation Now account or use an existing one.
Download and install the PlayStation Now app on the PC.
Launch the app and sign in with the PlayStation Now account.
Browse the game library and select Heavenly Sword.
Click on the “Stream” button and wait for the game to load.
Enjoy the game.
The unofficial way to play Heavenly Sword on PC is to use the RPCS3 emulator, which is software that can run PlayStation 3 games on a PC. RPCS3 is an open-source project that is constantly being improved and updated by its developers and community.
RPCS3 can run many PS3 games, including Heavenly Sword, with high resolution, frame rate, and performance. However, RPCS3 also has some drawbacks, such as requiring a powerful PC, a PS3 firmware, and a game disc or file. RPCS3 may also have some bugs, glitches, and compatibility issues with some games. To play Heavenly Sword on PC using RPCS3, the user has to follow these steps:
Download and install the RPCS3 emulator on the PC from its official website.
Download and install the PS3 firmware from the PlayStation website.
Obtain a copy of Heavenly Sword, either by ripping the game disc or downloading the game file from a trusted source.
Launch the RPCS3 emulator and load the PS3 firmware.
Add the Heavenly Sword game to the emulator’s game library.
Configure the emulator’s settings, such as the graphics, audio, and controller options, according to the user’s preference and PC specifications.
Run the game and enjoy.
Heavenly Sword PC Requirements
The Heavenly Sword PC requirements depend on the method that the user chooses to play the game. For PlayStation Now, the minimum PC requirements are:
Windows 7 or higher
Intel Core i3 2.0 GHz or AMD A10 2.8 GHz or higher
2 GB of RAM or higher
300 MB of storage space or higher
DirectX 11 compatible graphics card
5 Mbps or higher internet speed
Compatible controller
For RPCS3, the recommended PC requirements are:
Windows 10 64-bit
Intel Core i5 9600K or AMD Ryzen 5 3600 or higher
16 GB of RAM or higher
1 TB of SSD storage space or higher
NVIDIA GeForce GTX 1060 or AMD Radeon RX 580 or higher
Vulkan-compatible graphics driver
Compatible controller
Conclusion
Heavenly Sword is a hack-and-slash action-adventure game that was released in 2007 for the PlayStation 3. The game features a captivating story, stunning graphics, and dynamic combat. The game can be played on PC in 2023, either by using the PlayStation Now service or the RPCS3 emulator.
Both methods have their pros and cons, and the user has to decide which one suits their needs and preferences. The Heavenly Sword PC requirements vary depending on the method, but generally, the user needs a decent PC, a stable internet connection, and a compatible controller. Heavenly Sword is a great game that can provide hours of fun and challenge for PC gamers who love hack-and-slash games.
GTA 5, or Grand Theft Auto V, is a popular open-world action-adventure game that lets you explore the city of Los Santos and its surrounding areas. The game features rich and diverse gameplay, with various missions, activities, and challenges to complete. One of the aspects that makes GTA 5 so enjoyable and immersive is the ability to customize your character’s appearance, style, and personality.
You can choose from a wide range of clothing items, accessories, and hairstyles, to create your unique look. But how can you save your outfits in GTA 5, so that you can easily switch between them, or show them off to your friends? In this article, we will show you how to save outfits in GTA 5, using different methods and tips. Whether you are a casual player or a fashion enthusiast, this guide will help you make the most of your GTA 5 wardrobe.
How to Save Outfits in GTA 5 Using Wardrobes?
Gta 5 10th Anniversary Date
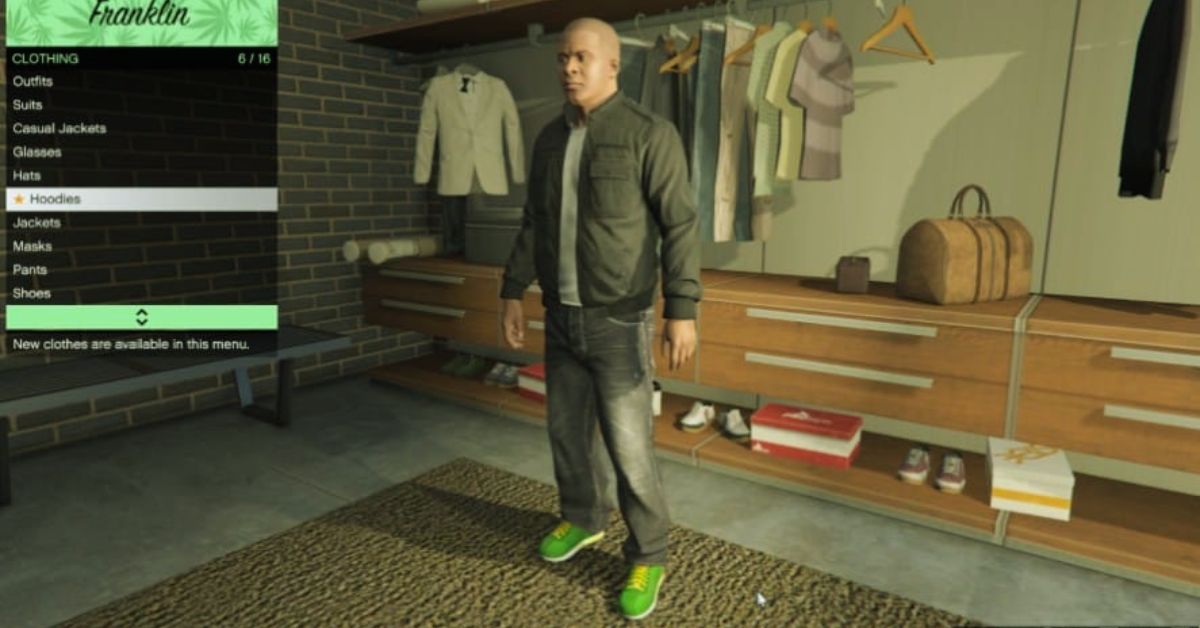
The simplest and most common way to save outfits in GTA 5 is to use wardrobes. Wardrobes are furniture items that can be found in various locations in the game, such as safe houses, apartments, or clothing stores. Wardrobes allow you to access your clothing inventory, and create, edit, or delete outfits. To save outfits in GTA 5 using wardrobes, follow these steps:
Go to a location that has a wardrobe, such as your safe house, apartment, or clothing store.
Approach the wardrobe and interact with it. You will see a menu with different options, such as Tops, Pants, Shoes, Accessories, and Outfits.
Select the Outfits option. You will see a list of your saved outfits, as well as empty slots that you can use to create new outfits.
Select an empty slot to create a new outfit. You will see a preview of your character wearing the outfit, as well as the name and price of the outfit.
To customize your outfit, you can use the left and right arrows to browse through different clothing categories, such as Tops, Pants, Shoes, Accessories, and so on. You can also use the up and down arrows to browse through different items within each category. To select an item, press the confirm button.
To change the name of your outfit, press the rename button. You can enter a custom name for your outfit, using the keyboard or the controller.
To save your outfit, press the save button. You will see a confirmation message that your outfit has been saved.
To exit the wardrobe, press the back button.
How to Save Outfits in GTA 5 Using the Interaction Menu?
Another way to save outfits in GTA 5 is to use the interaction menu. The interaction menu is a feature that allows you to access various options and settings in the game, such as inventory, map, contacts, and so on.
The interaction menu can be accessed by holding the select button on your controller, or the M key on your keyboard. To save outfits in GTA 5 using the interaction menu, follow these steps:
Open the interaction menu by holding the select button on your controller, or the M key on your keyboard.
Navigate to the Style option. You will see a list of different options, such as Outfit, Helmet, Glasses, and so on.
Select the Outfit option. You will see a list of your saved outfits, as well as empty slots that you can use to create new outfits.
Select an empty slot to create a new outfit. You will see a preview of your character wearing the outfit, as well as the name and price of the outfit.
To customize your outfit, you can use the left and right arrows to browse through different clothing categories, such as Tops, Pants, Shoes, Accessories, and so on. You can also use the up and down arrows to browse through different items within each category. To select an item, press the confirm button.
To change the name of your outfit, press the rename button. You can enter a custom name for your outfit, using the keyboard or the controller.
To save your outfit, press the save button. You will see a confirmation message that your outfit has been saved.
To exit the interaction menu, press the back button.
How to Save Outfits in GTA 5 Using the Quick Save Feature?
Another way to save outfits in GTA 5 is to use the quick save feature. The quick save feature is a feature that allows you to save your game progress, as well as your character’s appearance, without using a wardrobe or the interaction menu.
The quick save feature can be accessed by using your phone in the game, which can be accessed by pressing the up button on your controller, or the T key on your keyboard. To save outfits in GTA 5 using the quick save feature, follow these steps:
Open your phone in the game by pressing the up button on your controller, or the T key on your keyboard.
Navigate to the Quick Save app, which is represented by a floppy disk icon. You will see a list of your saved games, as well as empty slots that you can use to create new saves.
Select an empty slot to create a new save. You will see a preview of your character wearing the outfit, as well as the name and date of the save.
To save your game and your outfit, press the confirm button. You will see a confirmation message that your game and your outfit have been saved.
To exit your phone, press the back button.
How to Switch Between Saved Outfits in GTA 5?
Once you have saved your outfits in GTA 5, you can easily switch between them, depending on your mood, situation, or preference. There are different ways to switch between saved outfits in GTA 5, such as using wardrobes, the interaction menu, or the quick menu. To switch between saved outfits in GTA 5, follow these steps:
Using wardrobes: Go to a location that has a wardrobe, such as your safe house, apartment, or clothing store. Approach the wardrobe and interact with it. Select the Outfits option. You will see a list of your saved outfits. Select the outfit that you want to wear, and press the confirm button. You will see a preview of your character wearing the outfit, as well as the name and price of the outfit. To exit the wardrobe, press the back button.
Using the interaction menu: Open the interaction menu by holding the select button on your controller, or the M key on your keyboard. Navigate to the Style option. Select the Outfit option. You will see a list of your saved outfits. Select the outfit that you want to wear, and press the confirm button. You will see a preview of your character wearing the outfit, as well as the name and price of the outfit. To exit the interaction menu, press the back button.
Using the quick menu: Open the quick menu by pressing the left button on your controller, or the Q key on your keyboard. Navigate to the Outfit option. You will see a list of your saved outfits. Select the outfit that you want to wear, and press the confirm button. You will see a preview of your character wearing the outfit, as well as the name and price of the outfit. To exit the quick menu, press the back button.
GTA Online is a game that has been around for over a decade and has plenty of useful ideas for gamers to use. Hardcore players should be aware of all of this, but novices and even casual veterans may be oblivious.
This article will highlight five useful ideas and methods to help you get through the day. All of the entries were relevant as of the San Andreas Mercenaries update and should continue to be usable in future versions unless Rockstar Games modifies a related feature significantly.
Anyone can become proficient in GTA Online if they take the time to grasp some of the game’s minor nuances. Some of the following features aren’t explicitly disclosed to the player, so it’s a good idea to be aware of them and use them later.
10 Tips Every GTA Player Should Know
Jojoy GTA 5
1.) Purchasing Ammunition From The Interaction Menu
In GTA Online, here’s how to collect ammo from anywhere on the map:
Open the Interaction Menu.
Choose Inventory.
Select the Ammo choice.
Purchase whatever ammunition you desire. If you go to the left or right a little, you should see an option to purchase it for all of your guns at once.
As a result, players no longer need to visit Ammu-Nation or associated shops to purchase weaponry. While this Interaction Menu technique makes the process considerably easier, players should bear in mind that it isn’t free because ammo is required.
Knowing this trick is still incredibly useful because there may be situations where a player runs out of ammunition, and being able to acquire it from any place can be a lifesaver.
2.) Purchase Bulletproof Helmets
Players in GTA Online who are concerned about PvP should realize that wearing a bullet-resistant helmet is preferable to not having one. Certain helmets allow the user to endure one or two headshots. Without them, a single bullet to the head would kill the player.
Bullet-resistant helmets are typically those that seem like they might be worn by a member of the military. Make careful to save one outfit with the helmet equipped so you can utilize it every time you enter the PvP realm.
3.)Take a chopper
Because San Andreas is such a large area, hijacking a chopper can be a major time saver. Given that even one of Elitas Travel’s less expensive ‘copters (the $780,000 Buckingham Maverick) will drain your bank account, your change purse will be grateful.
The easiest one to steal is near the flying school at Los Santos International Airport. You can vault the surrounding fence and claim it for yourself with some skilful driving. Let the skyward crime begin!
4.) Save Money Before Purchasing A Business
After years of upgrades and expansions, you can now engage in a wide range of illegal enterprises, from nightclubs and arcades to celebrity agencies and drub laboratories, however, each one requires a significant investment to establish by obtaining the necessary property and equipment.
As a result, you should search around to see what enterprises are accessible, then focus on one to get started so that you don’t spread your resources too widely over many endeavours. When you choose a location for your business, there will often be several add-ons available for a fee, but you can always go back and bolt these on later, so don’t worry about needing to buy everything at once.
5.) Maintain Heist Activity
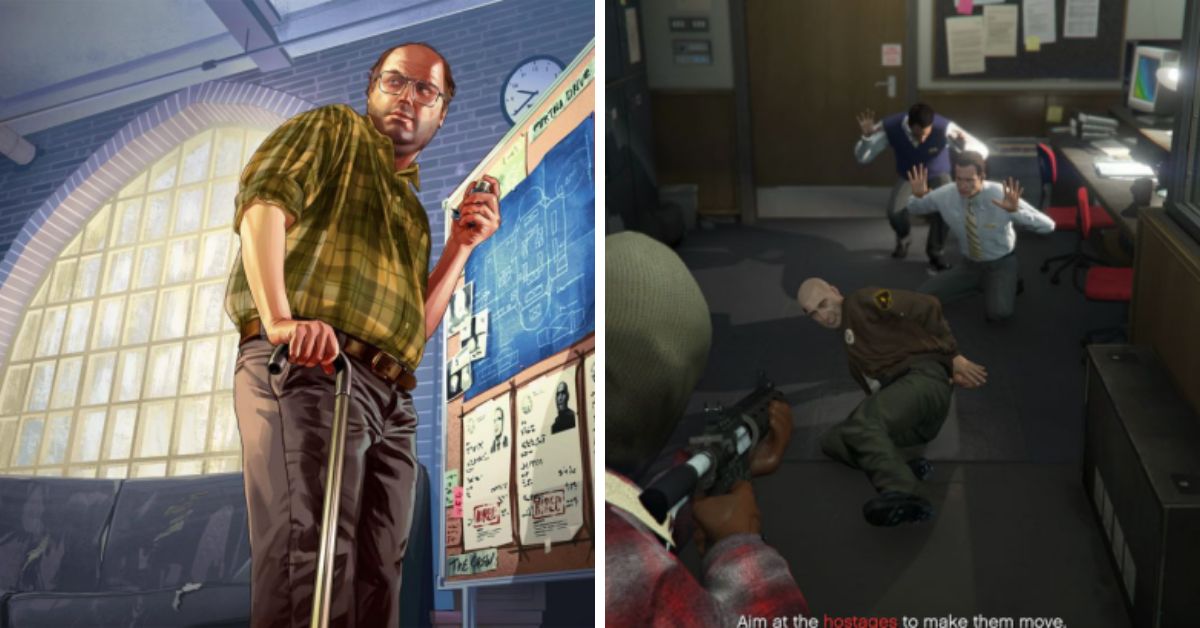
Maintaining a heist in progress will ensure that you are invited by Lester to continue the heist whenever you are online during a session. If you accept the phone call invitation, you will be taken immediately to the spot, saving you time and safeguarding you from ice.
Bonus tip: If you have both doomsday and the ordinary heist running, you may rapidly go between the facility and your flat.
6.) Sell Cars For Easy Cash
Whenever you need some additional cash, go to the nearest Los Santos Customs. If you modify the cars you steal, they can be sold for a higher price.
Remember that you can only sell one automobile every day, and a day in-game lasts approximately 45 minutes. Remember to lock your car so you don’t end up losing your ride.
7.) Use A Bank
Instead of carrying all of your cash around, deposit it with a bank. If you are robbed, you will not lose all of your cash on hand. The game allows you to deposit dollars using your phone, saving you time at the ATM.
You might think that $5000 isn’t a lot of money in GTA, but every little bit adds up, so save your money and it will pay benefits in the long run.
8.) Insurance Pays Off
Getting insurance in GTA Online is a no-brainer. If you want to keep your cars, you need to buy insurance. In this instance, if your automobile is stolen, the firm will replace it for a price of 10% of the insurance premium.
It should be noted that only vehicles equipped with a tracking system will be eligible for insurance. If you get a garage, every automobile you store in it will be equipped with a tracker.
9.) Expect Some Griefers
Griefing is a given in an online environment where players can murder one another without penalty. It’s impossible to avoid the fact that many high-level players would rush at the chance to prey on low-level ones; such is the cycle of life in GTA Online.
As a result, anticipating this type of welcome human behaviour is an important element of the experience. Intentional trolling or outright destroying the fun for others is not uncommon in GTA Online, as it is in other competitive online games.
10.) Purchase a High End Apartment
Before you can enjoy GTA Online’s fantastic heists, you must first reach level 12. Importantly, if you want to design these multi-part assignments yourself and hence have control over how the pay is divided, you’ll also need to purchase a high-end residence.
These posh apartments include planning boards, which are essential for robbery preparations, and the ‘cheapest’ can be found in Del Perro Heights. Visit the Dynasty 8 Real Estate app on your character’s phone to purchase the property for $200,000. More information on obtaining properties may be found in our tutorial on how to buy a house in GTA Online.
This is everything you need to know about the 10 Tips Every GTA Player Should Know. You can also read our guides on Vapid Aleutian GTA 5 and GTA 5 Graphics Mod. Stay up to date with GameEmpress.com for the most recent gaming news and guides.
GTA SA, or Grand Theft Auto: San Andreas, is a classic open-world action-adventure game that was released in 2004. The game is set in the fictional state of San Andreas, which is based on California and Nevada and follows the story of Carl Johnson, a former gangster who returns to his hometown after his mother’s death.
The game features a variety of weapons, such as pistols, shotguns, rifles, and explosives, that can be used to fight enemies, complete missions, or cause chaos.
However, some players have reported a texture glitch that causes the weapons to show white in the game. This glitch can affect the appearance and performance of the weapons, and make the game less enjoyable.
GTA SA Weapons Show White
GTA SA Weapons Show White
The glitch can be caused by various factors, such as corrupted files, outdated drivers, incompatible mods, or low graphics settings. Fortunately, some possible solutions can help you fix the glitch and restore the normal colours of the weapons. Here are some of them:
Solution 1: Verify the Integrity of Game Files
One of the possible causes of the texture glitch is corrupted or missing game files, which can happen due to improper installation, deletion, or modification. To fix this, you can verify the integrity of the game files, which is a process that checks and repairs any errors or discrepancies in the game files. You can verify the integrity of the game files by following these steps:
Launch Steam and go to your Library.
Right-click on GTA SA and select Properties.
Go to the Local Files tab and click on Verify Integrity of Game Files.
Wait for the process to complete and then launch the game.
Solution 2: Update Your Drivers
Another possible cause of the texture glitch is outdated or faulty drivers, which are software that helps your hardware communicate with your OS and applications. Outdated or faulty drivers can cause compatibility issues, performance problems, or graphical errors.
To fix this, you can update your drivers, which is a process that installs the latest and most compatible versions of the drivers for your hardware. You can update your drivers by following these steps:
Press the Windows key and type Device Manager. Then, click on the Device Manager app that appears.
Expand the Display Adapters category and right-click on your graphics card. Then, select Update Driver.
Choose Search automatically for updated driver software and follow the on-screen instructions.
Repeat the same steps for the Sound, Video and Game Controllers category and your sound card.
Restart your computer and launch the game.
Solution 3: Remove or Disable Any Mods
Another possible cause of the texture glitch is incompatible or conflicting mods, which are modifications that add or change features, content, or gameplay of the game. Mods can enhance or customize the game, but they can also cause bugs, crashes, or glitches, especially if they are not compatible with the game version, the other mods, or the hardware.
To fix this, you can remove or disable any mods that you have installed, which is a process that restores the game to its original state. You can remove or disable any mods by following these steps:
Go to the folder where you installed the game, which is usually C:\Program Files (x86)\Steam\steamapps\common\Grand Theft Auto San Andreas.
Look for any folders or files that are related to the mods, such as modloader, cleo, or gta_sa.exe. Then, delete or move them to another location.
Alternatively, you can use a mod manager, such as SAMI or Mod Loader, to uninstall or deactivate the mods.
Launch the game and check if the glitch is fixed.
Solution 4: Adjust Your Graphics Settings
Another possible cause of the texture glitch is low or incorrect graphics settings, which are options that affect the visual quality and performance of the game.
Low or incorrect graphics settings can cause the game to run poorly, or to display the textures incorrectly. To fix this, you can adjust your graphics settings, which is a process that optimizes the game for your hardware and preferences. You can adjust your graphics settings by following these steps:
Launch the game and go to the Options menu.
Go to the Display Setup sub-menu and adjust the following settings:
Resolution: Set it to the highest value that your monitor and graphics card can support.
Draw Distance: Set it to the highest value that your graphics card can handle without lagging.
Frame Limiter: Set it to On, which will limit the game to 30 FPS and prevent any glitches or bugs.
Visual FX Quality: Set it to Very High, which will improve the quality of the textures and effects.
Mip Mapping: Set it to On, which will smooth the edges of the textures and reduce aliasing.
Antialiasing: Set it to 3, which will further smooth the edges of the textures and reduce aliasing.
Save the settings and restart the game.
Conclusion
GTA SA is a classic open-world action-adventure game that features a variety of weapons that can be used to fight enemies, complete missions, or cause chaos. However, some players have reported a texture glitch that causes the weapons to show white in the game.
This glitch can affect the appearance and performance of the weapons, and make the game less enjoyable. The glitch can be fixed by verifying the integrity of game files, updating the drivers, removing or disabling any mods, or adjusting the graphics settings. These solutions can help you fix the glitch and restore the normal colours of the weapons.
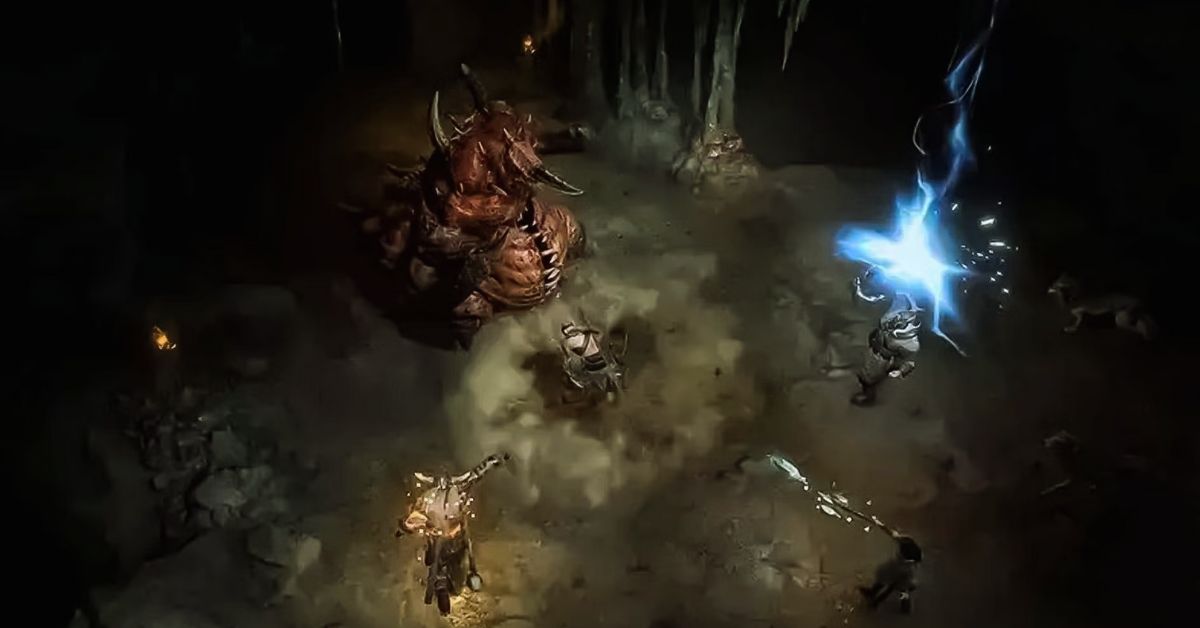
Diablo 4 is the latest installment of the popular action role-playing game series that pits you against the forces of hell. One of the most challenging and rewarding encounters in the game is the Uber Lilith fight, also known as the Echo of Lilith, which is a remastered version of the final boss of the main story.
Uber Lilith is the daughter of Mephisto, the Lord of Hatred, and the mother of humanity. She is a powerful and cunning demon who seeks to unleash the Prima Evils, the ultimate evil beings, upon the world.
To defeat her, you will need to master her mechanics, dodge her attacks, and exploit her weaknesses. In this guide, we will show you how to unlock the Uber Lilith fight, what are the best strategies and tips to beat her, and what are the rewards and benefits of slaying her.
Diablo 4 Uber Lilith Guide
The Uber Lilith fight is only available after completing the second Capstone Dungeon, which is a special endgame activity that requires a Tera Orb to access. A Tera Orb is a rare item that can be obtained by completing certain quests or by purchasing it with real money.
Diablo 4 Season 2 Boss Loot Table
The second Capstone Dungeon is called the Fallen Temple, and it is a level 70 fixed-level dungeon that can only be attempted at World Tier 4. World Tier 4 is the highest difficulty level in the game, and it can only be unlocked by completing the first Capstone Dungeon, which is called the Cathedral of Light, and by reaching level 70.
The Cathedral of Light is a level 50 fixed-level dungeon that can only be attempted at World Tier 2. World Tier 2 is the second difficulty level in the game, and it can be unlocked by completing the main story and by reaching level 50.
To summarize, the steps to unlock the Uber Lilith fight are as follows:
Complete the main story and reach level 50 to unlock World Tier 2.
Complete the Cathedral of Light Capstone Dungeon at World Tier 2 to unlock World Tier 3.
Reach level 70 to unlock World Tier 4.
Complete the Fallen Temple Capstone Dungeon at World Tier 4 to unlock the Uber Lilith fight.
The Uber Lilith fight is marked on your map as an activity called Echo of Lilith.).
Uber Lilith Moveset and Stats
Uber Lilith has a formidable moveset and stats that make her a formidable opponent. Here are her moveset and stats:
Blood Wave: A red wave of blood that sweeps across the arena. It deals damage and knocks back anyone who touches it. It can be dodged by jumping over it or moving to the sides.
Blood Puddle: A pool of blood that forms on the ground. It deals damage and slows down anyone who stands on it. It can be avoided by moving away from it or jumping over it.
Blood Circle: A circle of blood that surrounds Lilith. It deals damage and stuns anyone who enters it. It can be escaped by moving out of it or using a movement skill.
Blood Cleave: A powerful slash that deals damage and bleeds anyone in front of Lilith. It can be avoided by moving behind her or to the sides.
Blood Sweep: A spinning attack that deals damage and knocks back anyone around Lilith. It can be avoided by moving away from her or using a movement skill.
Blood Boil: A burst of blood that deals damage and applies a debuff to anyone near Lilith. The debuff reduces your healing and damage output. It can be avoided by moving away from her or using a movement skill.
Uber Lilith has a base stat total of 1000, which is distributed as follows:
HP: 200
Attack: 200
Defense: 100
Special Attack: 200
Special Defense: 100
Speed: 200
Uber Lilith also has a unique ability called Quark Drive, which boosts her stats depending on the terrain. Here are the effects of Quark Drive on different terrains:
Electric Terrain: Boosts Special Defense by 50% and Speed by 30%.
Grassy Terrain: Boosts Attack by 50% and Defense by 30%.
Misty Terrain: Boosts Special Attack by 50% and Special Defense by 30%.
Psychic Terrain: Boosts Attack by 50% and Speed by 30%.
Uber Lilith Weaknesses and Resistances
Uber Lilith is weak to four types of attacks: Fire, Ice, Holy, and Arcane. These types deal double damage to her when used by your skills or items. You should try to use these types as much as possible in your build and strategy.
Uber Lilith is also resistant to six types of attacks: Electric, Grass, Water, Dark, Poison, and Blood. These types deal half damage to her when used by your skills or items. You should avoid using these types unless you have no other option.
Uber Lilith Best Strategies and Tips
Many strategies and tips can help you defeat Uber Lilith effectively in Diablo 4. Here are some of the best ones:
Use a balanced team of four players with different classes and roles. You will need a tank, a healer, a damage dealer, and a support. The tank should taunt and block Lilith’s attacks, the healer should heal and buff the team, the damage dealer should deal as much damage as possible, and the support should debuff and crowd-control Lilith.
Use skills and items that deal with Fire, Ice, Holy, or Arcane damage. These types are the most effective against Lilith, and they can also trigger elemental effects that can further damage or disable her. For example, Fire can burn her, Ice can freeze her, Holy can blind her, and Arcane can silence her.
Use skills and items that increase your mobility and survivability. You will need to dodge and escape Lilith’s attacks, especially the Blood Wave and the Blood Sweep. You will also need to heal and protect yourself from her damage and debuffs, especially the Blood Boil and the Blood Cleave. For example, you can use skills like Teleport, Leap, Dash, or Blink to move around, and skills like Shield, Barrier, Heal, or Regen to recover and defend.
Use skills and items that reduce Lilith’s stats and abilities. You will need to weaken and disrupt Lilith’s attacks, especially the Quark Drive and the Blood Circle. You will also need to prevent her from healing and buffing herself, especially with the Grassy Terrain and the Swords Dance. For example, you can use skills like Curse, Hex, Slow, or Stun to impair her, and skills like Dispel, Purge, Silence, or Interrupt to counter her.
Use the terrain to your advantage. You will need to use the terrain to avoid or mitigate Lilith’s attacks, especially the Blood Wave and the Blood Puddle. You will also need to use the terrain to enhance or trigger your attacks, especially the Electric Terrain and the Misty Terrain. For example, you can use the platforms to jump over the Blood Wave and use the water to conduct the Electric Terrain.
Uber Lilith Rewards and Benefits
If you manage to defeat and catch Uber Lilith in the Tera Raid, you will get some rewards and benefits. Here are some of them:
You will get a rare and powerful item that can enhance your build and collection. The item is called Lilith’s Wings, and it is a legendary accessory that grants you the following effects:
+50% damage to demons
+50% resistance to blood
+10% movement speed
+5% critical chance
+5% critical damage
You will get some Tera Candies that can be used to power up your Tera skills. Tera skills are special skills that can only be used in Tera Raids, and they have powerful effects that can help you defeat the bosses. You can use the Tera Candies to increase the level and potency of your Tera skills.
You will get some Tera Coins that can be used to buy items and services in the Tera Shop. The Tera Shop is a special shop that sells exclusive items and services that can help you in the Tera Raids. You can buy items like Tera Orbs, Tera Potions, Tera Scrolls, and Tera Stones, and services like Tera Resurrection, Tera Teleportation, and Tera Identification.
You will get some Tera Points that can be used to rank up in the Tera League and unlock more rewards and features. The Tera League is a special leaderboard that ranks the players based on their performance in the Tera Raids. You can earn Tera Points by completing the Tera Raids, and you can use them to increase your Tera Rank. The higher your Tera Rank, the more rewards and features you can unlock, such as Tera Titles, Tera Emotes, Tera Skins, and Tera Pets.
Iron Leaves is a legendary Grass-type Pokemon that can be encountered in Pokemon Scarlet and Violet (SV). It is a part of the Paradox Pokemon group, which are Pokemon that have different types and abilities depending on the terrain.
Iron Leaves has a unique ability called Quark Drive, which boosts its stats depending on the terrain. It also has a powerful moveset that includes Leaf Blade, Megahorn, Psyblade, and Swords Dance. To catch it, you will need to participate in a Tera Raid, which is a high-level raid that requires a Tera Orb. In this guide, we will show you how to join the Iron Leaves Tera Raid event, what are the best counters and strategies to defeat it, and what are the rewards and benefits of catching it.
Iron Leaves Tera Raid Event Details
The Iron Leaves Tera Raid event is a special event that allows you to battle and catch Iron Leaves in a Tera Raid. A Tera Raid is a high-level raid that requires a Tera Orb to participate. You can obtain a Tera Orb by completing certain quests or by purchasing it with real money. The Iron Leaves Tera Raid event is available from December 25, 2023, to January 7, 2024, in the Paldea region.
Serebii Update: The latest Pokémon Scarlet & Violet Tera Raid Battle Event is now live.
Walking Wake and Iron Leaves have returned to Raid Battles until Sunday January 7th at 23:59 UTC.
Iron Leaves has a formidable moveset and stats that make it a challenging opponent. Here are its moveset and stats:
Leaf Blade: A Grass-type physical move that deals damage and has a high critical hit ratio.
Megahorn: A Bug-type physical move that deals damage and has a high critical hit ratio.
Psyblade: A Psychic-type physical move that deals damage and lowers the target’s Attack stat by one stage.
Swords Dance: A Normal-type status move that raises the user’s Attack stat by two stages.
Iron Leaves has a base stat total of 680, which is distributed as follows:
HP: 100
Attack: 150
Defense: 100
Special Attack: 100
Special Defense: 100
Speed: 130
Iron Leaves also has a unique ability called Quark Drive, which boosts its stats depending on the terrain. Here are the effects of Quark Drive on different terrains:
Electric Terrain: Boosts Special Defense by 50% and Speed by 30%.
Grassy Terrain: Boosts Attack by 50% and Defense by 30%.
Misty Terrain: Boosts Special Attack by 50% and Special Defense by 30%.
Psychic Terrain: Boosts Attack by 50% and Speed by 30%.
Iron Leaves Weaknesses and Resistances
Iron Leaves are weak to four types of attacks: Fire, Ice, Poison, and Bug. These types deal double damage to it when used by your Pokemon. You should try to use these types as much as possible in your team composition.
Iron Leaves is also resistant to six types of attacks: Electric, Grass, Water, Fighting, Ground, and Psychic. These types deal half the damage to it when used by your Pokemon. You should avoid using these types unless you have no other option.
Iron Leaves Best Counters
There are many Pokemon that can counter Iron Leaves effectively in Pokemon SV. Here are some of the best ones:
Mega Charizard X: This Fire and Dragon-type Pokemon has a fast move of Fire Spin that deals Fire damage and has a 30% chance to burn the target. It also has a charge move of Fire Blast that deals Fire damage and lowers the target’s Special Defense stat by one stage. This combination makes Mega Charizard X one of the best counters for Iron Leaves.
Mega Gengar: This Ghost and Poison-type Pokemon has a fast move of Lick that deals Poison damage and has a 30% chance to poison the target for two turns. It also has a charge move of Sludge Bomb that deals Poison damage and has a 30% chance to poison the target for two turns. This combination makes Mega Gengar another great counter for Iron Leaves.
Mega Scizor: This Bug and Steel-type Pokemon has a fast move of Bullet Punch that deals Steel damage and has a 30% chance to paralyze the target for two turns. It also has a charge move of X-Scissor that deals Bug damage and lowers the target’s Defense stat by one stage. This combination makes Mega Scizor another excellent counter for Iron Leaves.
Mega Rayquaza: This Dragon and Flying-type Pokemon has a fast move of Dragon Tail that deals Dragon damage and has a 30% chance to flinch the target for two turns. It also has a charge move of Outrage that deals Dragon damage and lowers the target’s Attack stat by one stage. This combination makes Mega Rayquaza another powerful counter for Iron Leaves.
Mega Latios: This Psychic and Flying-type Pokemon has a fast move of Psychic that deals Psychic damage and lowers the target’s Special Attack stat by one stage. It also has a charge move of Outrage that deals Psychic damage and lowers the target’s Attack stat by one stage. This combination makes Mega Latios another effective counter for Iron Leaves.
How to Use the Circle Lock Technique?
The Circle Lock Technique is an advanced technique that allows you to guarantee Great or Excellent throws on your first throw against any target in any mode. To use this technique effectively against Iron Leaves, you will need:
A Golden Razz Berry
A partner who can throw first
A partner who can lock on
A partner who can circle lock
The steps are as follows:
Your partner locks on to Iron Leaves.
Your partner throws first.
Your partner circles the target until they are within range.
Your partner locks on again.
Your partner throws again.
Your partner circles again until they are within range.
Your partner locks on again.
Your partner throws again.
Your partner circles again until they are within range.
Your partner locks on again.
Your partner throws again.
If your first throw hits without any misses or errors (such as double taps or triple taps), you will get a Great or Excellent throw bonus, which will increase your chances of catching Iron Leaves.
Iron Leaves Tera Raid Rewards and Benefits
If you manage to defeat and catch Iron Leaves in the Tera Raid, you will get some rewards and benefits. Here are some of them:
You will get a rare and powerful Pokemon that can enhance your team and collection.
You will get some Tera Candies that can be used to power up your Tera Pokemon.
You will get some Tera Coins that can be used to buy items and services in the Tera Shop.
You will get some Tera Points that can be used to rank up in the Tera League and unlock more rewards and features.
Conclusion
Iron Leaves is a legendary Grass-type Pokemon that can be encountered in Pokemon SV. It is a part of the Paradox Pokemon group, which has different types and abilities depending on the terrain. To catch it, you will need to participate in a Tera Raid, which is a high-level raid that requires a Tera Orb.
In this guide, we showed you how to join the Iron Leaves Tera Raid event, what are the best counters and strategies to defeat it, and what are the rewards and benefits of catching it. Iron Leaves is a rare and valuable Pokemon that can enhance your team and collection.
If you are interested in knowing more articles related to Pokemon Go, you can check Defit Pokemon Go and Shiny Oddish Pokemon Go. We appreciate your interest in our website! Make Gameempress.com your go-to site for gaming information. Share this:
We have compiled a list of cheats and tricks to assist you in locating and eliminating your targets in Assassin’s Creed Mirage, an action-adventure game set in 9th-century Baghdad during the Islamic Golden Age.
Basim Ibn Ishaq, a street pickpocket, joins the Hidden Ones to fight for peace and liberty against the Order of the Ancients, who seek peace through domination. The game’s main plot revolves around Basim’s internal conflict between his duties as a Hidden One and his desire to learn more about his strange origins.
Assassin’s Creed Mirage is available on PS4, PS5, Xbox Series X/S, and PC.
Assassins Creed Mirage Cheats
Unfortunately, Assassin’s Creed Mirage was released without any console commands or cheats, most likely to encourage players to play the game as the makers intended.
Assassins Creed Mirage Cheats
The excitement of masterfully carrying out an assassination is surely one reason, even if we found the game to have its problems in our assessment.
But if you need aid, a few mods are willing to lend a hand.
One provides endless skill points (and, to a lesser extent, power), although it does necessitate the use of the third-party program Cheat Engine.
Another allows you to change Basim’s appearance, while a third grants access to all Helix store items.
While this results in a more limited initial offering of Assassin’s Creed Mirage cheat-like mods, more may appear in the future.
The series isn’t known for being the most mod-friendly out there, but it’ll be intriguing to see what modders come up with in the following months.
With the console commands and cheats for Assassin’s Creed Mirage covered, learn more about the game’s notoriety system.
Assassins Creed Mirage Tips
Pay attention to the Trickster Skill Tree
Focus on unlocking every Trickster skill tree skill for Basim since this will assist in unlocking and enhancing his tools, which can be quite handy during missions. Knife Recovery, Engineer, and Pickpocket Mastery, in particular, are among the finest talents in Assassin’s Creed Mirage.
Enhance the Throwing Knives
Knives are silent and lethal in Assassin’s Creed Mirage, and they are the first tool Basim has access to. With the proper upgrades, this ranged weapon is capable of doing important tasks such as one-hit headshot kills, opening locked doors, and blowing up an oil pot from afar.
Select the Smoke Bombs
When you unlock your first tool for the Banu Musa brothers, you will be given a choice of five tools.Choose the Smoke Bombs because adversaries caught in its explosion cannot move, attack, or detect Basim, resulting in simple assassinations.When Basim has to flee, he can also deploy Smoke Bombs as a distraction.