Category: Game Guides

In-depth game guides from Game Empress, with walkthroughs, tier lists, location maps, and step-by-step strategies to help you master the games you love.

  • Is Granblue Fantasy Versus Rising Crossplay? Your Burning Question Answered!

    Is Granblue Fantasy Versus Rising Crossplay? Your Burning Question Answered!

    Granblue Fantasy Versus Rising is the latest update for the anime fighting game developed by Arc System Works and Cygames. The update adds new characters, modes, features, and improvements to the game, which is based on the popular mobile RPG Granblue Fantasy.

    One of the most anticipated features of the update is the crossplay support, which allows players to play together across different platforms. In this article, we will explain what crossplay is, how to enable it, and what are the benefits and limitations of the feature.

    Is Granblue Fantasy Versus Rising Crossplay?

    Yes, Grandblue Fantasy Versus Rising is Crossplay. Crossplay is a feature that allows players to play Granblue Fantasy Versus Rising together regardless of the platform they are using. This means that players on PlayStation 4, PlayStation 5, and PC (Steam) can join the same online matches and lobbies, and enjoy the game’s multiplayer modes.

    Crossplay also enables cross-save, which means that players can use the same Granblue Fantasy Versus Rising account and access their progress, items, and customizations on any platform.

    How to Enable Crossplay in Granblue Fantasy Versus Rising?

    To enable crossplay in Granblue Fantasy Versus Rising, players need to have a Granblue Fantasy Versus Rising account and link it to their platform account. For example, if you play on PlayStation, you need to link your Granblue Fantasy Versus Rising account to your PlayStation Network account.

    You can do this by visiting the Account Linking page on the official Granblue Fantasy Versus Rising website and following the instructions.

    Once you have linked your accounts, you can enable cross-play in the game’s settings menu. You can toggle the “Crossplay” option on or off, depending on your preference. You can also choose to enable or disable crossplay chat, which allows you to communicate with other players on different platforms.

    When crossplay is enabled, you can join or invite other players to your online matches and lobbies, regardless of their platform. You can also use the public matchmaking feature to find other players to play with. You can identify the platform of other players by the icon next to their name. For example, a PlayStation player will have a PS logo, while a PC player will have a Steam logo.

    You might also like to know about if these other games are cross-platform or not:

    What are the Benefits and Limitations of Crossplay in Granblue Fantasy Versus Rising?

    Crossplay in Granblue Fantasy Versus Rising has many benefits and advantages, such as:

    • Expanding the player base and the community, and making it easier to find and play with other players.
    • Enhancing the gameplay experience and the variety, and allowing players to enjoy the game’s content and features on different devices.
    • Preserving the progress and the continuity, and allowing players to switch between platforms without losing their data or items.

    However, crossplay in Granblue Fantasy Versus Rising also has some limitations and challenges, such as:

    • Requiring a stable and fast internet connection, and potentially causing lag, latency, or disconnect issues.
    • Having some compatibility and performance differences, and potentially causing bugs, glitches, or errors.
    • Having some update and patch delays, and potentially causing some content or feature discrepancies.

    Therefore, players should use crossplay in Granblue Fantasy Versus Rising at their own discretion and responsibility, and be aware of the possible outcomes.

    They should also report any issues or feedback to the developers, and help improve the feature. Crossplay in Granblue Fantasy Versus Rising is a great addition to the game and a testament to the developers’ vision and commitment.

    We appreciate your interest in our website! Make Gameempress.com your go-to site for gaming information.

  • Saints Row 4 Cheats for PS4: How to Unlock Everything and Have Fun?

    Saints Row 4 Cheats for PS4: How to Unlock Everything and Have Fun?

    Players may obtain any vehicle or weapon they like and breeze through even the most challenging tasks with the help of Saints Row 4 cheats. Learn how to enter and activate cheat codes in Saints Row 4 with this comprehensive cheats list.

    Saints Row 4 Cheats List for PS4

    Here are some of the cheat codes you can use in Saints Row 4 for PS4:

    • Unlockitall – Unlocks everything, including weapons, vehicles, upgrades, and outfits.
    • Cheese – Gives you $100,000 cash.
    • Letsrock – Gives you a full load-out of randomized weapons.
    • Vroom – Makes your vehicles indestructible.
    • Repaircar – Repair your current vehicle.
    • Goodygoody – Removes your Notoriety, which is the level of attention you get from the enemies.
    • Runfast – Gives you unlimited sprinting ability.
    • Bigheadmode – Makes all the heads of the characters bigger.
    • Evilcars – Makes all the cars on the road target you and start attacking you.
    • Fastforward – Speeds up the progression of time.
    • Fryhole – Makes all the dead bodies lying around start to rise into the air.
    • Givehovertank – Spawns an alien hover tank for you to use.
    • Givetrouble – Spawns an XOR, which is an alien hoverbike.
    • Hohoho – Makes all the pedestrians either pimps or prostitutes.
    • Insanecity – Makes the pedestrians go crazy and attack each other.
    • Instantwarden – Generates instant Warden notoriety, which means a powerful alien boss will attack you.
    • Isquishyou – Makes your cars able to drive over other cars like tanks.
    • Mascot – Makes all the pedestrians turn into mascots.
    • Noglitchcity – Disables the glitch effects that happen when you hack the simulation.
    • Nosuperpowers – Disables all your superpowers.
    • Nowardens – Disables all Warden spawns, which means the alien bosses won’t attack you.
    • Superblast – Unlocks the Superblast power, which lets you shoot a powerful blast of energy.
    • Superbuff – Unlocks the Buff power, which makes you stronger and more resistant to damage.
    • Superdfa – Unlocks the Death from Above power, which lets you fly up and slam down on the ground, creating a shockwave.
    • Superstomp – Unlocks the Stomp power, which lets you stomp the ground and send enemies flying.
    • Supertk – Unlocks the Telekinesis power, which lets you lift and throw objects and enemies with your mind.
    • Ascii – Enables ASCII mode, where all the graphics are made of computer characters.

    How Do You Enter and Activate Saints Row 4 Cheats?

    saints row 4 cheats ps4

    Go to Hub, select the Cheats option, and add the cheat code you want to use in order to enter and activate Saints Row 4 cheat codes. Take these actions to activate the cheats:

    • Visit the Hub first.
    • Choose Extras from the menu.
    • Click the “Cheats” option.
    • Put in the cheat code that you want to use.
    • It will start working as soon as you go inside.

    Saints Row 4 is a game that lets you have fun and be creative with your gameplay. You can use cheat codes to unlock everything and change the game rules to your liking. Whether you want to have more money, more weapons, more powers, or more chaos, there is a cheat code for you. Just remember to save your game before using cheat codes, as they will disable your auto-saves and achievements.

    You might also be interested in the following game, Cheats: NBA Street Vol 2 Cheats and Pokemon Moon Black 2 Cheats. We appreciate your interest in our website! Make Gameempress your go-to site for gaming information.

  • Total War Warhammer 3 PC Requirements: How To Prepare Your Rig For The Ultimate Fantasy Strategy Game?

    Total War Warhammer 3 PC Requirements: How To Prepare Your Rig For The Ultimate Fantasy Strategy Game?

    Total War Warhammer 3 is the  finale of the epic fantasy strategy trilogy from Creative Assembly and Sega. The game will feature six new playable races, each with its own unique units, mechanics, and campaign.

    The game will also introduce the Realm of Chaos, a new map that will challenge players with dynamic and unpredictable events and battles. The game is expected to be released in February 2022 for Windows and Xbox consoles.

    But before you can dive into the world of Warhammer and lead your armies to glory or ruin, you will need to make sure that your PC can handle the game’s system requirements.

    The game will have high-quality graphics, animations, and sound effects, as well as large-scale and complex gameplay mechanics, which will require a lot of memory, processing power, and storage space. Here is everything you need to know about the Total War Warhammer 3 PC requirements.

    Total War Warhammer 3 PC Requirements

    Total War Warhammer 3 PC Requirements
    Total War Warhammer 3 PC Requirements

    Minimum PC Requirements

    The minimum PC requirements are the lowest specifications that your PC needs to run the game at the lowest settings and resolution.

    These requirements are usually meant for players who have older or less powerful PCs, and who are willing to sacrifice some visual quality and performance for the sake of playing the game. Based on the game’s official website, the minimum PC requirements for Total War Warhammer 3 are as follows:

    • OS: Windows 7 64-bit
    • Processor: Intel i3/Ryzen 3 series
    • Memory: 6 GB RAM
    • Graphics: Nvidia GTX 900/AMD RX 400 series | Intel Iris Xe Graphics
    • DirectX: Version 11
    • Storage: 120 GB available space
    • Additional Notes: 8GB Memory if using integrated GPU

    These requirements are slightly higher than the ones for Total War Warhammer 2, which was the previous game in the series, with improved graphics and features. However, since Total War Warhammer 3 will use the same engine and will have similar gameplay mechanics, we can expect that these requirements will be enough to run the game, but not very well.

    Recommended PC Requirements

    The recommended PC requirements are the optimal specifications that your PC needs to run the game at the highest settings and resolution.

    These requirements are usually meant for players who have newer or more powerful PCs, and who want to experience the game’s full potential and beauty. Based on the game’s official website, the recommended PC requirements for Total War Warhammer 3 are as follows:

    • OS: Windows 10 (64-bit)
    • Processor: Intel i5/Ryzen 5 series
    • Memory: 8 GB RAM
    • Graphics: Nvidia GeForce GTX 1660 Ti/AMD RX 5600-XT
    • DirectX: Version 12
    • Storage: 120 GB available space

    These requirements are similar to the ones for Starfield, which is the upcoming sci-fi RPG from the same developer and engine as Total War Warhammer 3.

    However, since Total War Warhammer 3 will likely have more features and content than Starfield, we can expect that these requirements will be ideal to run the game, and that the game will look and run amazing at these settings.

    Tips and Tricks for the Total War Warhammer 3 PC Requirements

    Here are some tips and tricks to help you prepare your PC for the Total War Warhammer 3 PC requirements:

    • Use a wired connection and a stable internet service to ensure a smooth and lag-free online experience. Avoid using Wi-Fi or mobile data, as they can cause latency and disconnections.
    • Use a headset and a microphone to communicate with your teammates and opponents. You can also use the in-game chat and emotes to send messages and express yourself.
    • Be respectful and friendly to other players, regardless of their platform or skill level. Don’t trash talk, rage quit, or cheat, as they can ruin the game for everyone.
    • Have fun and learn from your matches. Don’t be discouraged by losses or frustrated by wins. Instead, try to improve your skills and strategies, and enjoy the game.

    This is everything you need to know about Total War Warhammer 3 PC Requirements. Additionally, you can check our guide on The Elder Scrolls VI PC Requirements and Valorant PC Requirements. Stay connected with GameEmpress.com to get the latest news and guides about the gaming world.

  • The Elder Scrolls VI PC Requirements: What You Need To Play The Next Epic Fantasy RPG?

    The Elder Scrolls VI PC Requirements: What You Need To Play The Next Epic Fantasy RPG?

    The Elder Scrolls VI is the highly anticipated sequel to the acclaimed fantasy RPG series, The Elder Scrolls. The game is being developed by Bethesda Game Studios and published by Bethesda Softworks and will be the second game to use the studio’s new engine, Creation Engine 2, after Starfield.

    The game is expected to be released for Windows and Xbox consoles and will feature a vast and immersive open world, dynamic and nonlinear gameplay, and rich and diverse lore and cultures.

    However, to enjoy the game’s stunning graphics, smooth animations, and responsive controls, you will need a powerful PC that can meet the game’s system requirements.

    While the official system requirements have not been announced yet, we can make some educated guesses based on the game’s trailer, the developer’s statements, and the previous games in the series. Here is everything you need to know about The Elder Scrolls VI PC requirements.

    The Elder Scrolls VI PC Requirements

    The Elder Scrolls VI PC Requirements
    The Elder Scrolls VI PC Requirements

    Minimum PC Requirements

    The minimum PC requirements are the lowest specifications that your PC needs to run the game at the lowest settings and resolution. These requirements are usually meant for players who have older or less powerful PCs, and who are willing to sacrifice some visual quality and performance for the sake of playing the game.

    Based on the game’s trailer, which showed a detailed and realistic landscape of mountains and forests, we can assume that the game will have high-quality textures, lighting, and shadows, which will require a lot of memory and processing power. Therefore, we can estimate the minimum PC requirements for The Elder Scrolls VI as follows:

    • CPU: Core i5-7500 / Ryzen 5 1400
    • RAM: 8 GB
    • OS: Windows 10 64-bit
    • GPU: GeForce GTX 970 / Radeon R7 265
    • VRAM: 4 GB
    • Pixel Shader: 5.1
    • Vertex Shader: 5.1

    These requirements are similar to the ones for The Elder Scrolls V: Skyrim Special Edition, which was a remastered version of the previous game in the series, with improved graphics and features.

    However, since The Elder Scrolls VI will use a new engine and will likely have more advanced and complex gameplay mechanics, we can expect that these requirements will be the bare minimum to run the game and that the game will not look or run very well at these settings.

    Recommended PC Requirements

    The recommended PC requirements are the optimal specifications that your PC needs to run the game at the highest settings and resolution. These requirements are usually meant for players who have newer or more powerful PCs, and who want to experience the game’s full potential and beauty.

    Based on the game’s trailer, which hinted at a large and diverse world with different regions, climates, and cultures, we can assume that the game will have a lot of variety and depth, which will require a lot of storage space and loading speed. Therefore, we can estimate the recommended PC requirements for The Elder Scrolls VI as follows:

    • CPU: Core i7-9700 / Ryzen 7 3700X
    • RAM: 16 GB
    • OS: Windows 10 64-bit
    • GPU: GeForce RTX 2070 / Radeon RX 5700 XT
    • VRAM: 8 GB
    • Pixel Shader: 6.0
    • Vertex Shader: 6.0

    These requirements are similar to the ones for Starfield, which is the upcoming sci-fi RPG from the same developer and engine as The Elder Scrolls VI. However, since The Elder Scrolls VI will likely have more features and content than Starfield, we can expect that these requirements will be the ideal ones to run the game and that the game will look and run amazingly at these settings.

    This is everything you need to know about The Elder Scrolls VI PC Requirements. Additionally, you can check our guide on Forza Horizon 5 PC Requirements and Marvel Spiderman Remastered PC Requirements. Stay connected with GameEmpress.com to get the latest news and guides about the gaming world.

  • How To Recruit Minthara In Baldur’s Gate 3 Patch 5?

    How To Recruit Minthara In Baldur’s Gate 3 Patch 5?

    Minthara is a dark elf cleric and a potential companion in Baldur’s Gate 3, the role-playing game based on the Dungeons & Dragons universe. However, recruiting her is not easy, as she is aligned with the evil Cult of the Absolute and usually requires the player to betray the Tiefling refugees and the Druids in the first act of the game.

    This can result in losing other companions and missing out on some quests and rewards. However, with the latest Patch 5 update, there is a new way to recruit Minthara without going evil or killing innocents. In this article, we will show you how to do it, and what are the pros and cons of having Minthara at your party.

    The New Method to Recruit Minthara in Patch 5

    The new method to recruit Minthara in Patch 5 involves knocking her out in a non-lethal way in the Goblin Camp, where she can be found in the library of the castle ruins.

    Baldur’s Gate 3
    Baldur’s Gate 3

    This will prevent her from participating in the attack on Druid Grove, and allow her to reappear in the second act of the game, where she can be convinced to join the player’s party. Here are the steps to follow:

    • Make sure you have the non-lethal mode enabled in the character control panel. This will allow you to knock out enemies instead of killing them.
    • Enter the Goblin Camp without becoming hostile to the goblins. You can do this by pretending to be a member of the cult, or by wearing the goblin disguise that can be obtained from the goblin merchant in the Druid Grove.
    • Find Minthara in the library of the castle ruins. You can either talk to her and tell her to go to the Tiefling Camp, or simply attack her without talking. Either way, you will have to fight her and her guards.
    • Knock out Minthara with non-lethal attacks. You can use melee weapons, fists, or spells that deal non-lethal damage, such as Sleep or Hold Person. Do not use fire, acid, or poison attacks, as they can kill her after she is knocked out.
    • Leave Minthara unconscious on the ground. Do not loot her or interact with her in any way. You can also knock out the other two goblin leaders, Priestess Gut and Dror Ragzlin, in the same way, but this is optional.
    • Complete the first act of the game by saving the Druid Grove and the Tiefling refugees. You can do this by either killing the goblin leaders, or by convincing them to leave peacefully. You can also rescue Halsin, the druid leader, from the goblin camp, but this is optional.
    • Start the second act of the game by boarding the Nautiloid ship and traveling to the Underdark. You will find Minthara in the Moonrise Towers, where she is held captive by the Mind Flayers. You can free her and persuade her to join your party, or leave her to her fate.

    The Benefits and Drawbacks of Recruiting Minthara in Patch 5

    Recruiting Minthara in Patch 5 has some benefits and drawbacks, such as:

    Benefits:

    • You can have an extra companion and a cleric in your party, which can be useful for healing and support.
    • You can learn more about Minthara’s backstory, personality, and motivations, and influence her alignment and attitude.
    • You can romance Minthara, if you are into dark elves and evil cults.
    • You can access some unique quests, dialogues, and interactions with Minthara and other characters.

    Drawbacks:

    • You may have to deal with Minthara’s evil tendencies and opinions, which may clash with your own or other companions’.
    • You may have to face some consequences and reactions from other characters, who may not trust or like Minthara.
    • You may have to sacrifice some other companions or quests, as Minthara may not get along with them or approve of them.
    • You may have to deal with some bugs or glitches, as Minthara’s recruitment is still in beta and may not work as intended.

    You might also be interested in the following game, patch notes: WoW 10.2 Patch Notes and Pokemon Unite 1.13.1.2 Patch Notes. We appreciate your interest in our website! Make Gameempress.com your go-to site for gaming information.
  • Sims 4 Car Mod: How To Add And Drive Cars In The Game?

    Sims 4 Car Mod: How To Add And Drive Cars In The Game?

    Cars are one of the most requested features in The Sims 4, as they can add realism, convenience, and fun to the game. However, the game does not have any official cars or driving mechanics, and the only available vehicles are decorative or functional objects, such as bikes, scooters, or taxis.

    Fortunately, there are some ways to add and drive cars in the game, thanks to the creativity and hard work of the modding community. In this article, we will show you how to download and install Sims 4 car mods, and what you can do with them.

    What are Sims 4 Car Mods?

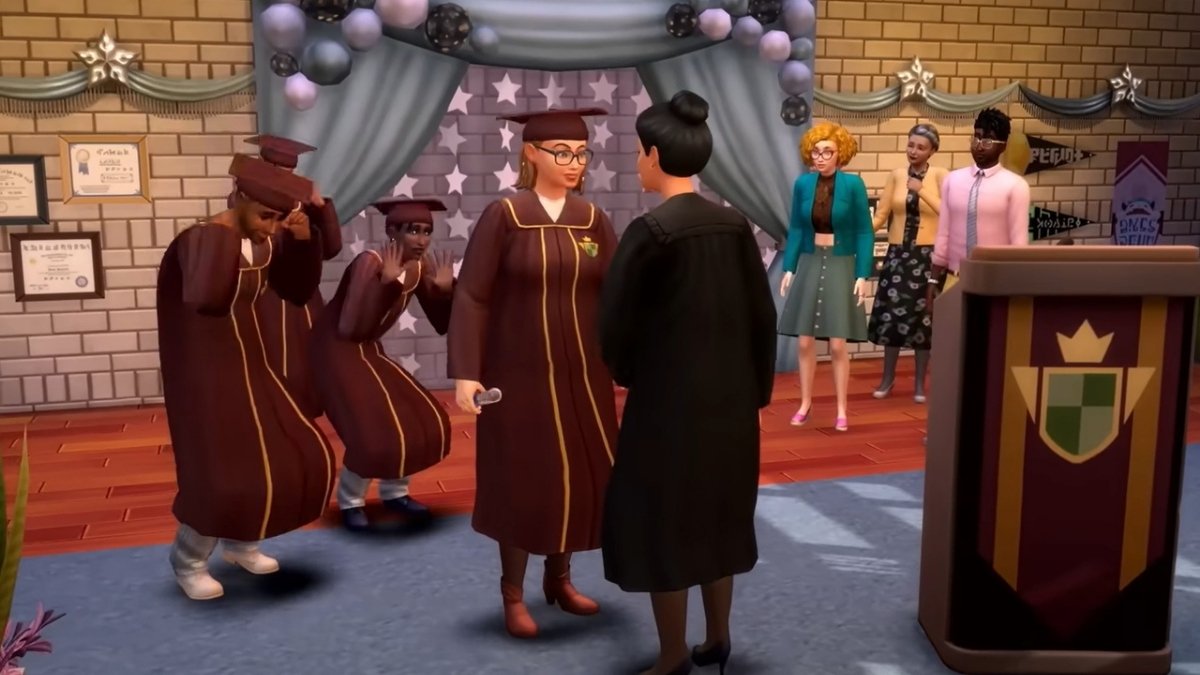
    Sims 4 High School Years Cheats
    Sims 4 High School Years Cheats

    Sims 4 car mods are custom content that can add cars and driving features to the game. There are two types of car mods: static and functional.

    Static car mods are objects that can be placed on lots or roads and can be used for decoration, posing, or storytelling. Functional car mods are objects that can be interacted with and can allow sims to drive, travel, or perform other actions with cars.

    How to Download and Install Sims 4 Car Mods?

    To download and install Sims 4 car mods, you will need to follow these steps:

    • Find and download the car mod that you want from one of the sources mentioned above. Make sure that the mod is compatible with your game version and any other mods or custom content that you have.
    • Extract the mod file from the zip or rar archive, and copy the .package or .ts4script file to your Mods folder. The Mods folder is located in the Documents\Electronic Arts\The Sims 4 folder.
    • Launch the game and go to the Options menu. Under the Other tab, make sure that the Enable Custom Content and Mods and the Script Mods Allowed options are checked. Apply the changes and restart the game.
    • Go to Build Mode and find the car mod in the catalogue. You can usually find it under the Vehicles category, or the Custom Content filter. Place the car mod on your lot or the road, and enjoy.

    What Can You Do with Sims 4 Car Mods?

    Sims 4 car mods can provide various benefits and options, such as:

    • Adding realism and immersion to the game, and making it more similar to real life.
    • Adding convenience and speed to the game, and allowing sims to travel faster and easier.
    • Adding fun and excitement to the game, and allowing sims to enjoy driving, racing, or customizing cars.
    • Adding variety and creativity to the game, and allowing sims to choose from different car models, styles, and colours.

    However, sims 4 car mods also have some limitations and challenges, such as:

    • Requiring additional mods or custom content to work properly, such as road mods, parking mods, or pose mods.
    • Having some compatibility and performance issues, and potentially causing bugs, glitches, or errors.
    • Having some update and patch delays, and potentially causing some content or feature discrepancies.
    • Having some gameplay and logic differences, and potentially causing some inconsistencies or conflicts.

    You might also be interested in the following game, Mods: Genshin Impact Mods and Spider-man Miles Morales Mods. We appreciate your interest in our website! Make Gameempress.com your go-to site for gaming information.
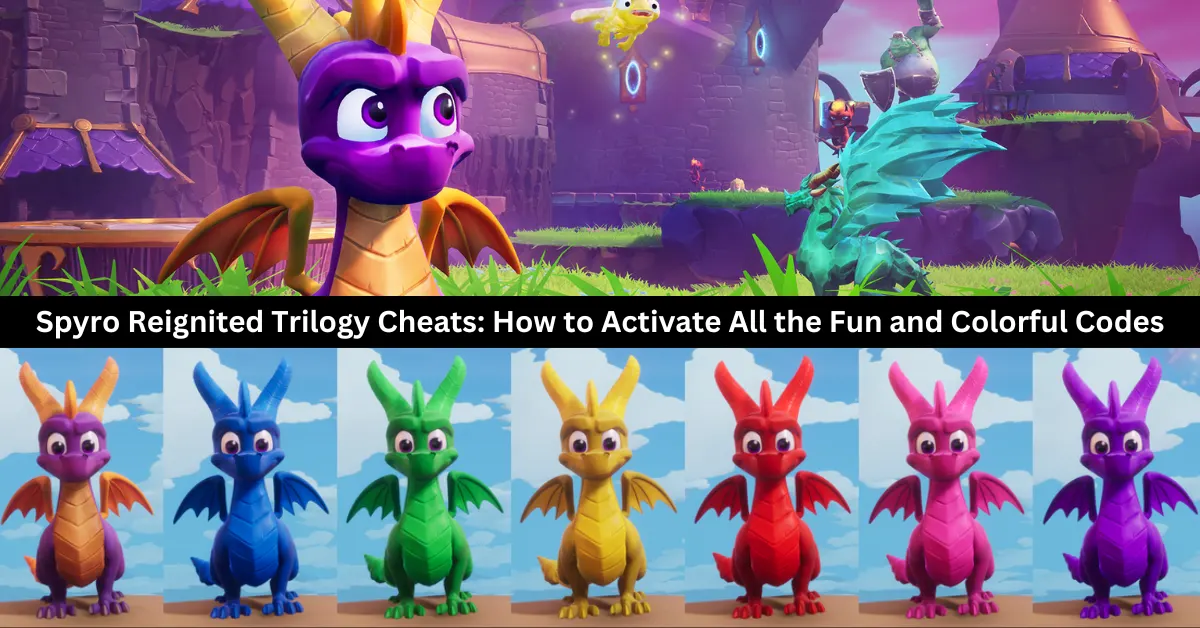
  • Spyro Reignited Trilogy Cheats: How to Activate All the Fun and Colorful Codes

    Spyro Reignited Trilogy Cheats: How to Activate All the Fun and Colorful Codes

    In contemporary gaming, cheat codes are as storied as they are underutilized. The “Konami Code” is well-known, and many independent games—like Infernax—continue to reference it. Nonetheless, cheat codes have largely become obsolete, so it’s surprising to see a contemporary, high-budget film include them. Let us introduce Spyro (who is not the Dragonfly, far from it…).

    Spyro Cheat codes have always existed for The Dragon, so when Spyro brought them with him to his fantastic remaster, the Reignited Trilogy, gamers everywhere celebrated. Furthermore, the game now has even more cheats, making it a haven for the long-lost skill of playing about.

    How to Activate Spyro Reignited Trilogy Cheats?

    All you need to do to enable cheats is enter the code in the Pause Menu. You only need to enter the code twice to disable a cheat. With the exception of Super Flame, which needs you to unlock the hack in-game, all of the codes listed below can be used without any unlock requirements.

    You must gather 10,000 Gems and 64 Orbs during a single playthrough of Ripto’s Rage in order to be able to trigger Super Flame, which is only available in that game.

    Spyro Reignited Trilogy Cheats for Code PS4

    Cosmetics

    Cheat Code
    Big Head Mode Up, Up. Up, Up, R1, R1, R1, R1, Cirlce
    Black Spyro Up, Left, Down, Right, Up, Square, R1, R2, L1, L2, Up, Right, Down, Left, Up, Down
    Black Sunglasses R1, R1, R1, R1, Left, Left, Left, Left, Down, Up, Triangle
    Blue Spyro Up, Left, Down, Right, Up, Square, R1, R2, L1, L2, Up, Right, Down, Left, Up, Cross
    Flat Spyro Left, Right, Left, Right, L2, R2, L2, R2, Square
    Green Spyro Up, Left, Down, Right, Up, Square, R1, R2, L1, L2, Up, Right, Down, Left, Up, Triangle
    Pink Spyro Up, Left, Down, Right, Up, Square, R1, R2, L1, L2, Up, Right, Down, Left, Up, Square
    Purple Spyro Up, Left, Down, Right, Up, Square, R1, R2, L1, L2, Up, Right, Down, Left, Up, Right
    Red Spyro Up, Left, Down, Right, Up, Square, R1, R2, L1, L2, Up, Right, Down, Left, Up, Circle
    Retro Spyro L1, L1, L1, L1, Up, Down, Up, Down, Up, Down, Triangle
    Small Head Mode Right, Right, Right, Right, R1, L1, Left, Left, Left, Left, Cross
    Tiny Wings Left, Left, Left, Left, L1, R1, Right, Right, Right, Right, Cross
    Yellow Spyro Up, Left, Down, Right, Up, Square, R1, R2, L1, L2, Up, Right, Down, Left, Up, Up
    Squid Skateboard (Year Of The Dragon) Up, Up, Left, Left, Right, Right, Down, Down, Square, Square, Circle

    Mechanics

    Cheat Code
    99-Lives R2, L2, R2, L2, Up, Up, Up, Up, O
    Super Flame (Ripto’s Rage) L1, L1, L1, L1, Up, Down, Up, Down, Up, Down, Triangle

    Spyro Reignited Trilogy Cheats Code for PC

    spyro reignited trilogy cheats

    Cosmetics

    Cheat Code
    Big Head Mode W, W, W, W, E, E, E, E, Left Click
    Black Spyro W, A, S, D, W, Left Click, E, 3, Q, 1, W, D, S, A, W, S
    Black Sunglasses E, E, E, E, A, A, A, A, S, W, F
    Blue Spyro W, A, S, D, W, Left Click, E, 3, Q, 1, W, D, S, A, W, Space
    Flat Spyro A, D, A, D, 1, 3, 1, 3, Right Click
    Green Spyro W, A, S, D, W, Left Click, E, 3, Q, 1, W, D, S, A, W, F
    Pink Spyro W, A, S, D, W, Left Click, E, 3, Q, 1, W, D, S, A, W, Right Click
    Purple Spyro W, A, S, D, W, Left Click, E, 3, Q, 1, W, D, S, A, W, D
    Red Spyro W, A, S, D, W, Left Click, E, 3, Q, 1, W, D, S, A, W, Left Click
    Retro Spyro LB, LB, LB, LB, Up, Down, Up, Down, Up, Down, Y
    Small Head Mode D, D, D, D, E, Q, A, A, A, A, Space
    Tiny Wings A, A, A, A, Q, E, D, D, D, D, Space
    Yellow Spyro W, A, S, D, W, Left Click, E, 3, Q, 1, W, D, S, A, W, W
    Squid Skateboard (Year Of The Dragon) W, W, A, A, D, D, Right Click, Right Click, Left Click

    Mechanics

    Cheat Code
    99-Lives 3, 1, 3, 1, W, W, W, W, Left Click
    Super Flame (Ripto’s Rage) A, D, A, D, E, E, E, E, Right Click

    Spyro Reignited Trilogy Cheats Code for Switch

    Cosmetics

    Cheat Code
    Big Head Mode Up, Up, Up, Up, RB, RB, RB, RB, A
    Black Spyro Up, Left, Down, Right, Up, Y, R, ZR, LB, ZL, Up, Right, Down, Left, Up, Down
    Black Sunglasses RB, RB, RB, RB, Left, Left, Left, Left, Down, Up, X
    Blue Spyro Up, Left, Down, Right, Up, Y, RB, ZR, L, ZL, Up, Right, Down, Left, Up, B
    Flat Spyro Left, Right, Left, Right, ZL, ZR, ZL, ZR, Y
    Green Spyro Up, Left, Down, Right, Up, Y, RB, ZR, L, ZL, Up, Right, Down, Left, Up, X
    Pink Spyro Up, Left, Down, Right, Up, Y, R, ZR, LB, ZL, Up, Right, Down, Left, Up, Y
    Pride Glasses (Switch Only) RB, RB, RB, RB, Left, Left, Left, Left, Down, Up, Y
    Purple Spyro Up, Left, Down, Right, Up, Y, R, ZR, LB, ZL, Up, Right, Down, Left, Up, Right
    Red Spyro Up, Left, Down, Right, Up, Y, R, ZR, LB, ZL, Up, Right, Down, Left, Up, A
    Retro Spyro LB, LB, LB, LB, Up, Down, Up, Down, Up, Down, X
    Small Head Mode Right, Right, Right, Right, RB, LB, Left, Left, Left, Left, B
    Tiny Wings Left, Left, Left, Left, LB, RB, Right, Right, Right, B
    Yellow Spyro Up, Left, Down, Right, Up, Y, RB, ZR, L, ZL, Up, Right, Down, Left, Up, Up
    Squid Skateboard (Year Of The Dragon) Up, Up, Left, Left, Right, Right, Down, Down, Y, Y, A

    Mechanics

    Cheat Code
    99-Lives ZR, ZL, ZR, ZL, Up, Up, Up, Up, A
    Super Flame (Ripto’s Rage) LB, LB, LB, LB, Up, Down, Up, Down, Up, Down, X

    Spyro Reignited Trilogy Cheats Code for Xbox One

    Cosmetics

    Cheat Code
    Big Head Mode Up, Up, Up, Up, RB, RB, RB, RB, B
    Black Spyro RB, RB, RB, RB, Left, Left, Left, Left, Down, Up, Y
    Black Sunglasses R1, R1, R1, R1, Left, Left, Left, Left, Down, Up, Triangle
    Blue Spyro Up, Left, Down, Right, Up, X, RB, RT, LB, LT, Up, Right, Down, Left, Up, A
    Flat Spyro Left, Right, Left, Right, LT, RT, LT, RT, X
    Green Spyro Up, Left, Down, Right, Up, X, RB, RT, LB, LT, Up, Right, Down, Left, Up, Y
    Pink Spyro Up, Left, Down, Right, Up, X, RB, RT, LB, LT, Up, Right, Down, Left, Up, X
    Purple Spyro Up, Left, Down, Right, Up, X, RB, RT, LB, LT, Up, Right, Down, Left, Up, Right
    Red Spyro Up, Left, Down, Right, Up, X, RB, RT, LB, LT, Up, Right, Down, Left, Up, B
    Retro Spyro LB, LB, LB, LB, Up, Down, Up, Down, Up, Down, Y
    Small Head Mode Right, Right, Right, Right, RB, LB, Left, Left, Left, Left, A
    Tiny Wings Left, Left, Left, Left, LB, RB, Right, Right, Right, A
    Yellow Spyro Up, Left, Down, Right, Up, X, RB, RT, LB, LT, Up, Right, Down, Left, Up, Down
    Squid Skateboard (Year Of The Dragon) Up, Up, Left, Left, Right, Right, Down, Down, X, X, B

    Mechanics

    Cheat Code
    99-Lives RT, LT, RT, LT, Up, Up, Up, Up, B
    Super Flame (Ripto’s Rage) LB, LB, LB, LB, Up, Down, Up, Down, Up, Down, Y

    You might also be interested in the following game, Cheats: NBA Street Vol 2 Cheats and Pokemon Moon Black 2 Cheats. We appreciate your interest in our website! Make Gameempress your go-to site for gaming information.

  • Is Warframe Crossplay? Unite Your Tenno Across Galaxies!

    Is Warframe Crossplay? Unite Your Tenno Across Galaxies!

    Warframe is a free-to-play sci-fi action game that lets you play as a space ninja in a vast and evolving universe. The game has been available on PC, PlayStation, Xbox, and Nintendo Switch for years, but until recently, players on different platforms could not play together.

    However, that has changed with the introduction of the crossplay feature, which allows players to join forces and enjoy the game across different devices. In this article, we will explain what crossplay is, how to enable it, and what are the benefits and limitations of the feature.

    Is Warframe Crossplay?

    Warframe has cross-play functionality as of December 2022. Digital Extremes has now launched the feature across PC, Xbox, PlayStation, and Nintendo Switch after extensive testing across many platforms.

    How to Enable Crossplay in Warframe?

    To enable crossplay in Warframe, players need to have a Warframe account and link it to their platform account. For example, if you play on PlayStation, you need to link your Warframe account to your PlayStation Network account.

    Once you have linked your accounts, you can enable cross-play in the game’s settings menu. You can toggle the “Crossplay” option on or off, depending on your preference. You can also choose to enable or disable crossplay chat, which allows you to communicate with other players on different platforms.

    When crossplay is enabled, you can join or invite other players to your squad, regardless of their platform. You can also use the public matchmaking feature to find other players to play with. You can identify the platform of other players by the icon next to their name. For example, a PC player will have a mouse icon, while a PlayStation player will have a PS logo.

    You might also like to know about if these other games are cross-platform or not:

    What Are the Benefits and Limitations of Crossplay in Warframe?

    Crossplay in Warframe has many benefits and advantages, such as:

    • Expanding the player base and the community, and making it easier to find and play with other players.
    • Enhancing the gameplay experience and the variety, and allowing players to enjoy the game’s content and features on different devices.
    • Preserving the progress and continuity, and allowing players to switch between platforms without losing their data or items.

    However, crossplay in Warframe also has some limitations and challenges, such as:

    • Requiring a stable and fast internet connection, and potentially causing lag, latency, or disconnect issues.
    • Having some compatibility and performance differences, and potentially causing bugs, glitches, or errors.
    • Having some update and patch delays, and potentially causing some content or feature discrepancies.

    Therefore, players should use crossplay in Warframe at their discretion and responsibility, and be aware of the possible outcomes.

    They should also report any issues or feedback to the developer, and help improve the feature. Crossplay in Warframe is a great addition to the game and a testament to the developer’s vision and commitment.

    We appreciate your interest in our website! Make Gameempress.com your go-to site for gaming information.
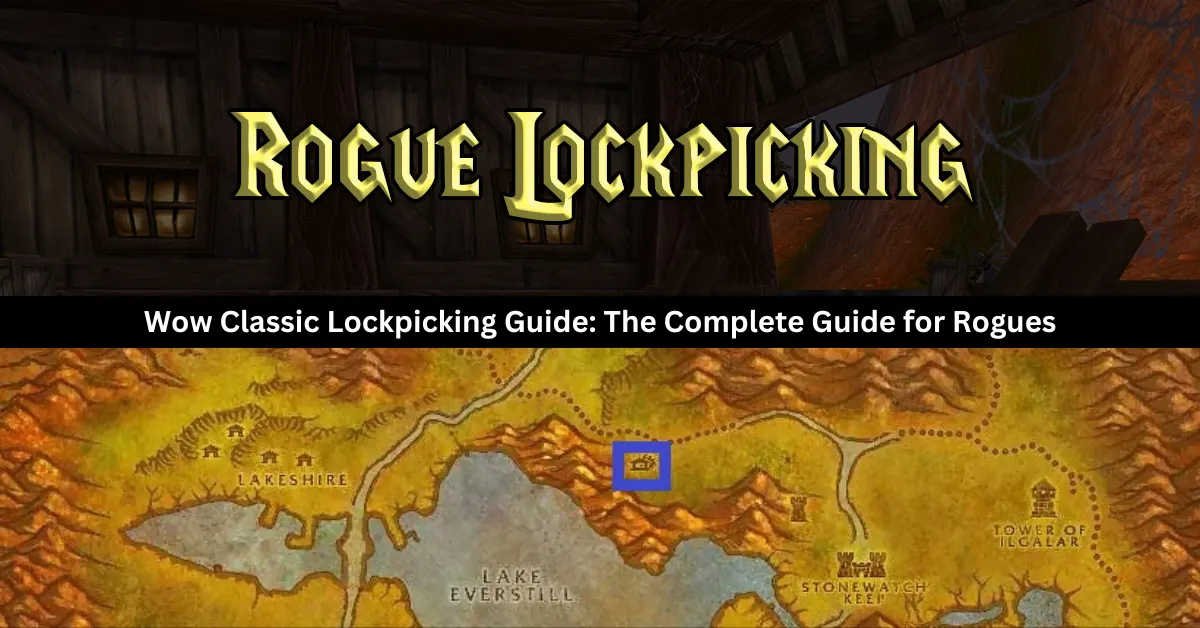
  • Wow Classic Lockpicking Guide: The Complete Guide for Rogues

    Wow Classic Lockpicking Guide: The Complete Guide for Rogues

    Greetings, buddy! Once more, it’s that time. It’s time to go deeper into drafting the new Magic set and explore. Therefore, you will find material in our Lost Caverns of Ixalan Draft Guide that will aid in your understanding of this draft format. I hope it leads to more victories.

    As a frequent reader, you are aware of what to anticipate. If not, then welcome! Here’s what to anticipate. An overview of all mechanics is given first. You will discover how they function and impact the format. The best commons come next. Throughout your drafts, you’ll see a lot of these cards. The types of decks you can draft are listed in the archetype overview.

    In this guide, we will show you how to level up your lockpicking skill from 1 to 300, as well as some tips and tricks to make the most of your lockpicking ability.

    How to Learn Lockpicking?

    To learn lockpicking, you need to be a rogue and complete a class-specific quest at level 16. The quest is different for each faction, but it will teach you the basics of lockpicking and give you a set of Thieves’ Tools, which you need to carry with you at all times to pick locks.

    • For Alliance rogues, the quest is Redridge Rendezvous, given by Lucius in Lakeshire. He will send you to a mill near Alther’s Mill, where you will find some Practice Lockboxes to pick. After that, you will have to go to Lake Everstill and pick up some Waterlogged Footlockers.
    • For Horde rogues, the quest is Mission: Possible But Not Probable, given by Taskmaster Fizzule in the Barrens. He will send you to a ship near Ratchet, where you will find some Buccaneer’s Strongboxes to pick. After that, you will have to go to Zoram Strand in Ashenvale and pick some Waterlogged Footlockers.

    Once you complete the quest, you will be able to pick locks up to a skill level of 100.

    Lockpicking Tips and Tricks

    • Your character’s level multiplied by five will be your lockpicking skill cap level. At level 30, you can unlock Lockpicking at level 150.
    • Pick Pocket all humans you come across when moving covertly between lockbox sites in a zone. You’ll receive junk boxes as a result, which you can open to get quick skill points.
    • Invest in some dark leather gloves! These will provide you a 5-point boost in your lockpicking talent, which can be very useful in enabling you to relocate to a new location if you don’t quite match the requirements.
    • In order to pick locks successfully, you’ll need your Thieves’ Tools. They’ll be yours to find during your Lockpicking adventure. To truly pick locks, carry them with you at all times.
    • Opening boxes for other players is a great method to make friends and allies when lockpicking. Although many players will gladly give you a gratuity, there are occasions when you can charge for your services.
    • Use Sap and Distract to avoid engaging in fights and to make pickpocketing considerably easier. Remember that in the event that you are discovered, you may always utilize Vanish.

    How to Raising Skill Level in Lockpicking?

    wow classic lockpicking guide

    1-110

    Rogue Lockpicking Quest (Level 16)

    Alliance

    Redridge Mountains: Inside the mill, you can locate Practice Lockboxes to pick. Once your skill level reaches approximately 70, proceed to Lake Everstill and pick the locks on the Waterlogged Footlocker located there. Select the soggy shoe lockers until they turn gray, and stop granting you further skill points. At this point, you ought to be at 110 Lockpicking.

    Horde

    The Barrens/Ashenvale Forest: Go through the front side of the ship. Locate the room containing Buccaneer’s Strongbox by going below deck. After leveling up to about 70, pick up the strongboxes and proceed to Ashenvale’s Zoram Strand to find Waterlogged Footlocker. You should be at about 110 when you pick these lockboxes till they turn gray and stop increasing your skill.

    Neutral

    Stonetalon Mountains:  As an alternative, you could go to Stonetalon Mountains and search Windshear Crag for the Battered Footlocker if you have attained 70 Lockpicking. These will get you from about 70 to 110 and are about the same skill level as any of the faction’s other places for that skill level.

    110-150

    Stonetalon Mountains: The easiest way to advance to the next level of training is to practice lockpicking in Windshear Crag in the Stonetalon Mountains. Windshear Mine is located directly southeast of the Crag proper. In actuality, the Battered Footlockers here are more skilled than those outdoors on the crag.

    Hillsbrad Foothills: The higher-level Battered Footlocker is also located in Durnholde Keep, both in the upper and lower levels.

    The Wetlands: Many Broken Footlockers may be found in the Murloc camps northeast of Menethil Harbor; these will demand a Lockpicking level of 110. The ones outside the camps are of a lesser skill level and will develop your lockpicking talent more slowly than the ones inside the camps, so if you’re training at this level, be sure to concentrate on them instead.

    Pick the Battered Footlockers’ locks at these three places until you gain no more experience by doing so. You should now be in the neighborhood of 150.

    150-200

    Desolace: Many waterlogged footlockers can be found beneath the waves in the seas of Sar’theris Strand on the shore of the Veiled Sea. While there are a lot of gangs and you are underwater, you have to be careful not to drown, this is the greatest place to level up your lockpicking skills.

    If you stay here until the boxes are just green or gray to you, you will probably be far over 200 in lockpicking. Nevertheless, you should continue picking locks here until you are at least over 170 in skill.

    The Temple of  Atal’Hakkar Swamp of Sorrows: As an alternative, you could go to the Temple of Atal’Hakkar and pick the locks on the Mossy Footlockers after you achieve 175 Lockpicking kills. They will assist you in reaching 200.

    Angor Fortress, Badlands: A much more practical, though occasionally less successful, approach is to travel to Angor Fortress in the Badlands. Head upstairs and open the Battered Footlocker from 150–175 Lockpicking. To reach 200 Lockpicking, go back down and open the Dented Footlocker once you reach 175.

    Because they are so close together, most players come here at this point just out of convenience, even if these lockboxes occasionally don’t award skill points for being picked.

    200-250

    The Slag Pits, Searing Gorge: Explore every inch of The Slag Pits in search of Dented Footlocker. Pickpocket, anytime you can to gather Sturdy Junkboxes while you’re hunting for them. You won’t be able to unlock the boxes you discover up there unless you are at least 225 Lockpicking, so stay away from the upper levels. Until you achieve 250 Lockpicking, keep doing this.

    Azshara: As an alternative to the second part of the above, you can head to Azshara after you’ve earned Lockpicking level 225. There, you’ll find Mossy Footlockers scattered across the shoreline areas, which will let you reach the remaining level of 250. For individuals looking to improve their lockpicking skills rapidly, this is not as recommended as the Slag Pits due to its lack of convenience.

    Tanaris: It is likewise not advised for those who are looking for efficiency and speed to pick up the Dented Footlockers on the shore east of the Caverns of Time, as they are essentially the same as those in the gorge. However, if you are in Tanaris and have a Lockpicking score of at least 225, this might be considerably simpler for you.

    250-280

    Tyr’s Hand, Eastern Plaguelands: In Tyr’s Hand, look for the Scarlet Footlocker. While you’re moving between box locations, be careful to pickpocket. You can begin unlocking your previous boxes to earn some easy points after you level 280 Lockpicking.

    280-300

    Blackrock Depths: The final section is extremely simple. Just enter Blackrock Depths, the dungeon, and turn left. Select the lock on the door that is visible. Open the door, and you see there as well when you get the chance to make a right.

    Proceed to the left and open the first door you come across. Once all three doors are unlocked, exit the dungeon using the same route you entered. After you’ve done it five times, you should probably take a break to allow your instance counter to reset. Otherwise, reset it and repeat.

    If you are interested in knowing more articles related to other games, you can check God of War Ragnarok DLC Release Date and Alone In The Dark Release Date Confirmed. We appreciate your interest in our website! Make Gameempress your go-to site for gaming information.
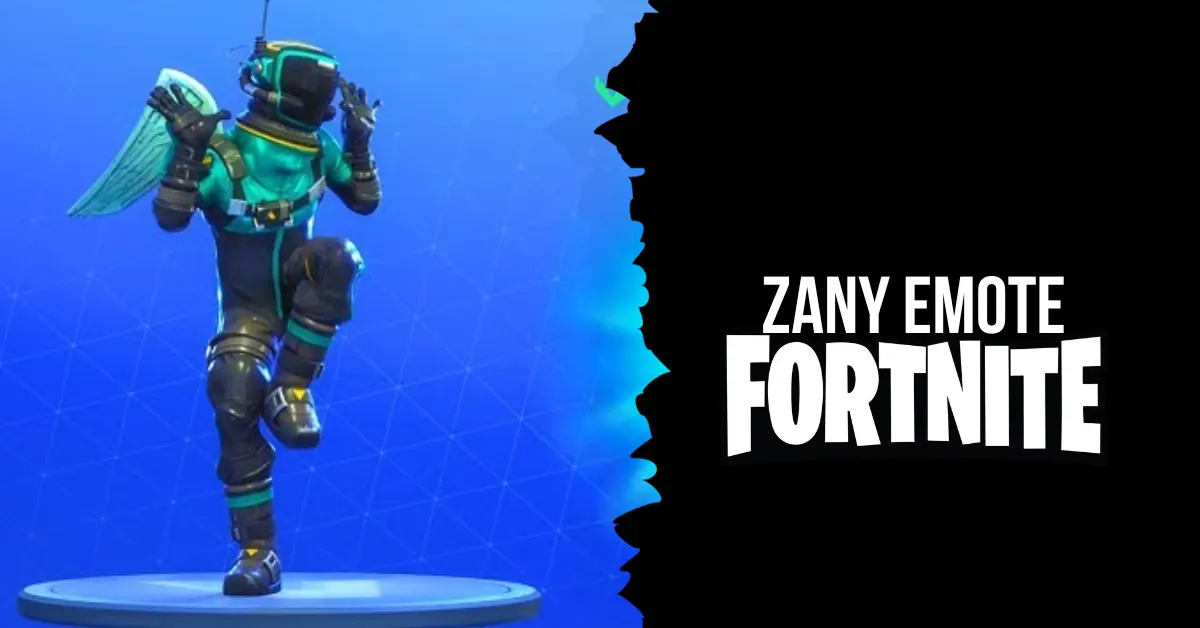
  • Zany Emote Fortnite: How to Get and Use the Viral Dance Move

    Zany Emote Fortnite: How to Get and Use the Viral Dance Move

    One of the most played shooters to date is Fortnite Battle Royale. Fans also love how many personalization choices it offers. You can wear a variety of Outfits, including ones inspired by pop culture and Fortnite originals.

    Your Glider, Pickaxe, and Back Bling can all have their appearances changed with hundreds of possible combinations. Not to be overlooked are the Emotes and the enduringly well-liked Fortnite dances. In relation to emotes, we will discuss the Zany Emote in Fortnite today, including its description and how you obtain it. Continue reading.

    What is the Zany Emote?

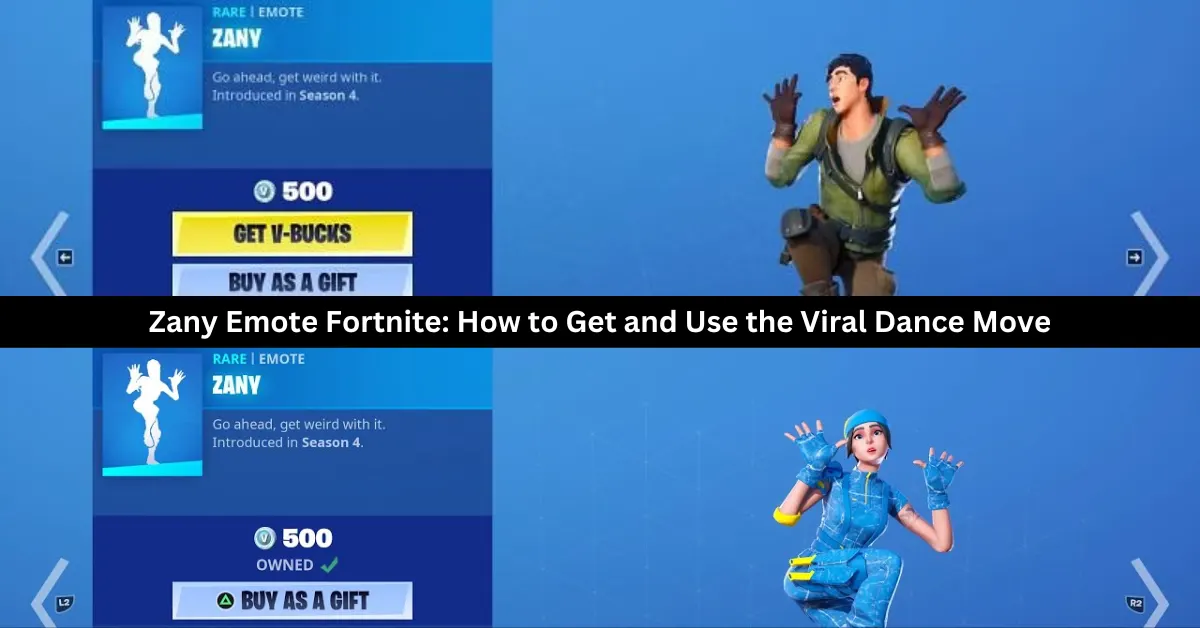
    In Fortnite, Zany is a Rare Emote. For 500 V-Bucks, you can buy it separately. It is largely modeled off the dance from El Chombo’s “Dame Tu Cosita” music video. It might be removed entirely at some point because, as far as we know, the original author did not grant permission for Fortnite’s cosmetics to utilize his movie. Thus, this might be your only opportunity to own this dance.

    How to Get Zany Emote in Fortnite?

    zany emote fortnite

    On December 21, you may buy the Zany Emote from Fortnite’s Item Shop. Navigate to the top of the screen from the game’s main menu to find the shop tab. When you click on it, Zany Emote may be easily found within the current selection of cosmetics. It requires 500 V-Bucks to be reserved.

    We don’t know if the Emote will still be available in the shop after today because Fortnite’s marketplace rotates. If you want to get Zany for yourself, act quickly because it’s better to be safe than sorry. Likely, the item won’t be there tomorrow because the things in the shop change every day.

    How to Use the Zany Emote?

    Players need to equip the Zany emote in their locker before entering a match to use it. Once in the game, players can access their emote wheel by pressing the D-pad on consoles, B on PC, or tapping the screen on mobile devices. Then, they can select the Zany emote and watch their character dance. The Zany emote can be used in any game mode, such as Battle Royale, Save the World, or Creative.

    Why Use the Zany Emote?

    The Zany emote is a fun and humorous way to show off your personality and style in Fortnite. The emote can be used to celebrate a victory, taunt an enemy, or have a good time with your friends. The Zany emote is also a rare emote, which means that not many players have it, making it more exclusive and desirable. The Zany emote is a perfect choice for players who want to go ahead and get weird with it.

    We have more Fortnite articles, so check out Ragsy Fortnite: How To Get And Use The Spooky Cuddle Team Leader Skin? and Solid Snake Fortnite Skin: The Ultimate Crossover For Metal Gear And Fortnite Fans! Stay up to date with GameEmpress for the most recent gaming news and guides.
  • Mortal Kombat 11 Krypt Guide: What Are the Benefits of Finding Important Objects?

    Mortal Kombat 11 Krypt Guide: What Are the Benefits of Finding Important Objects?

    You’ll be spending a lot of time in the game’s Krypt after finishing the main mode of Mortal Kombat 11 and its Aftermath DLC, as well as making it through Classic Towers and Towers of Time. Many of the game’s customizable items and gear are located in this third-person exploring section, and if they’re available here, they won’t be in the other modes.

    When you first start, the Krypt can be confusing because it’s full of puzzles, secret tunnels, and different kinds of chests. However, with the help of our Mortal Kombat 11 Krypt guide, you can sort through everything and obtain the gear of your dreams.

    How Does Krypt Work?

    You are tasked with gathering as much treasure as you can afford from the vast dungeon that is the Mortal Kombat 11 Krypt. Chests that can be opened with the Koins currency you’ve been accumulating throughout your play through the game’s different modes may be found running along the walls and in the center of almost every region you visit.

    The worth of the goods within a chest determines how much it costs to open it in the Krypt. Smaller stuff like development art or music can be found in a chest priced at 2,000 Koins, whereas character-specific gear, augmentation items, or skins can be found in chests priced at or above 8,000 Koins.

    More about it later.) and by creating new routes in the Krypt. However, returning to the Towers and engaging in combat with adversaries is the main means to obtain additional Koins. Hearts and Soul Fragments are the other two currencies found in the Krypt.

    The frightening mask atop rare chests indicates which ones require hearts to open. You can spend 250 Hearts to unlock the contents after smashing this. These hold some of the greatest rewards in the whole game, including multiple character customization items.

    You can use Scorpion’s Spear to destroy the dead that is located hanging in the Krypt itself and perform Fatalities during matches to earn Hearts. You’ll start finding green Soul Chests shortly after you start the Krypt, and you can use Soul Fragments to access them.

    These are earned by playing regular games and sometimes by finishing specific objectives in the Krypt, but you can’t use them to access Soul Chests until you’ve obtained Ermac’s Soul Amulet. They won’t affect you until you’ve gone farther into the Krypt.

    What Are the Benefits of Finding Important Objects in the Krypt?

    mortal kombat 11 krypt guide

    A large portion of your progress in the Krypt is dependent on important objects strewn over the large terrain. These have different purposes, but they’re all related to enabling you to keep going to new places and getting better equipment.

    The most significant things you’ll find are listed below, along with what they enable you to accomplish. They are arranged according to when you should buy them.

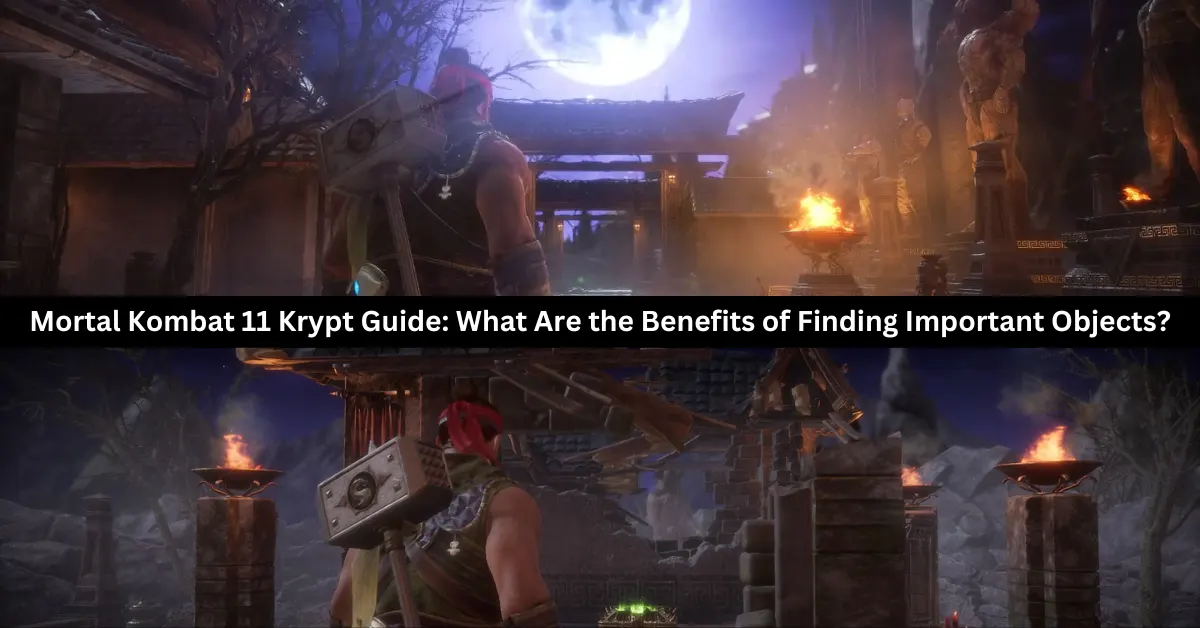
    Shao Kahn’s Hammer

    Shao Kahn’s Hammer is there in front of you as soon as you enter the Krypt, making it hard to overlook. You’ll need to demolish broken doors and walls with the hammer, which is located in the same chamber. As you advance, you must search for damaged places since, frequently, huge rooms full of riches can be found behind them.

    Additionally, you can break down skeletons and pots strewn about the Krypt with Shao Kahn’s Hammer. You will receive a meager quantity of Koins in return for this, but it is so insignificant that it won’t have much of an impact on the number of chests you may open.

    Gem of the Living and Cracked Horn of the Motaro

    You’ll need the Gem of the Living, a unique artifact, to advance farther into the Krypt and reach Goro’s lair, which holds some of the best loot in the entire game. Once you’re in the open space, walk toward the center and then north until you come to a section where multiple character sculptures are located.

    If you move forward, the Raiden statue will be destroyed by a meteorite. To obtain the Gem of the Living, strike the meteorite with your hammer. In order to advance farther into the Krypt, you’ll also need the Cracked Horn of the Motaro, which you can only obtain once you’ve obtained the Gem of the Living.

    To enter the subterranean section and open a door close to Kronika’s Time Vault, use the Gem of the Living. Inside, there is an unlockable gate where you can discover the horn. You can enter Goro’s Lair Door on the western side of the outdoor area by using the horn.

    Ermac’s Soul Amulet

    To open the annoying green glowing Soul Chests you’ve been seeing all around the Krypt, you’ll need this item. Once you’ve entered Goro’s Lair, keep going until you come to a large hall with a banquet area and a statue in front.

    Proceed and use the steps to stroll around the outside. In the front-right corner, you will find a chain that you may pull to unlock a gate. Proceed in this manner, find him in the chamber, and watch as a cutscene of a man being impaled appears.

    Now that he possesses Ermac’s Soul Amulet, those chests can be opened. Certain new paths can also be unlocked with Ermac’s Soul Amulet. For the first time, you’ll use it to get out of the rock-filled cavern where you discovered the amulet.

    Spear of Hanzo Hasahi (Scorpion’s Spear)

    Scorpion’s Spear is also located within Goro’s Lair, but you’ll need to go to the southeast section’s Armory area to find it. Once you’re in this region, keep looking until you come across a vertical line that is blazing and runs along a pillar. To pull the spear and equip it, interact with it.

    Scorpion’s Spear can be used to interact with several environmental items, such as drawbridges if you have it. But the spear’s primary function is to bring down any bodies that may be dangling above your location. These are destroyed and typically hold the hearts needed to access the priceless chests in the Krypt.

    The Forge

    Occasionally, while opening chests, you’ll come across materials that aren’t meant for customization or to open up new routes; these are referred to as “Forge Items” and are located on their own page in the Krypt menu.

    They will be useless to you at the beginning of your stay in the Krypt, but soon you will find a gong that you can hit with a hammer to open the route to the Forge. The Forge is a scary place with flames behind it, but you can produce rewards by feeding it items you’ve collected.

    The materials you add determine the benefits you receive, but if you add the incorrect resources, you might not receive anything at all from the Forge. Don’t try it again if you toss in three items and it doesn’t work; you’ll get the same outcome each time.

    To create anything, the Forge requires not only resources but also money. Before you put materials into the forge, make sure their combination will yield anything useful. This can come in the form of Koins, Soul Fragments, and Hearts.

    Discover how Hogwarts Legacy ads have taken over Mortal Kombat 11 in the gaming realm on GameEmpress: Mortal Kombat 11 Taken Over with Hogwarts Legacy Ads. Stay up-to-date with the top news, PC requirements, and available gameplay for Mortal Kombat 11 on GameEmpress: Mortal Kombat 11 Top News, PC Requirements, and Available Gameplay. Stay connected with GameEmpress to get the latest news and guides about the gaming world.

  • The Witcher 3 Wild Hunt PC Requirements: How To Run The Award-Winning RPG?

    The Witcher 3 Wild Hunt PC Requirements: How To Run The Award-Winning RPG?

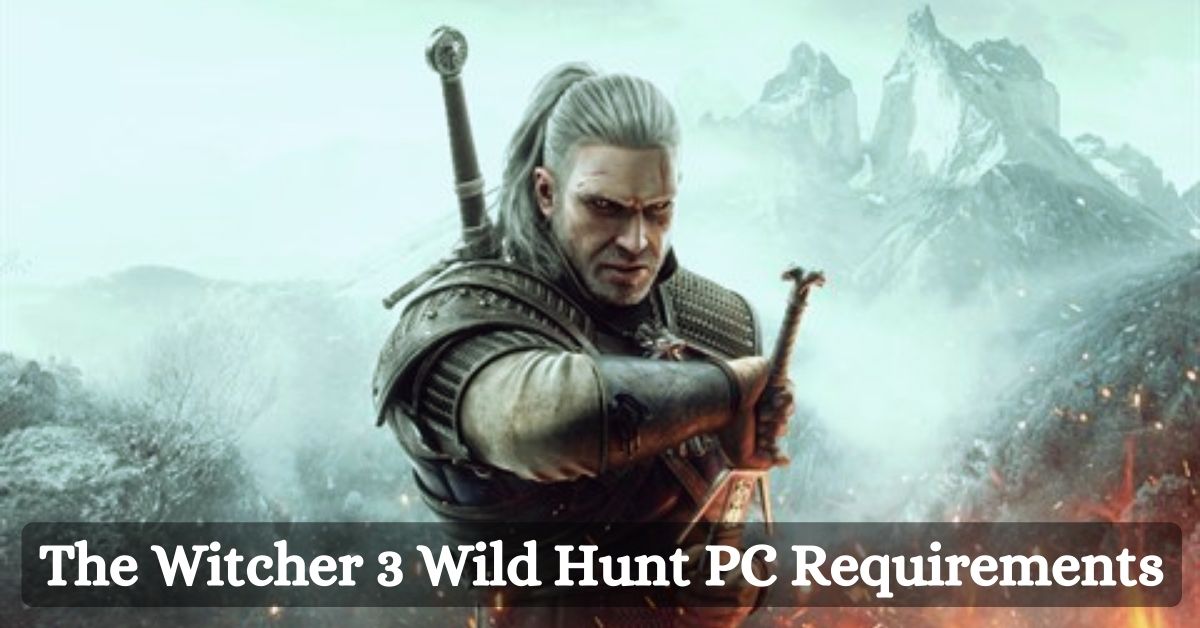
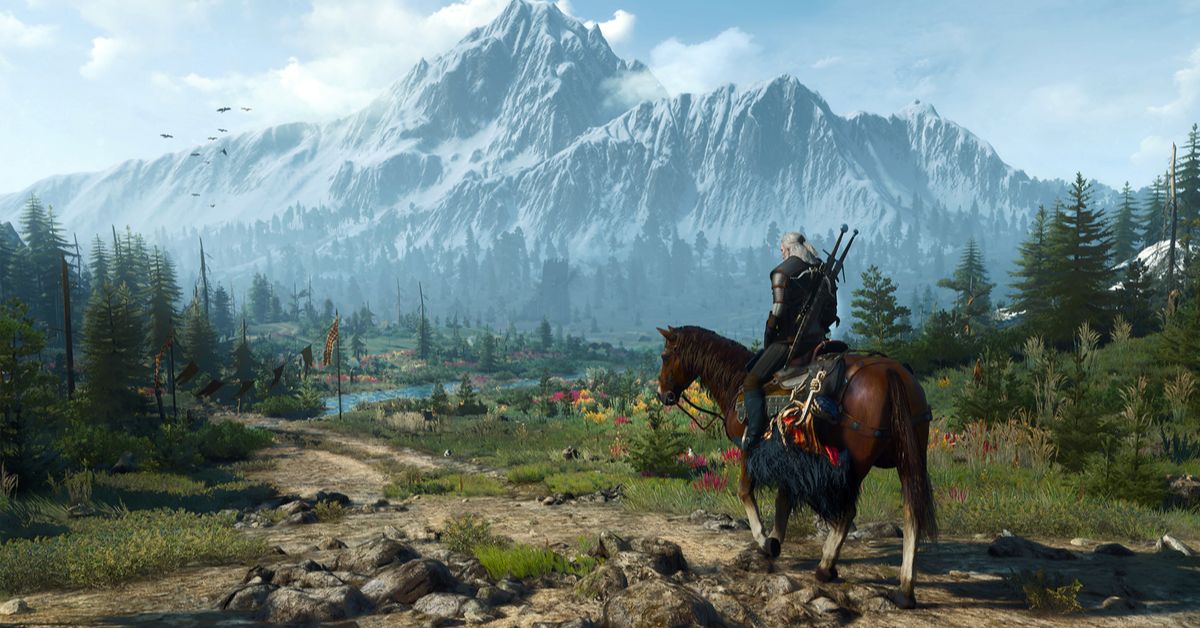
    The Witcher 3: Wild Hunt is a role-playing game that was released in 2015 by CD Projekt Red, the developers of the Cyberpunk 2077 and the Gwent card game. The game is based on fantasy novels by Andrzej Sapkowski, and it follows the story of Geralt of Rivia, a monster hunter who searches for his missing adopted daughter in a war-torn world.

    The game features an open-world environment, dynamic combat, branching storylines, and multiple endings.

    The game is available for Windows PC, PlayStation 4, Xbox One, and Nintendo Switch, and it supports cross-save between PC and Switch. The game also received a free next-gen update in 2022, which improved the graphics, performance, and features of the game, such as adding ray tracing and 4K resolution.

    However, to run the game smoothly and enjoy its full potential, players need to meet the game’s system requirements, which are not very low. In this article, we will provide you with the minimum, recommended, and optimal PC requirements for The Witcher 3: Wild Hunt, as well as some tips and tricks to optimize your performance and FPS.

    The Witcher 3 Wild Hunt PC Requirements

    The Witcher 3
    The Witcher 3

    Minimum PC Requirements

    According to the official website, the minimum PC requirements for The Witcher 3: Wild Hunt are as follows:

    • OS: 64-bit Windows 7, 64-bit Windows 8 (8.1) or 64-bit Windows 10
    • Processor: Intel CPU Core i5-2500K 3.3GHz or AMD A10-5800K APU (3.8GHz)
    • Memory: 6 GB RAM
    • Graphics: Nvidia GPU GeForce GTX 660 or AMD GPU Radeon HD 7870
    • DirectX: Version 11
    • Storage: 50 GB available space

    These are the minimum requirements to run the game at low settings and 1080p resolution, with an average of 30 FPS. However, these requirements may not be enough to handle the game’s high level of detail and action, especially during the boss fights and the cinematic scenes.

    Therefore, we recommend upgrading your PC to meet the recommended or optimal requirements, or at least the high-end requirements, which are slightly higher than the minimum.

    Recommended PC Requirements

    According to the official website, the recommended PC requirements for The Witcher 3: Wild Hunt are as follows:

    • OS: 64-bit Windows 7, 64-bit Windows 8 (8.1) or 64-bit Windows 10
    • Processor: Intel CPU Core i7-3770 3.4GHz or AMD CPU AMD FX-8350 4GHz
    • Memory: 8 GB RAM
    • Graphics: Nvidia GPU GeForce GTX 770 or AMD GPU Radeon R9 290
    • DirectX: Version 11
    • Storage: 50 GB available space

    These are the recommended requirements to run the game at medium settings and 1440p resolution, with an average of 60 FPS. These requirements will ensure a smooth and stable gameplay experience, with minimal lag, glitches, or crashes.

    However, these requirements may not be enough to achieve the highest possible FPS and the best possible graphics, especially if you have a high-end monitor or a competitive preference. Therefore, we suggest upgrading your PC to meet the optimal or high-end requirements, which are the highest possible requirements for the game.

    Optimal PC Requirements

    The optimal PC requirements for The Witcher 3: Wild Hunt are not officially stated by the developers, but we have estimated them based on the game’s features and performance. The optimal PC requirements for The Witcher 3: Wild Hunt are as follows:

    • OS: 64-bit Windows 10/11
    • Processor: Intel Core i7-9700K or AMD Ryzen 7 3700X
    • Memory: 16 GB RAM
    • Graphics: Nvidia RTX 3070 or AMD Radeon RX 6700 XT
    • DirectX: Version 12
    • Storage: 50 GB available space (SSD recommended)

    These are the optimal requirements to run the game at high settings and 4K resolution, with an average of 120 FPS. These requirements will ensure the best possible gameplay experience, with stunning graphics, realistic physics, and immersive sound.

    However, these requirements are very high and expensive, and they may not be necessary for most players unless they have a very powerful PC and a very demanding preference.

    Tips and Tricks to Optimize Your Performance and FPS

    If you want to optimize your performance and FPS in The Witcher 3: Wild Hunt, you can try some of these tips and tricks:

    • Update your drivers and software. Make sure that your drivers and software are up to date, especially your graphics card driver, your Windows 10/11 update, and your DirectX version. This will help you avoid compatibility issues and improve your performance and stability.
    • Adjust your graphics settings. You can tweak your graphics settings in the game’s menu, to find the best balance between quality and performance. You can lower some of the settings that have a high impact on your FPS, such as shadows, textures, anti-aliasing, and post-processing. You can also use the FPS counter and the benchmark tool in the game, to test your FPS and find the optimal settings for your PC.
    • Change your resolution and FOV. You can change your resolution and FOV (field of view) in the game’s menu, to suit your preference and monitor. However, keep in mind that higher resolution and FOV will require more resources and lower your FPS, while lower resolution and FOV will reduce your quality and visibility. You can also use the fullscreen mode, rather than the windowed or borderless mode, to improve your performance and FPS.
    • Use an SSD instead of an HDD. If you have an SSD (solid state drive), you can install the game on it, rather than on an HDD (hard disk drive). This will help you reduce your loading times and improve your performance and stability. However, if you don’t have an SSD, you can still defragment your HDD and free up some space, to improve your performance and FPS.
    • Close unnecessary programs and background processes. You can close any unnecessary programs and background processes that are running on your PC, to free up some RAM and CPU usage. You can use the Task Manager or the System Configuration tool to check and close any programs and processes that are not essential for your game. This will help you improve your performance and FPS.

    This is everything you need to know about The Witcher 3 Wild Hunt PC Requirements. Additionally, you can check our guide on Forza Horizon 5 PC Requirements and Final Fantasy 7 Rebirth PC Requirements. Stay connected with GameEmpress.com to get the latest news and guides about the gaming world.

  • Forza Horizon 5 PC Requirements: How To Run The Open World Racing Game?

    Forza Horizon 5 PC Requirements: How To Run The Open World Racing Game?

    Forza Horizon 5 is the latest instalment in the popular Forza Horizon series, developed by Playground Games and published by Xbox Game Studios. The game is an open-world racing game that takes place in a vibrant and diverse representation of Mexico, featuring a variety of terrains, climates, and cultures.

    The game is available for Windows 10 PC, Xbox One, Xbox Series X|S, and Xbox Cloud Gaming, and it supports cross-play and cross-save between all platforms.

    The game is known for its stunning graphics, realistic physics, dynamic weather, and extensive customization, as well as its fun and immersive gameplay, featuring hundreds of cars, events, activities, and challenges.

    The game also features a new campaign mode, called Horizon Story, where players can explore the world and interact with different characters and factions, as well as a new creative mode, called Horizon Arcade, where players can create and share their own mini-games and challenges.

    However, to run the game smoothly and enjoy its full potential, players need to meet the game’s system requirements, which are not very low. In this article, we will provide you with the minimum, recommended, and optimal PC requirements for Forza Horizon 5, as well as some tips and tricks to optimize your performance and FPS.

    Forza Horizon 5 PC Requirements

    Minimum PC Requirements

    According to the official website, the minimum PC requirements for Forza Horizon 5 are as follows:

    • OS: Windows 10 version 15063.0 or higher
    • Processor: Intel Core i3-4170 or AMD FX-8350
    • Memory: 8 GB RAM
    • Graphics: NVIDIA GeForce GTX 760 or AMD Radeon RX 460
    • DirectX: Version 12
    • Storage: 110 GB available space

    These are the minimum requirements to run the game at low settings and 1080p resolution, with an average of 30 FPS. However, these requirements may not be enough to handle the game’s high level of detail and action, especially during the seasonal changes and the weather effects.

    Therefore, we recommend upgrading your PC to meet the recommended or optimal requirements, or at least the high-end requirements, which are slightly higher than the minimum.

    Recommended PC Requirements

    According to the official website, the recommended PC requirements for Forza Horizon 5 are as follows:

    • OS: Windows 10 version 15063.0 or higher
    • Processor: Intel Core i5-8400 or AMD Ryzen 5 2600
    • Memory: 16 GB RAM
    • Graphics: NVIDIA GeForce GTX 970 or AMD Radeon RX 590
    • DirectX: Version 12
    • Storage: 110 GB available space

    These are the recommended requirements to run the game at medium settings and 1440p resolution, with an average of 60 FPS. These requirements will ensure a smooth and stable gameplay experience, with minimal lag, glitches, or crashes.

    However, these requirements may not be enough to achieve the highest possible FPS and the best possible graphics, especially if you have a high-end monitor or a competitive preference. Therefore, we suggest upgrading your PC to meet the optimal or high-end requirements, which are the highest possible requirements for the game.

    Optimal PC Requirements

    The optimal PC requirements for Forza Horizon 5 are not officially stated by the developers, but we have estimated them based on the game’s features and performance. The optimal PC requirements for Forza Horizon 5 are as follows:

    • OS: Windows 10 version 15063.0 or higher
    • Processor: Intel Core i7-9700K or AMD Ryzen 7 3700X
    • Memory: 32 GB RAM
    • Graphics: NVIDIA GeForce RTX 2070 Super or AMD Radeon RX 5700 XT
    • DirectX: Version 12
    • Storage: 110 GB available space (SSD recommended)

    These are the optimal requirements to run the game at high settings and 4K resolution, with an average of 120 FPS. These requirements will ensure the best possible gameplay experience, with stunning graphics, realistic physics, and immersive sound.

    However, these requirements are very high and expensive, and they may not be necessary for most players, unless they have a very powerful PC and a very demanding preference.

    Tips and Tricks to Optimize Your Performance and FPS

    If you want to optimize your performance and FPS in Forza Horizon 5, you can try some of these tips and tricks:

    • Update your drivers and software. Make sure that your drivers and software are up to date, especially your graphics card driver, your Windows 10 update, and your DirectX version. This will help you avoid compatibility issues and improve your performance and stability.
    • Adjust your graphics settings. You can tweak your graphics settings in the game’s menu, to find the best balance between quality and performance. You can lower some of the settings that have a high impact on your FPS, such as shadows, textures, anti-aliasing, and post-processing. You can also use the FPS counter and the benchmark tool in the game, to test your FPS and find the optimal settings for your PC.
    • Change your resolution and FOV. You can change your resolution and FOV (field of view) in the game’s menu, to suit your preference and monitor. However, keep in mind that higher resolution and FOV will require more resources and lower your FPS, while lower resolution and FOV will reduce your quality and visibility. You can also use the fullscreen mode, rather than the windowed or borderless mode, to improve your performance and FPS.
    • Use an SSD instead of an HDD. If you have an SSD (solid state drive), you can install the game on it, rather than on an HDD (hard disk drive). This will help you reduce your loading times and improve your performance and stability. However, if you don’t have an SSD, you can still defragment your HDD and free up some space, to improve your performance and FPS.
    • Close unnecessary programs and background processes. You can close any unnecessary programs and background processes that are running on your PC, to free up some RAM and CPU usage. You can use the Task Manager or the System Configuration tool to check and close any programs and processes that are not essential for your game. This will help you improve your performance and FPS.

    This is everything you need to know about Forza Horizon 5 PC Requirements. Additionally, you can check our guide on Marvel Spiderman Remastered PC Requirements and Warzone 2 PC Requirements. Stay connected with GameEmpress.com to get the latest news and guides about the gaming world.

  • Marvel Spiderman Remastered PC Requirements: How To Run The Action-Adventure Game?

    Marvel Spiderman Remastered PC Requirements: How To Run The Action-Adventure Game?

    Marvel Spider-Man Remastered is a PC version of the 2018 PlayStation 4 game Marvel’s Spider-Man, which was developed by Insomniac Games and published by Sony Interactive Entertainment.

    The game is a third-person action-adventure game that follows the story of Peter Parker, a young superhero who balances his life as a photographer and a crime-fighter in New York City. The game features an open-world environment, dynamic combat, stealth, web-swinging, and various missions and side activities.

    The PC version of the game was released on August 12, 2022, during The Game Awards, and it was optimized for PC by Nixxes Software, a Dutch studio that specializes in porting games to different platforms.

    The PC version of the game includes the base game and the three DLC episodes that were released for the PS4 version, as well as improved graphics, performance, and features, such as ray tracing, 4K resolution, 120 FPS, and crossplay with PlayStation players.

    However, to run the game smoothly and enjoy its full potential, players need to meet the game’s system requirements, which are not very low. In this article, we will provide you with the minimum, recommended, and optimal PC requirements for Marvel Spider-Man Remastered, as well as some tips and tricks to optimize your performance and FPS.

    Marvel Spiderman Remastered PC Requirements

    Marvel's Spider-Man Remastered
    Marvel’s Spider-Man Remastered

    Minimum PC Requirements

    The minimum PC requirements for Marvel Spider-Man Remastered are as follows:

    • OS: Windows 10 64-bit (latest update)
    • Processor: Intel Core i3-4160, 3.6 GHz or AMD equivalent
    • Memory: 8 GB RAM
    • Graphics: NVIDIA GTX 950 or AMD Radeon RX 470
    • DirectX: Version 11
    • Storage: 75 GB available space

    These are the minimum requirements to run the game at low settings and 720p resolution, with an average of 30 FPS. However, these requirements may not be enough to handle the game’s high level of action and detail, especially during the boss fights and the cinematic scenes.

    Therefore, we recommend upgrading your PC to meet the recommended or optimal requirements, or at least the high-end requirements, which are slightly higher than the minimum.

    Recommended PC Requirements

    The recommended PC requirements for Marvel Spider-Man Remastered are as follows:

    • OS: Windows 10 64-bit (latest update)
    • Processor: Intel Core i5-4670, 3.4Ghz or AMD Ryzen5 1600, 3.2Ghz
    • Memory: 16 GB RAM
    • Graphics: NVIDIA GTX 1060 6GB or AMD Radeon RX 580 8GB
    • DirectX: Version 12
    • Storage: 75 GB available space

    These are the recommended requirements to run the game at medium settings and 1080p resolution, with an average of 60 FPS. These requirements will ensure a smooth and stable gameplay experience, with minimal lag, glitches, or crashes.

    However, these requirements may not be enough to achieve the highest possible FPS and the best possible graphics, especially if you have a high-end monitor or a competitive preference. Therefore, we suggest upgrading your PC to meet the optimal or high-end requirements, which are the highest possible requirements for the game.

    Optimal PC Requirements

    The optimal PC requirements for Marvel Spider-Man Remastered are not officially stated by the developers, but we have estimated them based on the game’s features and performance. The optimal PC requirements for Marvel Spider-Man Remastered are as follows:

    • OS: Windows 10 64-bit (latest update)
    • Processor: Intel Core i7-9700K or AMD Ryzen 7 3700X
    • Memory: 32 GB RAM
    • Graphics: NVIDIA RTX 3080 or AMD Radeon RX 6800 XT
    • DirectX: Version 12
    • Storage: 75 GB available space (SSD recommended)

    These are the optimal requirements to run the game at ultra settings and 4K resolution, with an average of 120 FPS. These requirements will ensure the best possible gameplay experience, with stunning graphics, realistic physics, and immersive sound.

    However, these requirements are very high and expensive, and they may not be necessary for most players unless they have a very powerful PC and a very demanding preference.

    Tips and Tricks to Optimize Your Performance and FPS

    If you want to optimize your performance and FPS in Marvel Spider-Man Remastered, you can try some of these tips and tricks:

    • Update your drivers and software. Make sure that your drivers and software are up to date, especially your graphics card driver, your Windows 10 update, and your DirectX version. This will help you avoid compatibility issues and improve your performance and stability.
    • Adjust your graphics settings. You can tweak your graphics settings in the game’s menu, to find the best balance between quality and performance. You can lower some of the settings that have a high impact on your FPS, such as shadows, textures, anti-aliasing, and post-processing. You can also use the FPS counter and the benchmark tool in the game, to test your FPS and find the optimal settings for your PC.
    • Change your resolution and FOV. You can change your resolution and FOV (field of view) in the game’s menu, to suit your preference and monitor. However, keep in mind that higher resolution and FOV will require more resources and lower your FPS, while lower resolution and FOV will reduce your quality and visibility. You can also use the fullscreen mode, rather than the windowed or borderless mode, to improve your performance and FPS.
    • Use an SSD instead of an HDD. If you have an SSD (solid state drive), you can install the game on it, rather than on an HDD (hard disk drive). This will help you reduce your loading times and improve your performance and stability. However, if you don’t have an SSD, you can still defragment your HDD and free up some space, to improve your performance and FPS.
    • Close unnecessary programs and background processes. You can close any unnecessary programs and background processes that are running on your PC, to free up some RAM and CPU usage. You can use the Task Manager or the System Configuration tool to check and close any programs and processes that are not essential for your game. This will help you improve your performance and FPS.

    This is everything you need to know about Marvel Spiderman Remastered PC Requirements. Additionally, you can check our guide on The Finals PC Requirement and Armored Core 6 PC Requirements. Stay connected with GameEmpress.com to get the latest news and guides about the gaming world.

  • Samurai Armor Elden Ring: How To Get, Upgrade, And Use The Legendary Armor Set?

    Samurai Armor Elden Ring: How To Get, Upgrade, And Use The Legendary Armor Set?

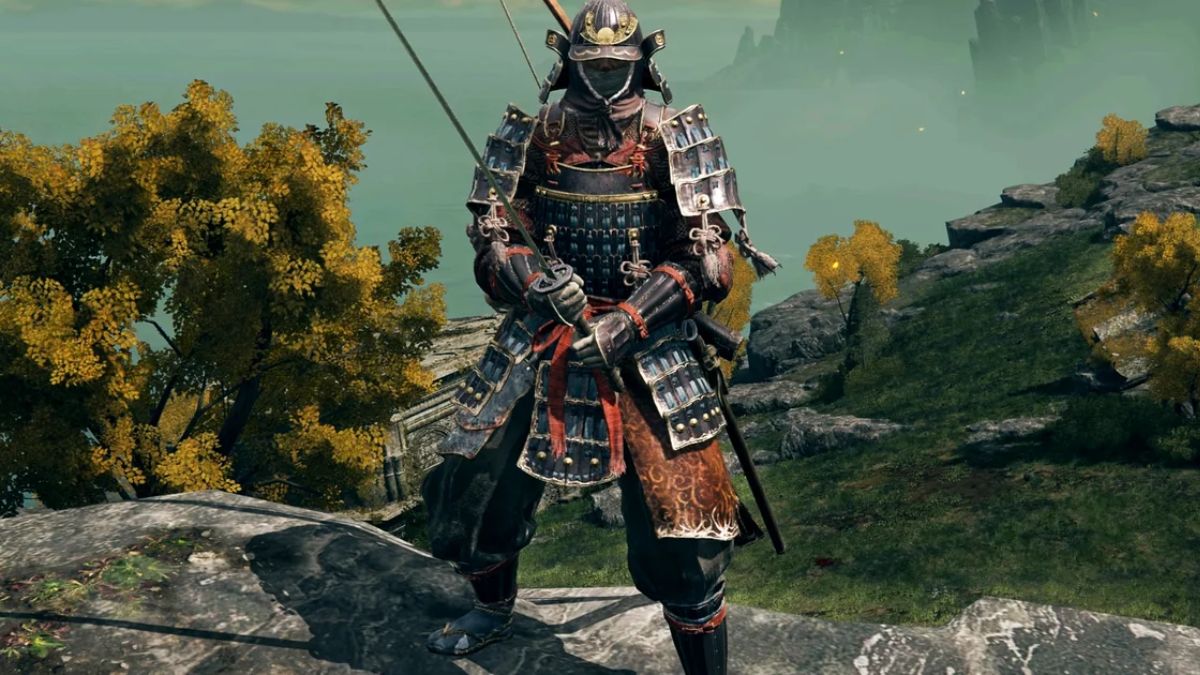
    Samurai Armor is a legendary armour set that can be obtained in Elden Ring, the upcoming open-world action RPG from FromSoftware. The armour set is based on the traditional Japanese armour worn by the samurai warriors and features a distinctive helmet, chest plate, gauntlets, and greaves.

    The armor set also has unique stats, effects, and abilities, and can be customized and upgraded to suit different playstyles and strategies.

    In this article, we will show you how to get, upgrade, and use the Samurai Armor in Elden Ring. We will also provide some tips and tricks on how to make the most of this rare and powerful armour set.

    How to Get the Samurai Armor in Elden Ring?

    Samurai Armor Elden Ring (1)
    Samurai Armor Elden Ring (1)

    To get the Samurai Armor in Elden Ring, you need to follow these steps:

    • Travel to the Land of Reeds, a region in the eastern part of the map that is inspired by feudal Japan. The region is full of bamboo forests, rice fields, temples, and castles, as well as various enemies, such as ninjas, ronin, yokai, and dragons.
    • Find the Isolated Merchant’s Shack, a location near the Site of Grace in the north of the Land of Reeds. The Site of Grace is a place where you can rest, level up, and access your inventory. The Isolated Merchant’s Shack is a small hut where you can find a vendor who sells various items, including the Samurai Armor Set.
    • Buy the Samurai Armor Set from the vendor for 50,000 Souls, the currency of the game. The Samurai Armor Set consists of four pieces: the Land of Reeds Helm, the Land of Reeds Armor (Altered), the Land of Reeds Gauntlets, and the Land of Reeds Greaves. You can also buy the Uchigatana, a katana sword that matches well with the Samurai Armor Set, for 10,000 Souls.
    • Equip the Samurai Armor Set and the Uchigatana from your inventory. You can also customize the appearance and the colour of the armour set and the sword from the same menu.

    How to Upgrade the Samurai Armor in Elden Ring?

    To upgrade the Samurai Armor in Elden Ring, you need to follow these steps:

    • Collect various materials, such as Iron, Steel, Silver, Gold, and Dragon Scales, from the game world. You can find these materials by exploring, looting, or defeating enemies. You can also buy some of these materials from certain vendors or trade them with other players.
    • Find a Blacksmith, a character who can upgrade your weapons and armour for a fee. You can find a Blacksmith in various locations, such as the Site of Grace, the Deathtouched Catacombs, or the Stormhill Castle. You can also summon a Blacksmith to your location by using a Memory of Grace, an item that allows you to access various services from anywhere.
    • Talk to the Blacksmith and select the Upgrade option. Choose the Samurai Armor Set and the Uchigatana from your inventory and select the level you want to upgrade them to. You will need to pay a certain amount of Souls and materials for each upgrade. The maximum level you can upgrade your weapons and armour to is 10.
    • Confirm your choice and watch the Blacksmith perform the upgrade. You will see a short animation of the Blacksmith hammering and polishing your weapons and armour. You will also see the stats and effects of your weapons and armour increase.

    How to Use the Samurai Armor in Elden Ring?

    To use the Samurai Armor in Elden Ring, you need to consider these factors:

    • Stats: The Samurai Armor Set has high Physical, Slash, and Strike defence, as well as moderate Magic, Fire, Light, and Holy defence. The armour set also has high Immunity and Focus, which affect your resistance to status effects and your ability to use special attacks. The armour set also has low Weight, which affects your mobility and stamina consumption.
    • Effects: The Samurai Armor Set has a unique effect called Unsheathe, which allows you to perform a powerful slash attack with the Uchigatana after drawing it from its scabbard. This attack deals high damage and has a chance to inflict Bleed, a status effect that causes the enemy to lose health over time. To use this effect, you need to press the right bumper on your controller after switching to the Uchigatana.
    • Abilities: The Samurai Armor Set has two abilities, one active and one passive, that can be used in combat. The active ability is called Cloak, which allows you to become invisible for a short time and move faster. This ability can be used to sneak up on enemies, escape from danger, or reposition yourself. To use this ability, you need to press the left bumper on your controller. The passive ability is called Focus, which allows you to regenerate your stamina faster and use less stamina for your attacks. This ability is always active and enhances your performance and endurance.

    Tips and Tricks for the Samurai Armor in Elden Ring

    Here are some tips and tricks to help you make the most of the Samurai Armor in Elden Ring:

    • Use the Unsheathe effect wisely. The Unsheathe effect can deal a lot of damage and cause bleeding, but it also has a cooldown and can be blocked or dodged by enemies. Use it when you have an opening, or when you want to finish off a low-health enemy.
    • Use the Cloak ability strategically. The Cloak ability can help you avoid detection, surprise attack, or escape from trouble, but it also has a duration and a cooldown and can be cancelled by attacking or taking damage. Use it when you need to, or when you want to create an advantage.
    • Use the Focus ability constantly. The Focus ability can help you sustain your stamina and use more attacks, but it also has a limit and can be depleted by using special attacks or taking damage. Use it to keep your stamina high, or to unleash a flurry of attacks.
    • Use the Longbow as a secondary weapon. The Longbow is a ranged weapon that can be used to thin out enemies from a distance or to target weak spots or hard-to-reach enemies. The Longbow also has different types of arrows, such as Fire Arrows or Poison Arrows, that can cause additional damage or effects. Use the Longbow when you need to, or when you want to diversify your arsenal.

    This is everything you need to know about the Samurai Armor Elden Ring. You can also read our games guide like Holotactics Guide and Warlock Metamorphosis Rune Guide. Stay up to date with GameEmpress.com for the most recent gaming news and guides.

  • XDefiant Gameplay: How To Master The Fast-Paced Online Shooter?

    XDefiant Gameplay: How To Master The Fast-Paced Online Shooter?

    XDefiant is a free-to-play, first-person arena shooter that combines the characters, factions, and abilities from various Ubisoft games, such as Tom Clancy’s Splinter Cell, Ghost Recon, The Division, and Far Cry.

    The game features 6v6 matches, with four different factions to choose from Wolves, Outcasts, Cleaners, and Echelon. Each faction has its unique traits, abilities, and weapons, and can be customized to suit different playstyles and strategies.

    In this article, we will show you how to play XDefiant, what are the main modes and mechanics of the game, and how to master the fast-paced online shooter. We will also provide some tips and tricks on how to improve your skills and tactics in the game.

    How to Play XDefiant?

    To play XDefiant, you need to download and install the game on your PC, console, or mobile device. You can access the game from various platforms, such as Steam, PlayStation Store, Xbox Store, or Google Play Store. The game supports online multiplayer mode only, so you need to have a stable internet connection and a microphone to communicate with other players.

    XDefiant Release Date PS5
    XDefiant Release Date PS5

    To start the game, you need to create or join a match. You can choose from different match types, such as Team Deathmatch, Domination, Escort, or Extraction. You can also customize various settings, such as the map, the time limit, the score limit, and the rules. You can also use mods or cheats to enhance or alter your gameplay experience.

    Once you enter the match, you need to choose a faction, a role, and a loadout. You can choose from four factions: Wolves, Outcasts, Cleaners, and Echelon.

    Each faction has its theme, style, and personality, and can be further divided into three roles: Assault, Support, or Specialist. Each role has different weapons, equipment, and abilities, and can be further customized with attachments, perks, and skins. You can also create your loadouts and save them for later use.

    Once you enter the match, you will spawn in a random location on the map. You will have a basic inventory, a map, a compass, and a health bar. Your main objective is to work with your team and defeat the enemy team.

    You will have to deal with various challenges, such as enemy fire, friendly fire, recoil, reload, and cooldown. You will also have to use your abilities, such as cloaking, healing, hacking, or burning, to gain an edge in combat.

    The match will end when one team reaches the score limit, the time limit, or the objective. The winner of the match will be the team with the highest score, the most kills, or the most objectives. You can then claim your rewards and join another match, or exit the game and return to the main menu.

    What Are the Main Modes and Mechanics of Xdefiant?

    XDefiant is a dynamic and diverse game that has many modes and mechanics that make the game fun and exciting. Here are some of the main modes and mechanics of the game:

    Maps

    The game features 10 maps, each based on a different Ubisoft game, such as Splinter Cell, Ghost Recon, The Division, or Far Cry. Each map has different terrain, landmarks, and objectives, and can be played in different modes and settings. Each map also has different environmental hazards, such as fire, water, or electricity, that can affect the gameplay.

    Modes

    The game features four modes, each with its own rules and objectives. The modes are:

    • Team Deathmatch: A classic mode where two teams of six players compete to get the most kills. The team with the most kills at the end of the match wins.
      Domination: A mode where two teams of six players compete to capture and hold three zones on the map. The team that controls the most zones at the end of the match wins.
    • Escort: A mode where two teams of six players take turns to escort a payload across the map. The team that escorts the payload to the destination or prevents the enemy from doing so wins.
    • Extraction: A mode where two teams of six players compete to collect and deposit data drives on the map. The team that collects and deposits the most data drives at the end of the match wins.

    Mechanics

    The game features various mechanics that affect the gameplay and the strategy. The mechanics are:

    • Abilities: Each role has two abilities, one active and one passive, that can be used in combat. The active ability has a cooldown and can be activated by pressing the right bumper on your controller. The passive ability is always active and provides a bonus or an effect to your character. The abilities can be offensive, defensive, or supportive, and can be used to attack, defend, or assist your team.
    • Loadouts: Each role has a loadout, which consists of a primary weapon, a secondary weapon, a gadget, and a grenade. The loadout can be customized with attachments, perks, and skins, to improve the performance and the appearance of your weapons and equipment. The loadout can also be changed during the match, by accessing the loadout menu or by visiting a supply crate.
    • Health: Each character has a health bar, which indicates the amount of damage they can take before they die. The health bar can be restored by using a health pack, a healing ability, or a supply crate. The health bar can also be reduced by causing damage, bleeding, or burning. The health bar can also be affected by the armour plating, which provides extra protection and durability to your character.

    This is everything you need to know about the XDefiant Gameplay. You can also read our games guide like 7 Days To Die Gameplay and Hell Let Loose Gameplay. Stay up to date with GameEmpress.com for the most recent gaming news and guides.